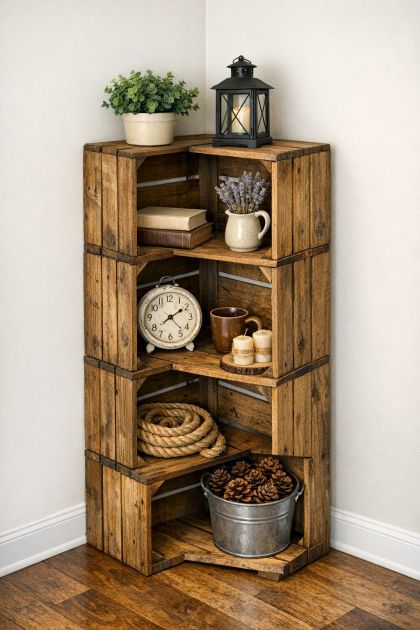
Transform ordinary wooden crates into a chic corner shelf unit that maximizes space and adds character to any room. This DIY project is perfect for those looking to repurpose materials and create a functional piece of furniture that is both stylish and practical. By using simple tools and a bit of creativity, you can craft a unique shelving unit that showcases your personal style and provides ample storage or display space.
Place the finished corner shelf in a living room, study, or bedroom to add a rustic touch. Coordinate with neutral or earthy tones to complement the natural wood texture. Consider adding small decorative items such as plants, books, or photo frames to enhance the visual appeal. For a cohesive look, match with other wooden elements in the room or contrast with modern metallic accents.
Wooden Crate Corner Shelf Unit
Materials
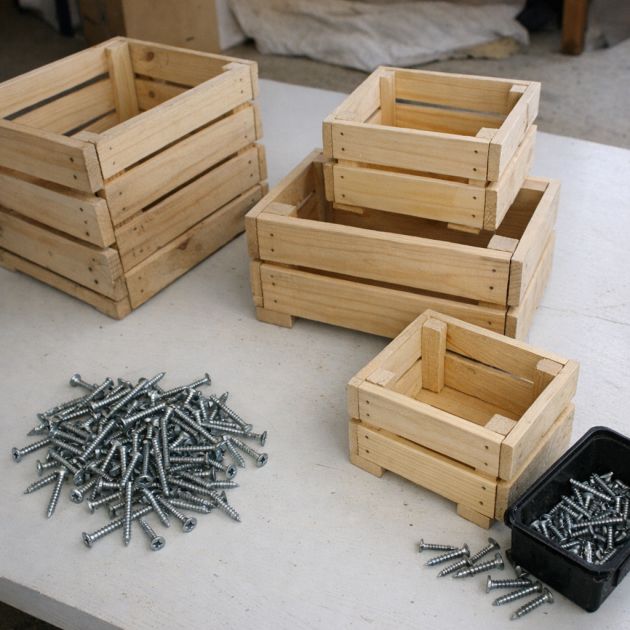
3 wooden crates (approximately 18x12x9 inches each)
Wood screws (1.5 inches, quantity: 12)
Drill with drill bit (compatible with screw size)
Sandpaper (medium and fine grit)
Wood stain or paint (optional, color of choice)
Paintbrush or rag (if staining or painting)
Directions
Start by sanding all surfaces of the wooden crates with medium grit sandpaper to remove any rough edges. Follow up with fine grit sandpaper for a smooth finish.
If desired, apply wood stain or paint to the crates using a paintbrush or rag. Allow them to dry completely before proceeding.
Arrange the crates in a corner configuration, with one crate at the bottom lying flat, and two crates stacked vertically on top, each rotated 90 degrees to form a stepped pattern.
Use the drill to secure the crates together at the contact points with wood screws, ensuring they are stable and aligned. Each vertical joint should have at least two screws to maintain stability.
Position the assembled shelf unit in the desired corner of the room, ensuring it is level and stable. Adjust as necessary.
Variations & Tips
For a different look, consider painting each crate a different color for a playful, eclectic style. Add small caster wheels to the bottom crate for mobility, or attach hooks to the sides for additional hanging storage. For a more industrial aesthetic, incorporate metal brackets at the joints for both decorative and structural purposes.