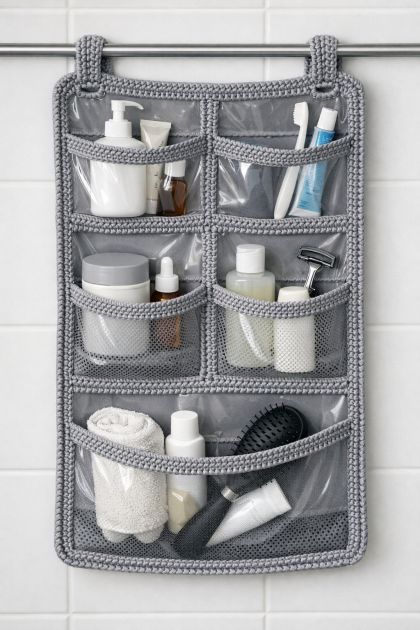
Crocheting has long been a beloved DIY craft for creating functional and decorative pieces. This project introduces a clever hack for repurposing a torn plastic shoe rack into a hanging toiletry organizer using waterproof nylon cord. By integrating crochet techniques, this hack not only salvages an otherwise unusable item but also adds a unique, handmade touch to bathroom storage solutions. It addresses the problem of limited space and organization in bathrooms, offering a stylish, waterproof option that is both practical and visually appealing.
The finished crochet piece should be used as a hanging toiletry organizer in the bathroom. Opt for a color palette that complements your bathroom decor; consider using natural tones like beige or gray for a minimalist look, or vibrant colors for a pop of personality. Ensure the texture is smooth and waterproof to withstand bathroom moisture. Hang it on a sturdy hook or a towel bar for easy access to toiletries, making it both a functional and aesthetic addition to the room.
DIY Crochet Hanging Toiletry Organizer from Repurposed Shoe Rack
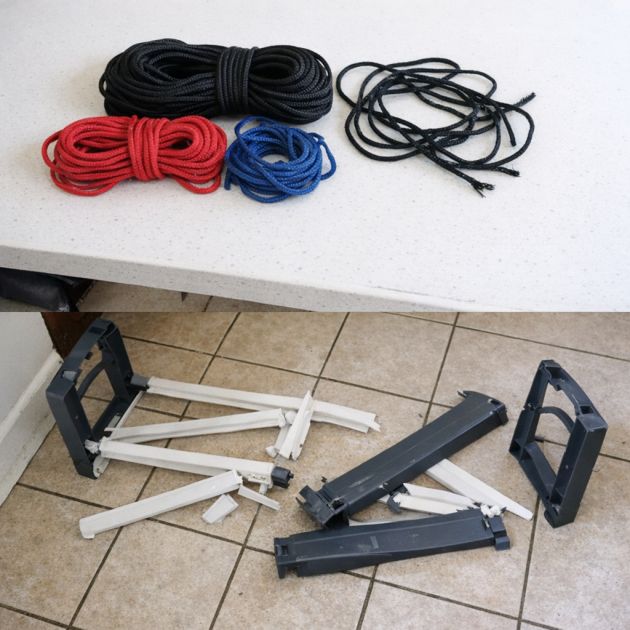
Materials
Waterproof nylon cord, approximately 100 yards
5mm crochet hook
Torn plastic shoe rack (clear or matching color)
Scissors
Tapestry needle for weaving in ends
Measuring tape
Directions
1. Cut the nylon cord into manageable lengths of about 10 yards each to prevent tangling.
2. Starting at the bottom of the torn section of the shoe rack, insert the crochet hook through the plastic and pull a loop of the nylon cord through. Chain 1 to secure the cord in place.
3. Single crochet (sc) across the width of the torn section, inserting the hook through the plastic to anchor each stitch.
4. At the end of the row, chain 1, turn, and sc back across the row, again inserting the hook through the plastic for each stitch.
5. Repeat this process, working in rows of single crochet, until the entire torn section is reinforced and covered with crocheted nylon.
6. Once the torn section is secure, continue crocheting around the edges of the shoe rack to create a border. Use single crochet stitches to ensure a sturdy frame.
7. Create loops at the top corners by chaining 15 and securing with a slip stitch. These loops will be used for hanging.
8. Fasten off the nylon cord and use the tapestry needle to weave in any loose ends.
Variations & Tips
For a different look, consider using colorful nylon cords to create a striped or patterned design, adding visual interest to your bathroom decor. If you prefer a softer texture, try using cotton-blend cord, though it may require sealing to maintain water resistance. Adjust the size of the organizer by adding or removing rows or stitches, ensuring it fits your storage needs. Experiment with crochet stitches, such as half double crochet or double crochet, to vary the texture while maintaining the organizer's functionality.