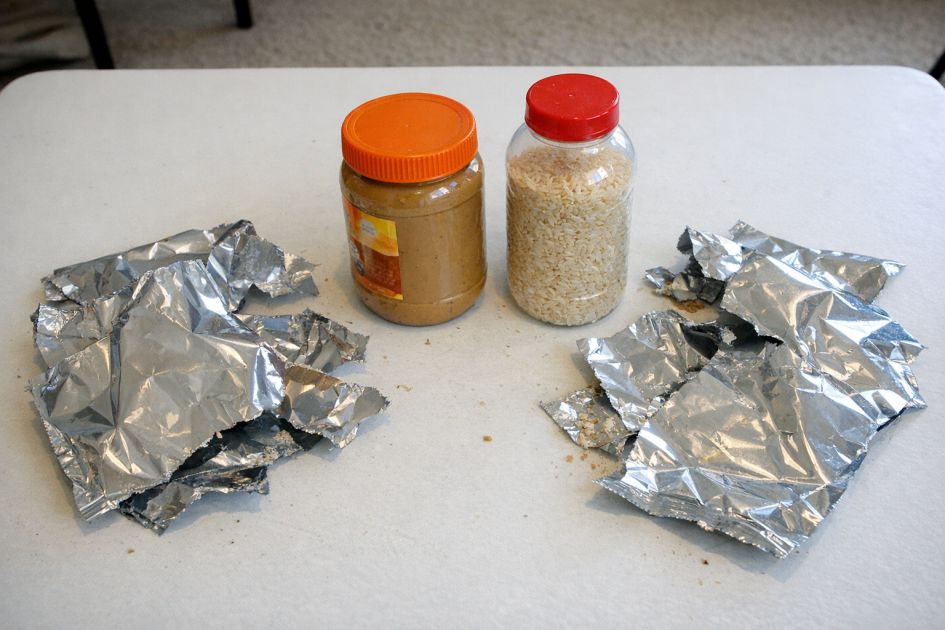
Transforming torn silver chip bags into stunning faux-hammered pewter decorative charger plates is an innovative and environmentally friendly DIY project. This unique craft repurposes mylar bags with the addition of two common pantry items, bringing a touch of elegance to your table settings. Whether you're looking to create a conversation piece or add a sophisticated flair to your dining decor, these charger plates will leave your guests speechless.
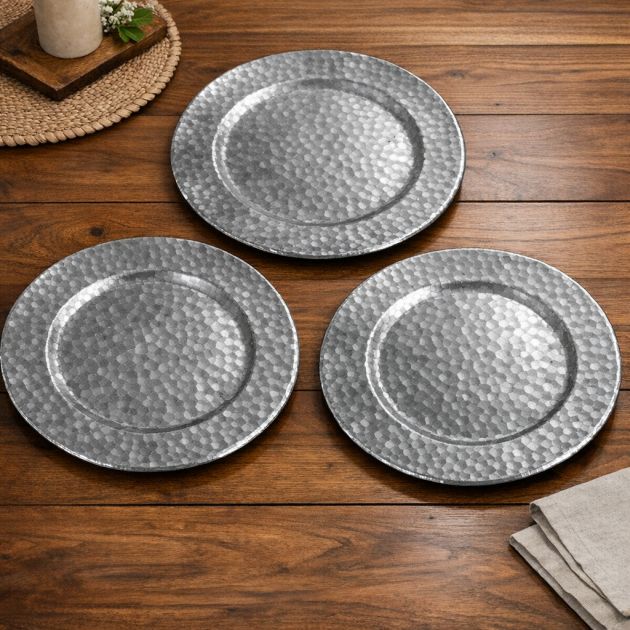
The finished faux-hammered pewter charger plates should be styled as part of a modern dining table setting. Pair them with simple white dinner plates and silver cutlery for a monochromatic look, or add a pop of color with bold napkins or a vibrant centerpiece. These chargers work beautifully in minimalist settings or can add a rustic touch to a more eclectic decor. Consider displaying them on a wooden dining table to highlight their metallic sheen and textured surface.
Faux-Hammered Pewter Charger Plates
Materials
6-8 torn silver mylar chip bags
1 roll of parchment paper
1 iron
Scissors
2 cups of flour
1 cup of water
Large mixing bowl
Paintbrush
Directions
Cut open the mylar chip bags and flatten them out completely using scissors.
Lay a large sheet of parchment paper on a flat, heat-resistant surface.
Position the flattened mylar pieces in overlapping layers on the parchment paper, ensuring they cover an area slightly larger than the intended size of the charger plates.
Cover the mylar pieces with another sheet of parchment paper.
Using an iron set to medium heat, carefully press over the parchment paper to fuse the mylar layers together, mimicking a hammered texture.
In a large mixing bowl, combine the flour and water to create a thick paste.
Using a paintbrush, apply the paste generously over the fused mylar surface, creating a smooth, even coat.
Allow the paste to dry completely, then gently peel off the parchment paper, revealing the textured surface.
Cut the dried, fused mylar into circular shapes, roughly 13 inches in diameter, to form the charger plates.
Variations & Tips
For a more artistic flair, consider painting the mylar surface with metallic acrylic paints before applying the flour paste. This adds depth and variation to the color, enhancing the pewter effect. Alternatively, experiment with different textures by pressing various objects into the mylar surface before ironing, such as crumpled foil or textured fabric, to create unique patterns. These variations maintain the core structure of the DIY while offering personalized design options.