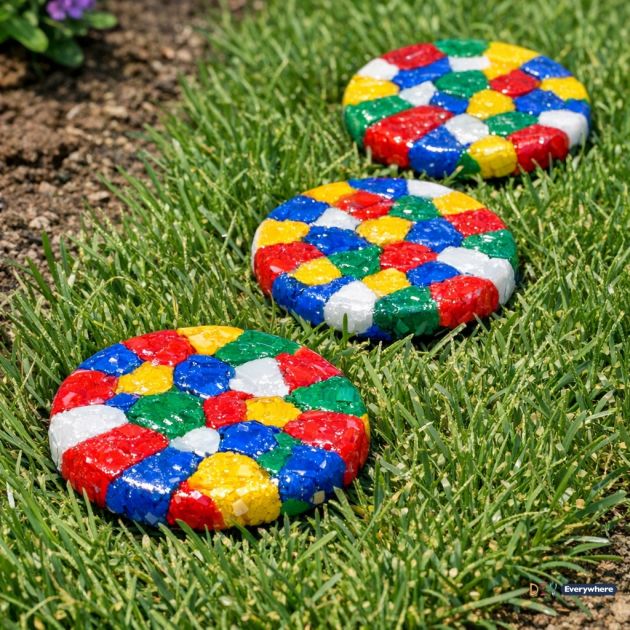
Transform ordinary plastic bottle caps into vibrant mosaic garden stepping stones with just a muffin tin and a couple of other household items. This DIY not only helps recycle plastic waste but also adds a splash of color and personality to your garden. It's an eco-friendly project that gives old bottle caps a second life as stunning, durable outdoor decor.
Place these stepping stones along a garden path, nestled among greenery for a pop of color. Coordinate the colors of the bottle caps with existing garden furniture or plant pots to create a harmonious outdoor space. The bright colors can also contrast beautifully with natural elements like stone, wood, or gravel.
Colorful Bottle Cap Mosaic Stepping Stones
Materials
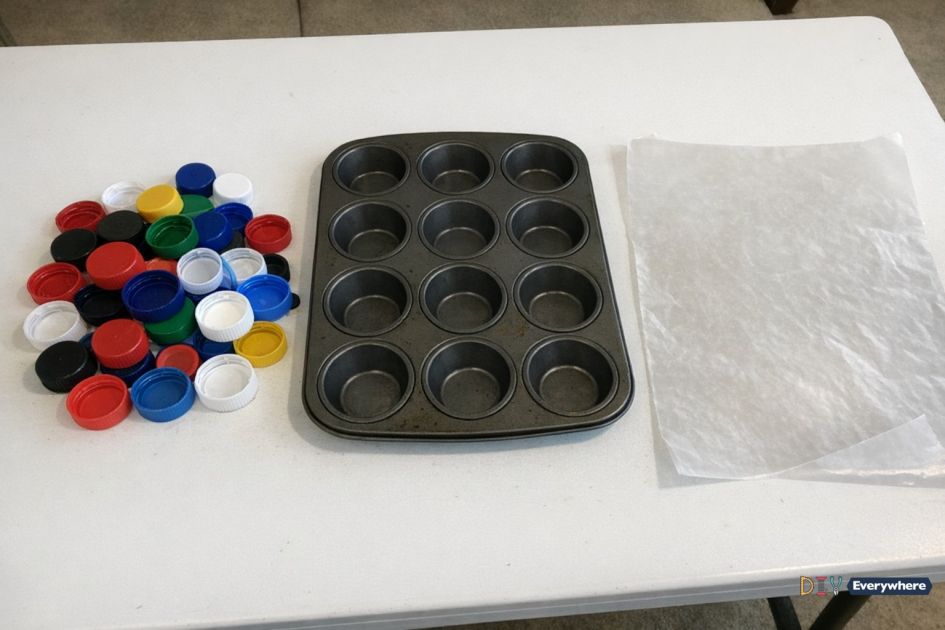
Plastic bottle caps (assorted colors, approximately 100 caps)
Muffin tin (standard size, non-stick)
Oven mitts
Old hand towel or cloth
Baking sheet
Directions
Preheat your oven to 350°F (175°C).
Arrange the plastic bottle caps in the cavities of a muffin tin, mixing colors for a mosaic effect. Fill each cavity to the top with caps.
Place the muffin tin on a baking sheet for stability and place it in the oven.
Bake the caps for 10-15 minutes, checking frequently until they begin to melt and flatten.
Remove the muffin tin from the oven using oven mitts and place it on a heat-resistant surface.
While still warm and pliable, use an old hand towel to carefully press down on the melted caps in each cavity to ensure they bond together and flatten evenly.
Allow the caps to cool completely in the muffin tin.
Once cooled, gently pop the mosaic stones out of the muffin tin.
Variations & Tips
For a more intricate design, try arranging the bottle caps in specific patterns or shapes before melting. Experiment with different muffin tin shapes, like mini loaf pans, to create varied stepping stone forms. You can also sprinkle glitter or add small beads between the caps before melting for added texture and sparkle.