
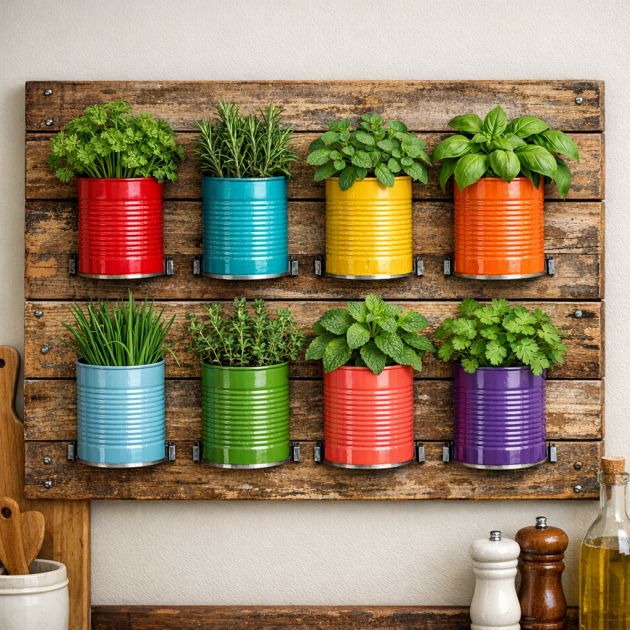
Transform your kitchen into a rustic haven with this DIY project that turns ordinary soup cans into charming herb planters. This project not only recycles materials but also adds a touch of vintage elegance to your home. By mounting painted cans onto a distressed wooden pallet, you create a unique and functional piece of wall art that allows you to grow fresh herbs right in your kitchen. Perfect for those who love cooking with fresh ingredients and enjoy adding a personal touch to their home decor.
These rustic kitchen herb planters pair beautifully with farmhouse-style interiors. Place them on a kitchen wall where they can serve both as a decorative piece and a functional herb garden. The distressed wood complements other natural elements, while the varying shades of painted cans can coordinate with your kitchen’s color theme. Consider using this piece as a focal point above a kitchen counter or near a window to ensure the herbs get ample sunlight.
Rustic Soup Can Herb Planters
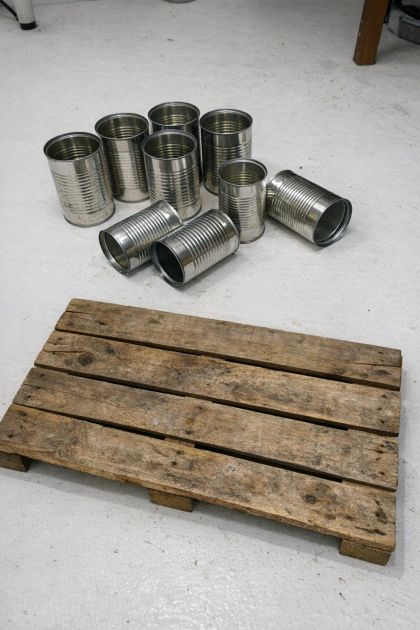
Materials
8 clean empty soup cans
1 wooden pallet board, approximately 24x36 inches
Distressing tool (sandpaper or wire brush)
Wood stain or paint for distressing
Acrylic or spray paint for the cans
Screws and screwdriver
Drill
Herb plants or seeds
Potting soil
Directions
1. Begin by preparing the wooden pallet board. Use a distressing tool to give it a worn, rustic appearance. Apply wood stain or paint lightly to enhance the distressed look and let it dry completely.
2. Clean the soup cans thoroughly and remove any labels. Use sandpaper to smooth any sharp edges.
3. Paint the soup cans with acrylic or spray paint in colors that complement your kitchen decor. Allow the paint to dry completely.
4. Arrange the cans in two rows of four on the pallet board. Ensure even spacing and mark the positions with a pencil.
5. Using a drill, make small holes in the back of each can near the top edge to attach them to the board.
6. Secure the cans to the board with screws, ensuring they are firmly attached and can support the weight of soil and plants.
7. Fill each can with potting soil and plant your choice of herbs.
8. Mount the completed board on a kitchen wall using appropriate wall mounts or hooks, ensuring it is secure and level.
Variations & Tips
For a personalized touch, consider painting the cans with chalkboard paint. This allows you to label each herb with chalk, making it easy to identify them. Alternatively, use a variety of can sizes for a more eclectic look. If you prefer a more polished finish, swap the distressed pallet for a sleek painted board. For those with limited wall space, you can reduce the number of cans and mount them in a single row.