
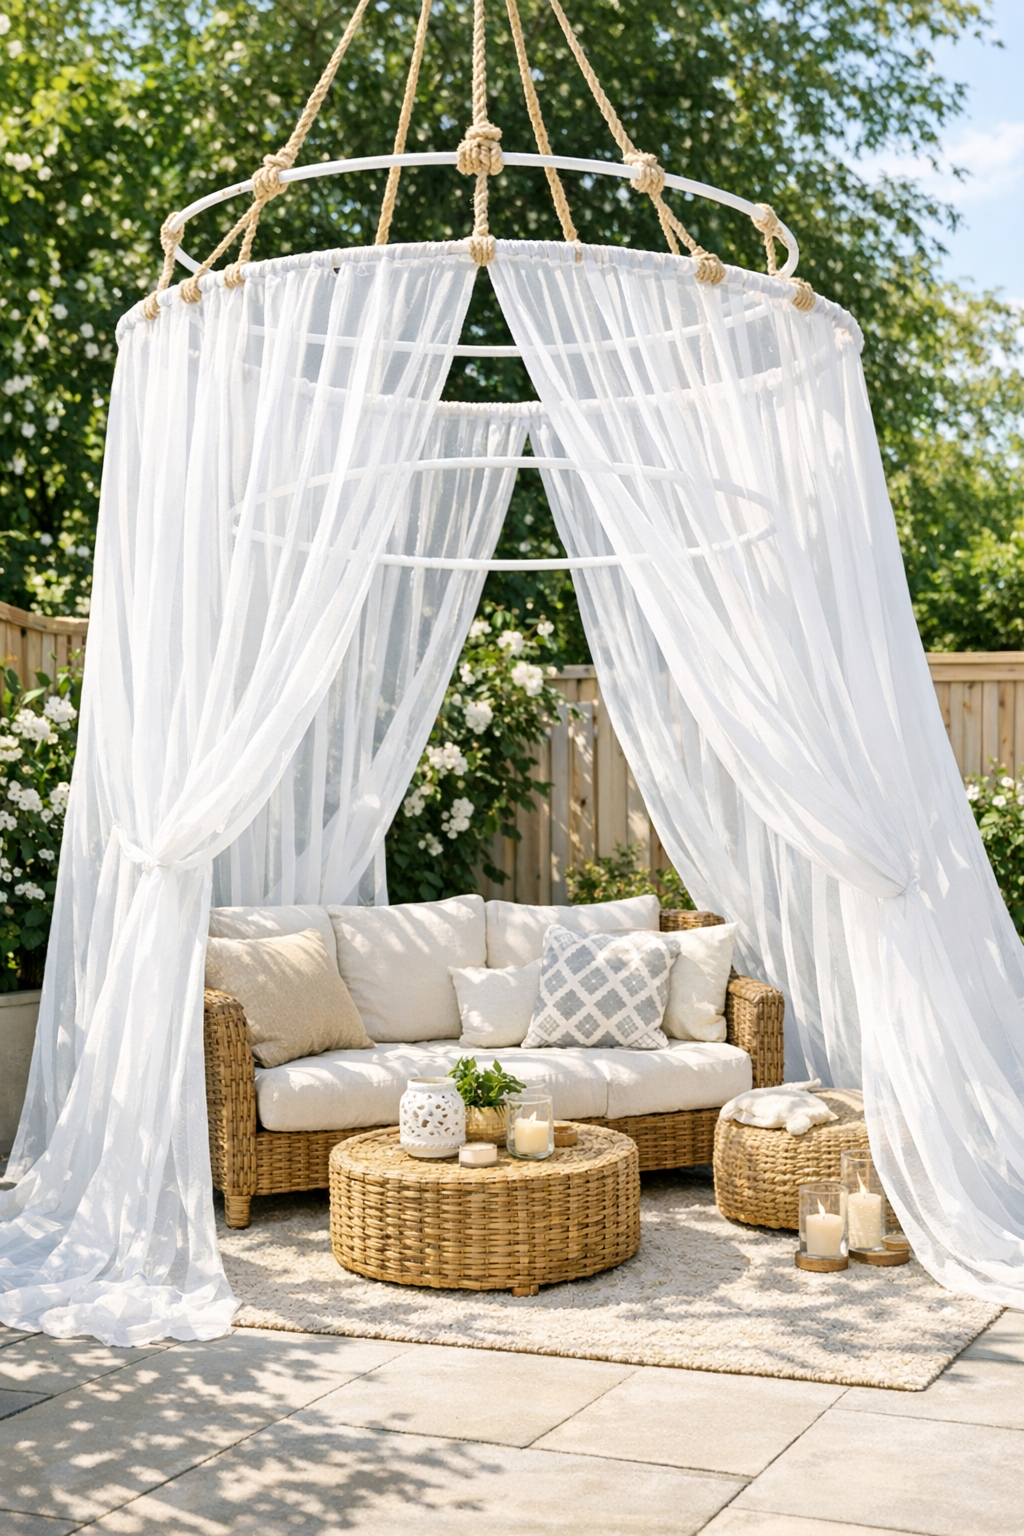
I love a backyard project that feels a little bit fancy without turning into a full weekend construction job, and this mosquito net canopy absolutely fits that category. By painting a few hula hoops, suspending them with macrame rope, and draping sheer white curtains over the top, you can create a soft, dreamy canopy over patio seating that adds shade, movement, and a helpful barrier against bugs.
This is a great DIY if you want a cozy outdoor retreat but don’t want to build a pergola or install anything too permanent. I’m always looking for ways to make our patio feel more finished after a long workweek, and this one gives a big visual payoff with simple materials and very manageable steps.
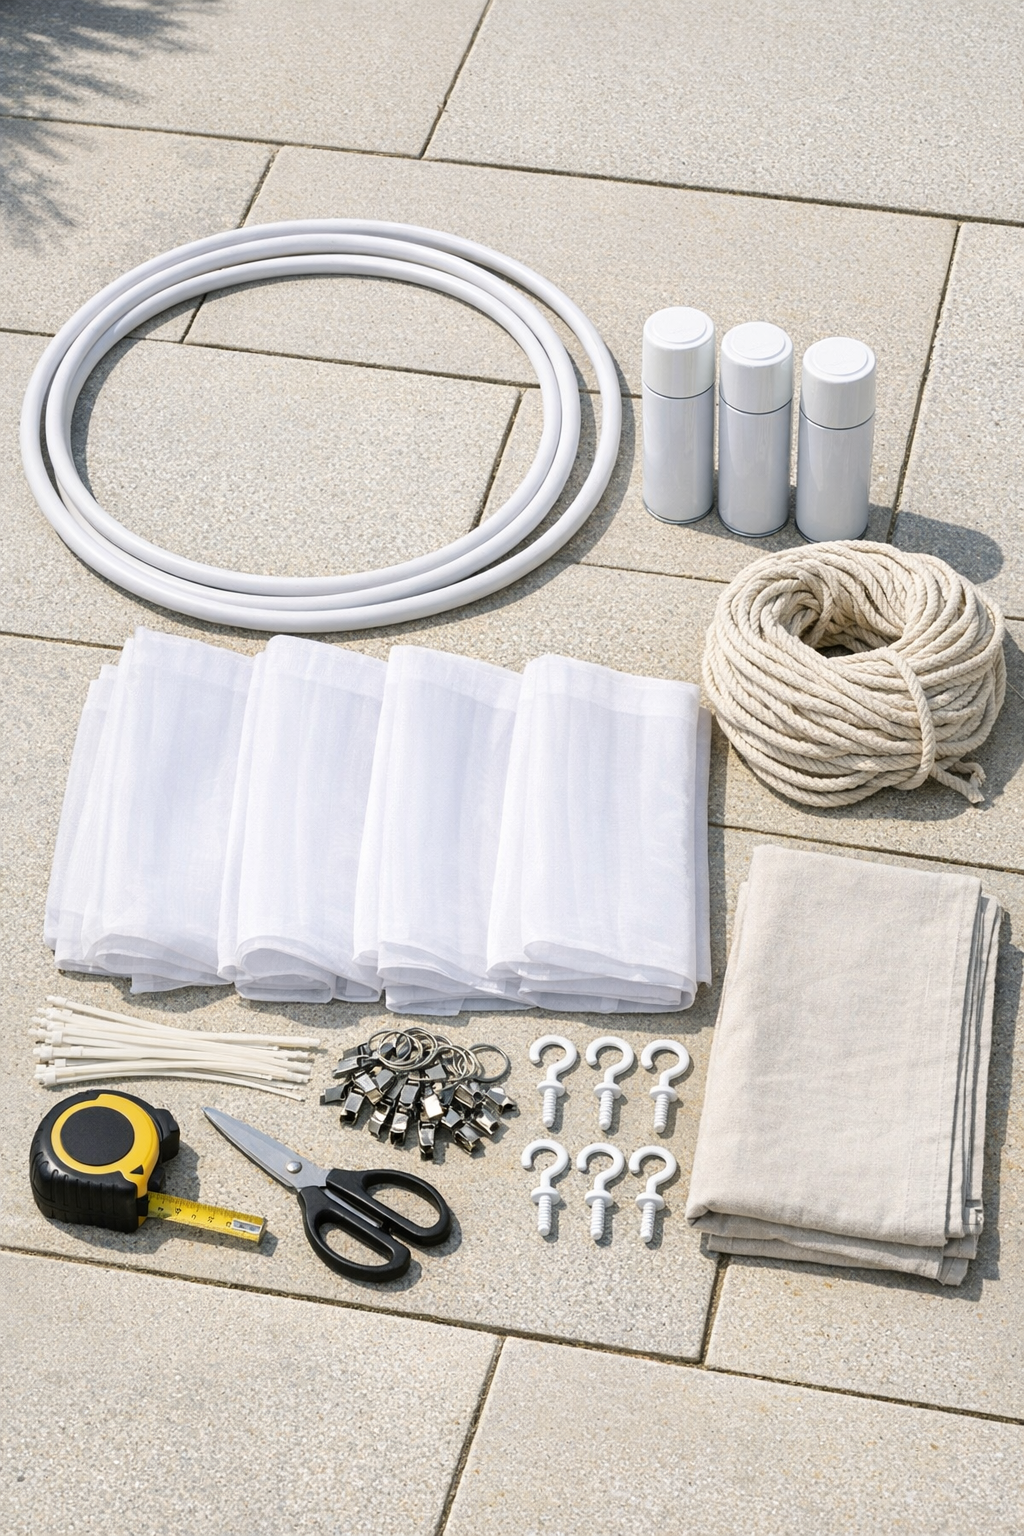
Materials
Instructions
1. Measure the patio seating area and decide where each canopy hoop will hang so the curtains will drape around the furniture without dragging too heavily on the ground. Leave about 18 to 24 inches between hoops if you’re creating a grouped canopy over a conversation set.
2. Lay the hula hoops on a drop cloth outdoors and spray them with light, even coats of white paint, rotating as needed to cover all sides. Let them dry fully, then add a second coat for a clean, solid finish.
3. If you want extra durability, spray the dried hoops with a clear outdoor sealer and let them cure according to the can directions. I like this extra step if the canopy will stay up for more than a few weeks during summer.
4. Cut nine equal lengths of macrame rope, 12 feet each, for the main hanging supports. Cut three more lengths, 2 feet each, to wrap around the top connection points and help gather each set neatly.
5. Tie three long rope lengths evenly around each hoop at equal points to create a balanced three-point hanger. Pull the ropes upward and knot them together temporarily so you can check that the hoop hangs level.
6. Wrap one short rope length around the gathered top of each hoop to cover the knot area and create a cleaner macrame-style finish. Knot it tightly and trim the ends.
7. Mark the ceiling or overhead support points above your patio seating, then install the heavy-duty hooks into solid wood framing or with appropriate anchors. Check that each hook is secure before hanging any weight from it.
8. Hang each hoop from its hook and adjust the rope lengths if needed so the bottoms of the hoops sit at a consistent height, about 12 to 18 inches above head level when seated. A level-looking setup makes the whole project feel much more polished.
9. Clip the sheer curtain panels around the hoops using curtain ring clips or small drapery clips, distributing the fabric evenly so it drapes softly on all sides. Overlap the curtain edges slightly to create better mosquito coverage.
10. Gather the curtain panels where needed and secure hidden spots with white zip ties on the hoop so the fabric stays in place on breezy days. Trim the zip tie ends closely for a cleaner look.
11. Adjust the curtain lengths so they skim the floor or stop just above it, depending on your patio surface and how much airflow you want. If they puddle too much, knot the bottoms loosely or hem them for a tidier finish.
12. Pull the curtains closed around the seating area to test the coverage, then open and arrange them until the canopy looks full and balanced from every side. Once it’s set, you’ll have a breezy little backyard nook that feels surprisingly resort-like.
Variations & Tips
For better bug control: Use extra curtain panels or overlap the sheers more generously if mosquitoes are especially bad in your yard. The fuller the drape, the easier it is to close gaps around the seating area.
For a softer look: Choose off-white or ivory sheer curtains instead of bright white if your patio has warmer wood tones or beige cushions. I do this a lot when I want the setup to feel less stark and more relaxed.
For windy patios: Add small sewn-in curtain weights or discreet tie-backs to keep the panels from blowing into seating or drinks. Even a few strategic ties make a big difference on breezy evenings.
For easier cleaning: Use machine-washable curtain panels and clip them on instead of permanently tying them. That way you can take them down quickly after storms or toss them in the wash mid-season.
For a renter-friendly version: Hang the hoops from existing covered patio beams, shepherd’s hooks, or sturdy freestanding supports instead of drilling new hardware. Just make sure the support can safely hold the weight.
For evening ambiance: Weave battery-operated warm white fairy lights around the hoops before adding the curtains. It gives the whole canopy a glowy look at night without needing extra wiring.
My practical tip: If your patio gets hit with regular rain or strong sun, bring the curtains in when you’re not using them for long stretches. It takes a few extra minutes, but it really helps them stay bright and pretty through the season.