
There’s something about an outdoor shower in summertime that feels downright luxurious, even when it’s tucked beside an ordinary backyard fence. This project turns a simple grommeted canvas drop cloth and a curved copper pipe frame into a sturdy, handsome outdoor shower curtain that gives you privacy, lets the breeze through at the bottom, and holds up far better than a flimsy plastic liner ever could.
I’m especially fond of a project like this because it has that practical, make-do spirit I grew up around here in the Midwest with: take durable materials, fit them together cleverly, and make something useful enough to last more than one season. If you’ve got a backyard shower, pool rinse station, lake cabin wash area, or even a garden hose setup that needs a bit of screening, this is a very manageable weekend build.
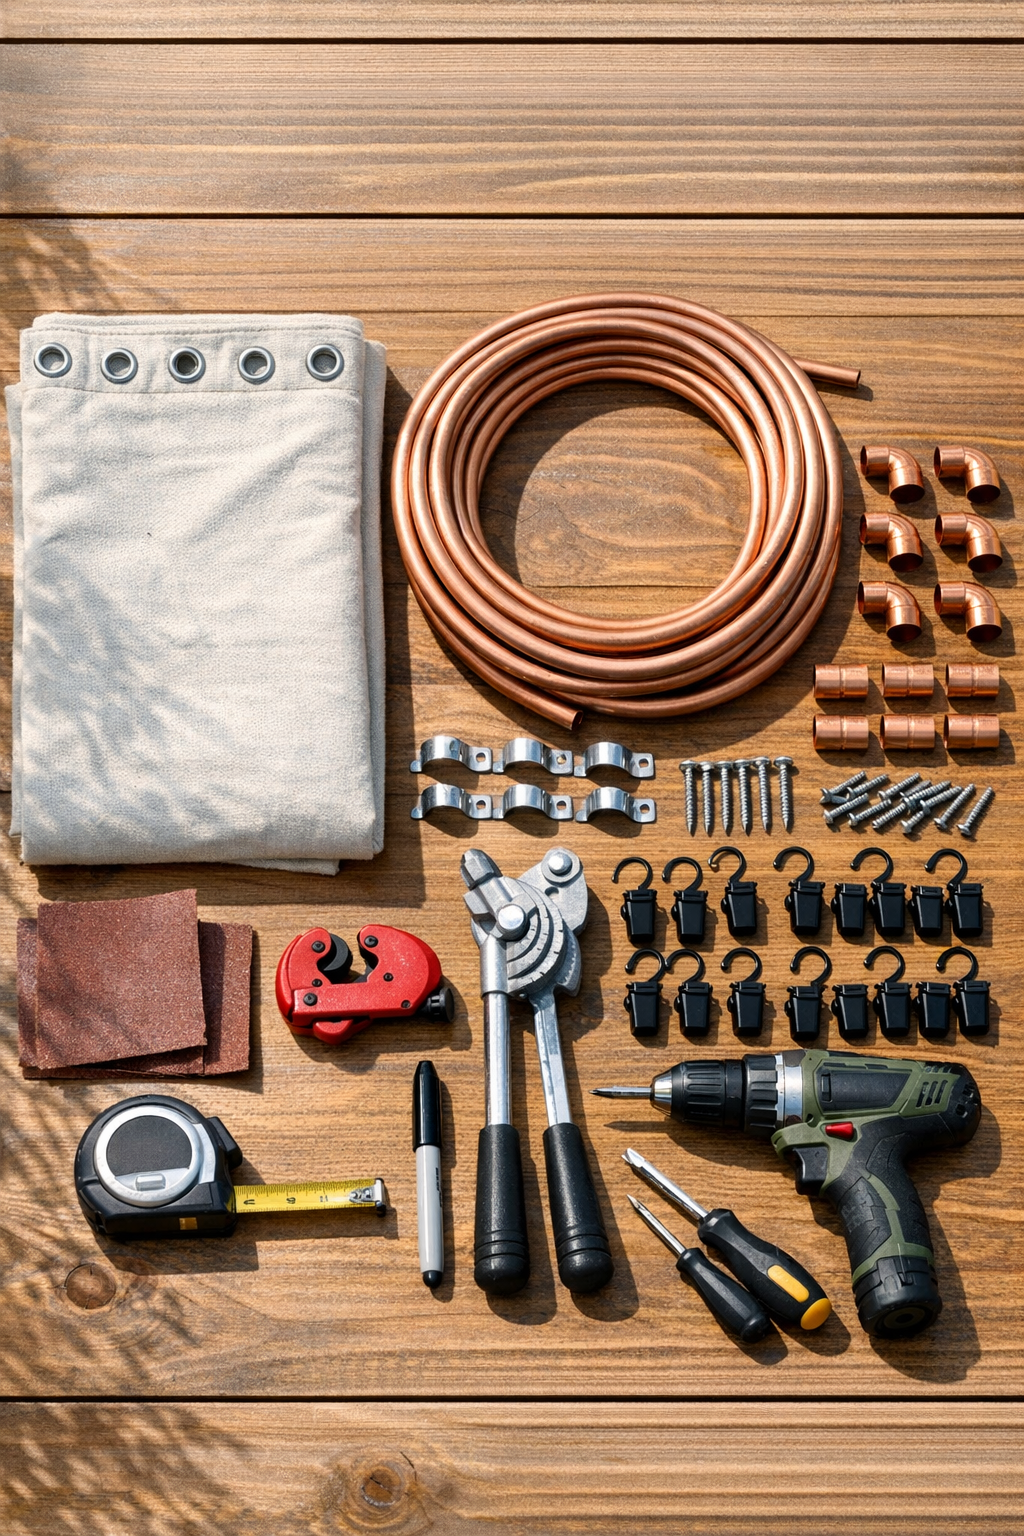
Materials
Instructions
1. Measure the space around your outdoor shower and decide how much coverage you want, then mark the finished frame width, depth, and height on the wall or posts. A good working size for one curtain panel is about 36 inches deep, 36 inches wide, and 78 inches high.
2. Lay out the drop cloth and check the grommet spacing so you know which edge will thread onto the copper frame. Choose the 9-foot edge if you want a fuller wrap and softer folds.
3. Cut the copper pipe to fit your layout: one top back piece to match the wall width, two curved or bent side/top pieces for the return, and two short vertical drop pieces if needed for your design. Smooth every cut end with sandpaper so the curtain won’t catch on rough metal.
4. Use a tubing bender to form the gentle curved sections that will sweep outward from the wall and around the shower area. Keep both bends as even as you can so the finished frame looks balanced from the front.
5. Dry-fit the frame on the ground with the elbows and couplings before mounting anything. Make small adjustments to the pipe lengths or bends until the frame sits square and the curtain path looks smooth.
6. Thread the grommeted edge of the canvas drop cloth directly onto the copper pipe before you install the last joint. Feed the pipe through each grommet in order, the way you’d slide a rod through a café curtain, and bunch the fabric gently as you go.
7. Add the final elbow or coupling to close the frame shape, then hold the assembled frame in place against the wall or support posts. Use a level to mark the exact mounting points for the pipe straps.
8. Drill pilot holes and install the pipe straps loosely first, then set the frame into them and tighten the screws once everything is level. If you’re mounting into masonry, use the appropriate anchors before driving the screws.
9. Test the curtain by sliding and pulling the canvas around the curve, then clip any loose section with stainless steel curtain clips if you want more control at the opening. The curtain should move easily but still feel substantial.
10. Spray the canvas with an outdoor fabric protector or clear sealant and let it dry completely before use. This helps the drop cloth resist mildew, dry faster, and stay looking tidy through the season.
11. Check that the bottom hem hangs 1 to 2 inches above the ground or deck so it won’t wick up water. If it hangs too low, raise the frame slightly or fold and clip the hem temporarily until you can sew a permanent hem.
12. Give the frame one final inspection for sharp spots, loose joints, or wobble, then open and close the curtain a few times to settle the folds. Once it’s hanging evenly, your outdoor shower is ready for summer use.
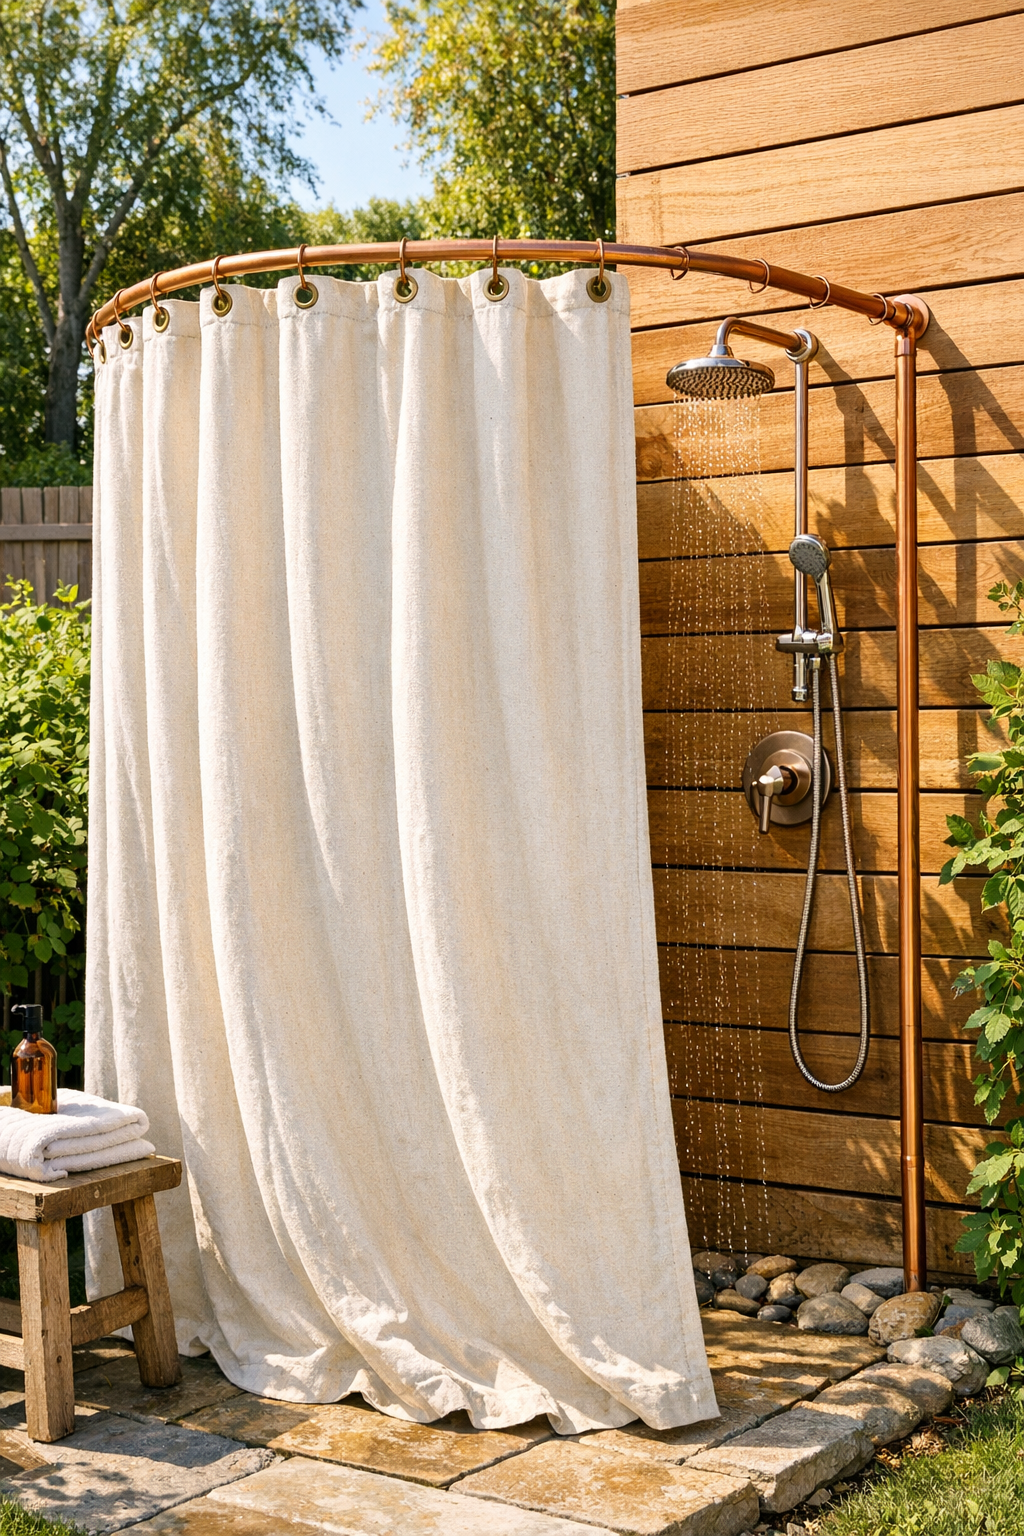
Variations & Tips
For a softer look: Wash and dry the canvas drop cloth before installation if the manufacturer allows it. I like the way prewashed canvas hangs with a more relaxed, broken-in drape.
For extra privacy: Use a wider 9 ft x 12 ft drop cloth and create deeper gathers along the pipe. More fullness means fewer gaps when the curtain is pulled around.
For a no-sew finish: If the curtain is a bit long, use outdoor-safe iron-on hem tape or stainless clips to shorten it without hauling out the sewing machine.
For longer frame life: Leave the copper natural for that pretty weathered patina, or apply a clear exterior metal sealer if you prefer the bright penny color. Either way, wipe the pipe down now and then so soap residue doesn’t build up.
If the curtain sticks: Rub a tiny amount of clear paste wax onto the copper where the grommets slide. Just a little makes the movement smoother without making a mess.
For windy yards: Sew small corner pockets into the lower hem and tuck in light curtain weights or smooth stones. That’s an old-fashioned sort of fix, but it works beautifully on breezy afternoons.
Best mounting advice: Fasten into solid wood posts, blocking, or studs whenever possible. A stout installation makes all the difference outdoors, especially once wet canvas gets heavier.