
There’s a certain kind of satisfaction in making something useful out of what most folks would toss aside, and this little siding project is exactly that sort of work. By flattening and fastening used pressed aluminum BBQ pans onto a simple scrap backing, you can make a heat-reflective panel that works well for sheds, chicken coops, garden walls, and other small outbuildings where you want a bit of sun bounce and weather-minded coverage without spending much money.
I’ve always had a soft spot for practical fixes that come from the pile by the garage instead of the store shelf. Around here, we’ve long believed a sturdy hand and a little patience can turn leftovers into something mighty handy. This project is best for small exterior surfaces, accent panels, or utility spaces rather than a whole house wall, and it’s especially good for anyone who likes upcycling and doesn’t mind a bit of careful trimming and fastening.
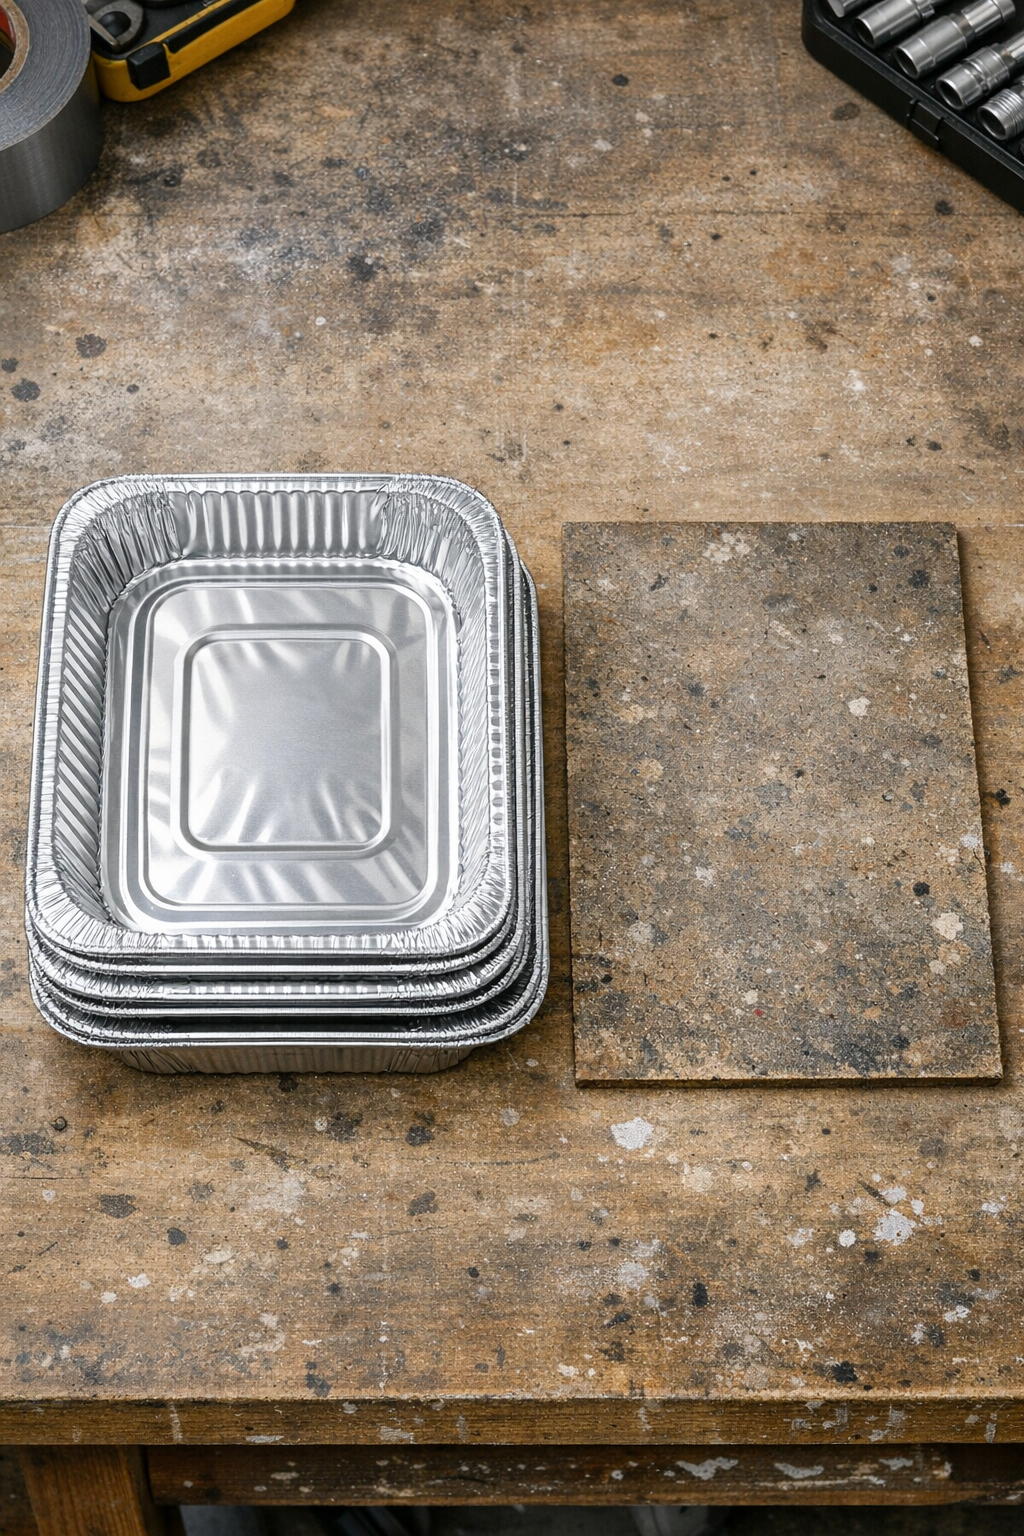
Materials
12 used pressed aluminum BBQ pans, standard 9 x 13 inch size, washed and fully dried
Instructions
1. Wash the aluminum pans thoroughly with warm soapy water, then dry them completely so no grease or moisture gets trapped behind the metal.
2. Trim away any curled rims if needed, then flatten each pan by pressing it upside down on a firm work surface until it forms a broad, slightly textured sheet.
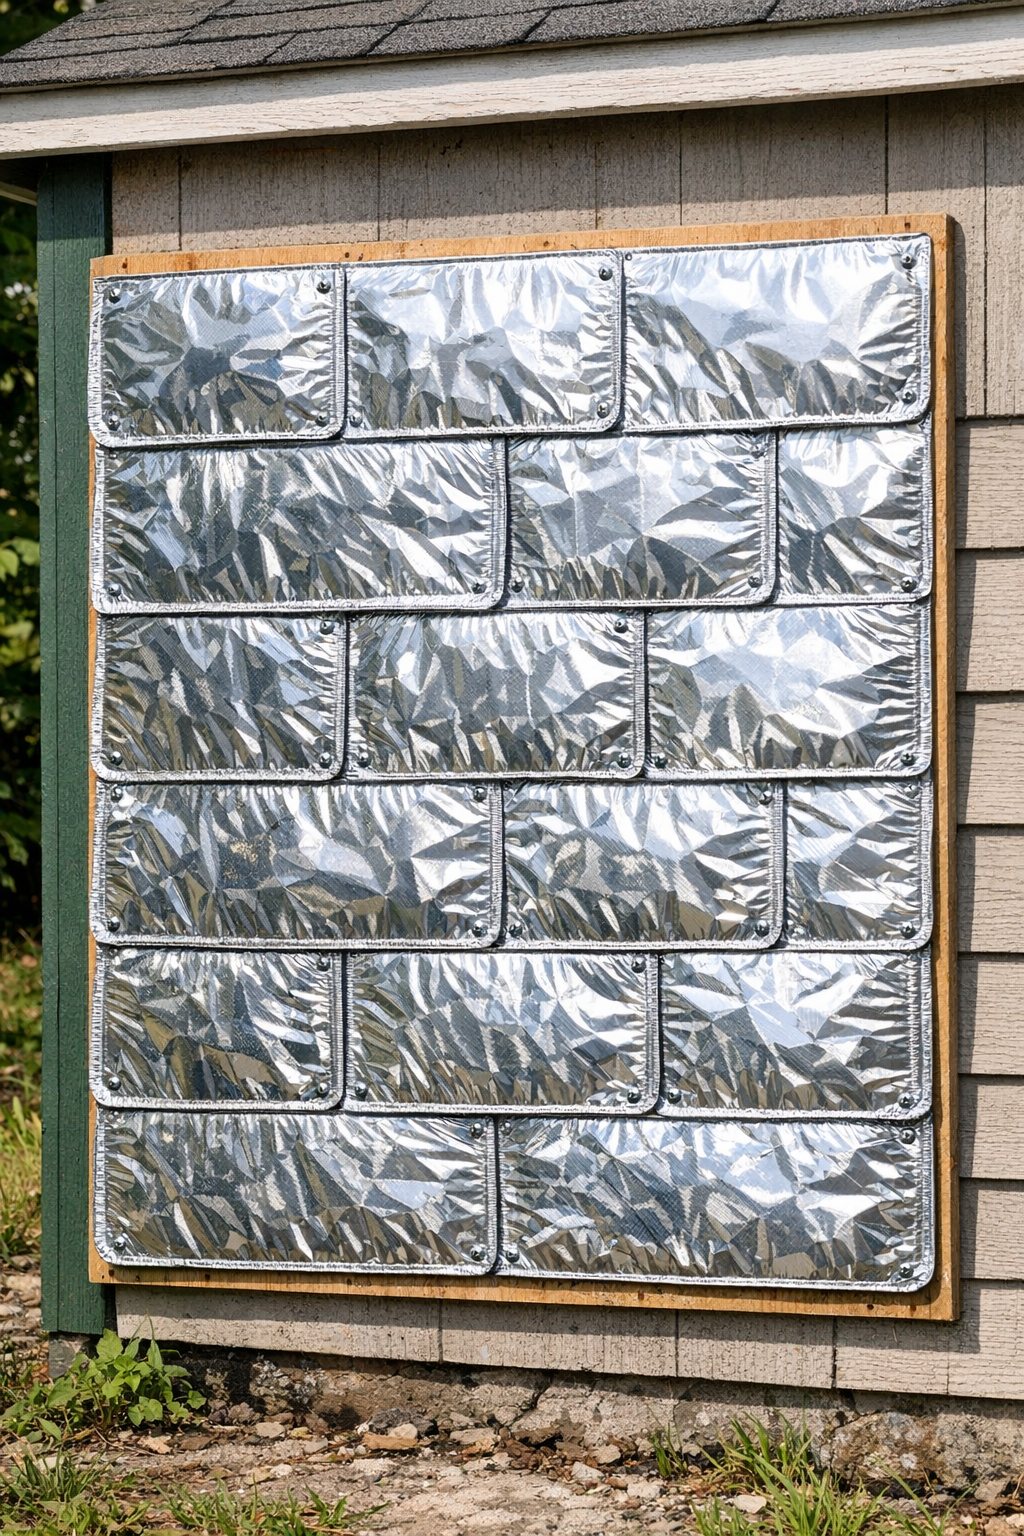
3. Set the 24 x 36 inch backing panel flat and plan your layout so the flattened pans overlap by about 1 inch on all joining edges, like old-fashioned shingles.
4. Start at the bottom edge of the panel and fasten the first row of flattened pans to the backing, keeping them straight and letting each one slightly overlap the next to shed water downward.
5. Add the second row above the first, overlapping the lower row by about 1 inch so the upper pieces cover the fasteners and continue the shingled pattern.
6. Continue upward row by row until the full panel is covered, trimming edge pieces as needed to keep the sides neat and the overlaps consistent.
7. Press down any raised corners so they sit snug against the backing and check that every overlap faces downward to encourage runoff instead of catching water.
8. Mount or lean the finished panel where you want extra reflected light or reduced heat absorption, making sure it’s used on a small utility structure or non-critical surface.
Variations & Tips
Best backing choice: If you have a scrap of thin plywood, that’s my first pick because it stays flatter than cardboard and handles outdoor use better for a temporary utility panel.
For better water shedding: Always begin at the bottom and work upward. That old overlapping habit is the same reason shingles and clapboards have lasted so long out here in farm country.
Use on the right project: This is best for sheds, animal shelters, privacy panels, compost bin lids, and sun-facing garden structures. I would not use it as code-approved house siding or for any structural weather barrier.
Keep the reflective side outward: The brighter face of the aluminum should point toward the sun to bounce away more heat and light up darker corners around a yard or outbuilding.
Mind sharp edges: Flattened aluminum can leave surprisingly sharp corners, so fold or trim any rough spots before installing. A careful hand saves a world of aggravation later.
Patchwork look: If your pans are different brands or have different pressed patterns, don’t fret. Once overlapped, they often make a handsome pieced-together surface with a real make-do charm that reminds me of the practical ingenuity folks have always relied on.