
There’s something mighty satisfying about adding a useful little touch to an outdoor space, especially one that looks like it has always belonged there. This foot wash station is a simple stacked-stone project with an old-fashioned brass faucet running through flat slate, draining into a basin of smooth river rock below. If you’ve got a pool, a garden path, a lake place, or just a backyard where sandy, muddy feet keep finding their way indoors, this is the kind of project that earns its keep right away.
I’ve always had a soft spot for practical things made handsome. Out here in the Midwest, we learn to build with what lasts—stone, brass, gravel, and a little patience. This project is for anyone comfortable with a weekend DIY that involves digging, leveling, stacking, and making a simple outdoor water connection. The finished station feels sturdy, natural, and charming in a way that reminds me of old farmyard hand-washing setups, only dressed up for the poolside.
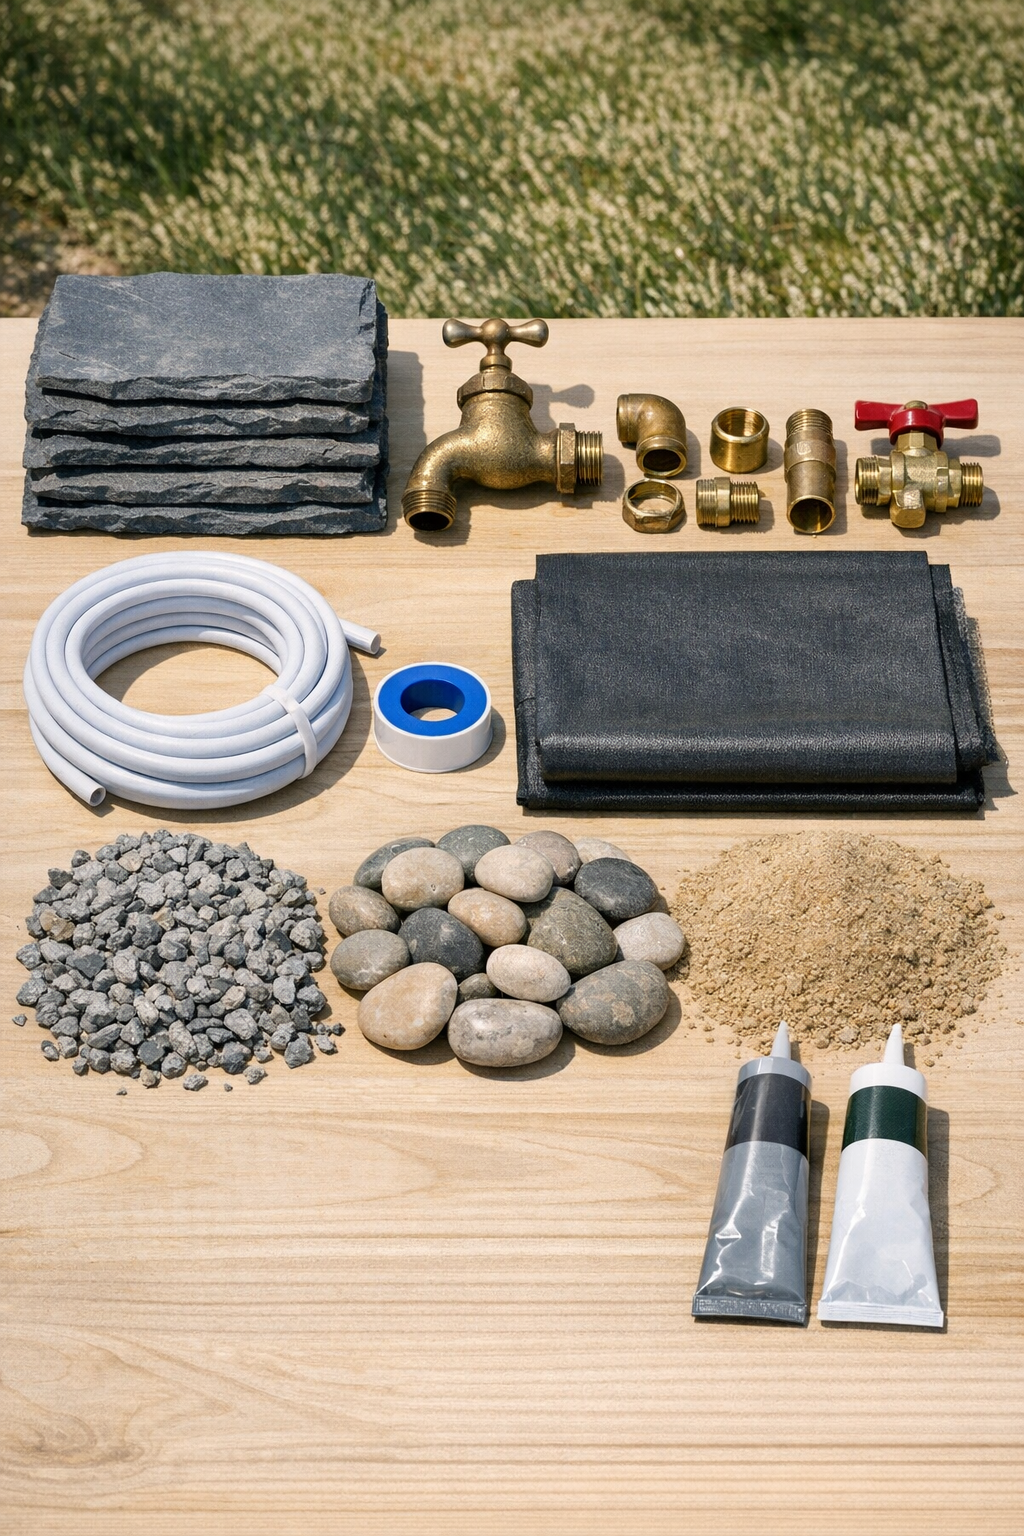
Materials
1 vintage brass outdoor faucet, 1/2-inch threaded inlet
Instructions
1. Choose a level spot near the pool, patio, or garden edge where water can safely drain away from foundations and walking surfaces. Mark out a basin area about 30 inches wide and 24 inches deep, with the faucet centered at the back.
2. Dig the marked area 6 to 8 inches deep, keeping the bottom as flat as you can. If your soil is soft, go a little deeper so you can build a firmer gravel base.
3. Line the excavation with landscape fabric, letting it run slightly up the sides. Pour in 4 inches of crushed gravel, spread it evenly, and tamp it down until firm.
4. Add 1 to 2 inches of leveling sand over the gravel and smooth it flat. Check with a level so the basin drains evenly and does not pitch toward the house or pool deck.
5. Set the first course of flat slate stones along the back and sides of the basin to form a low U-shaped wall. Dry-fit the stones first, adjusting them until they sit solidly with minimal wobble.
6. Build up the stone column at the back center where the faucet will mount, stacking slate pieces carefully and staggering seams for strength. Leave a hidden vertical channel between stones wide enough for the brass pipe and supply line.
7. Feed the flexible supply line up through the back of the stone column area and connect it to the shutoff valve and brass drop-ear elbow. Wrap all threaded brass connections with plumber’s tape before tightening.
8. Thread the 6-inch brass pipe nipple into the drop-ear elbow so it projects through the front of the stacked stone column. Test-fit the vintage brass faucet onto the nipple to confirm the reach and height feel comfortable for rinsing feet.
9. When the fit is right, glue the stacked stones together with exterior landscape block adhesive, working one course at a time. Keep the faucet opening centered and clear, and wipe away any excess adhesive before it hardens.
10. Add the larger cap stones on top of the side walls and column for a finished look. If you’re using a brass wall flange, slide it over the pipe before attaching the faucet so the stone opening looks tidy.
11. Backfill around the outside of the stone structure with soil or extra gravel to lock everything in place. Pour a little drainage gravel around the base of the pipe channel if needed so moisture does not collect there.
12. Fill the basin with smooth river rock, spreading the stones evenly to just below the top edge of the basin walls. Set an optional splash stone directly under the faucet if you want a flatter place to stand while rinsing.
13. Sweep polymeric sand into any visible stone joints at the top and sides, then brush off the excess. Lightly mist only if the product directions call for it, taking care not to wash sand into the river rock basin.
14. Connect the supply line to your outdoor water source, turn on the shutoff valve, and test the faucet slowly. Check every joint for drips, then let the water run for a minute to make sure it drains cleanly through the river rock.
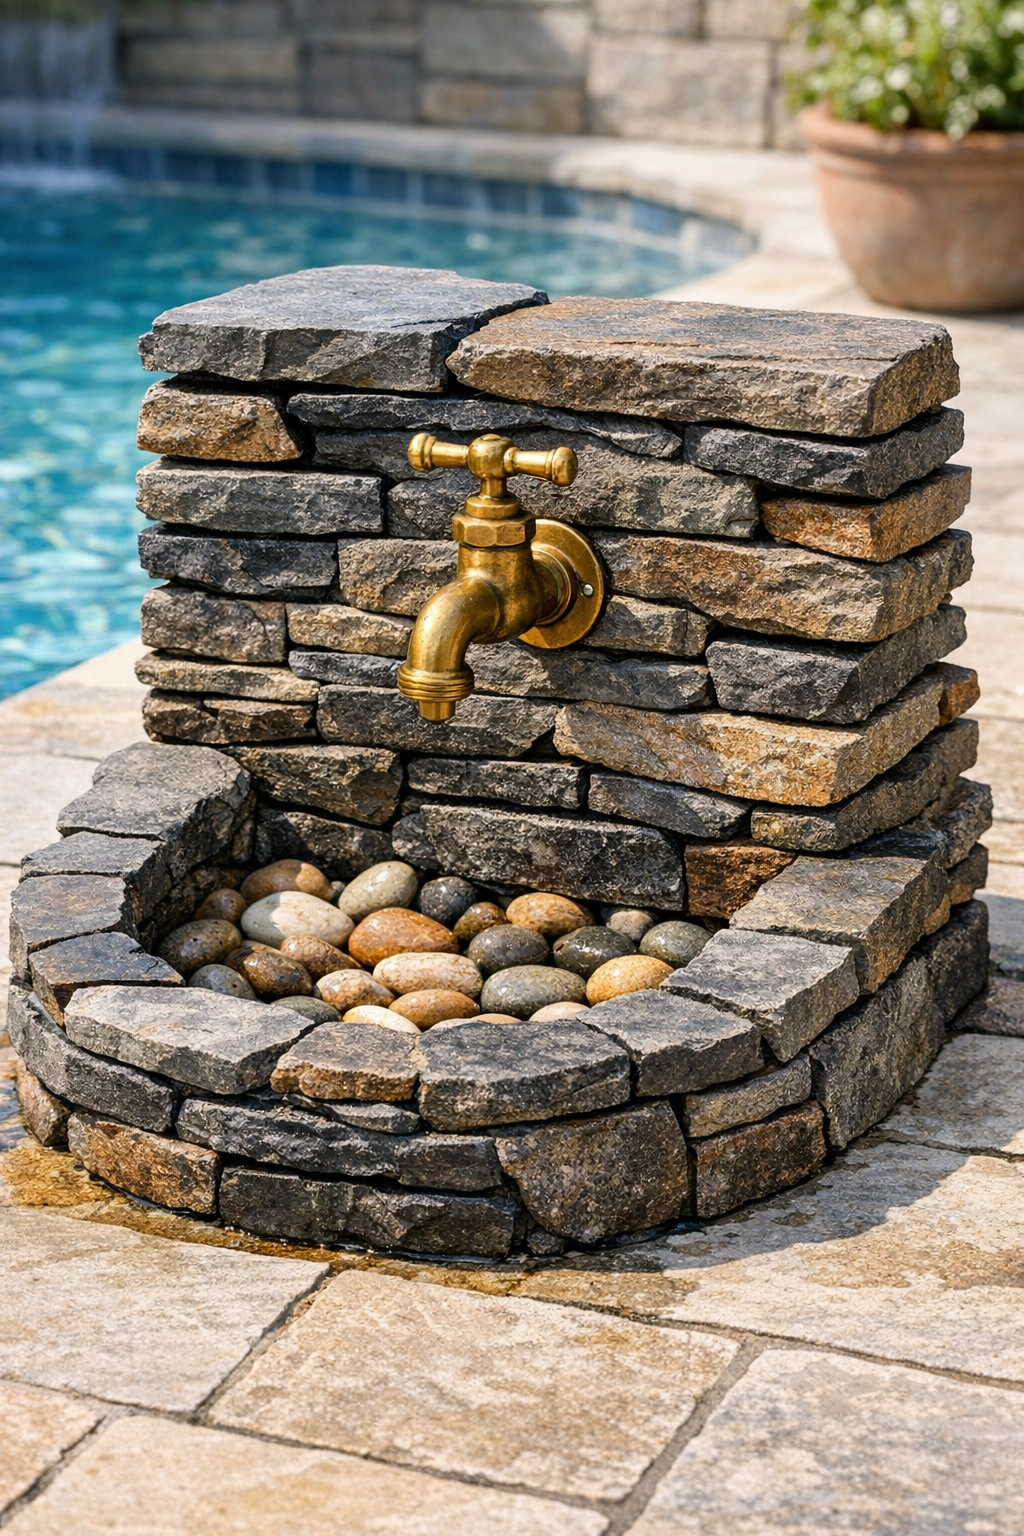
Variations & Tips
For colder climates: If you live where winters freeze hard, install a shutoff inside the house or use a removable supply connection so you can drain the line before cold weather sets in. That little bit of planning saves a lot of springtime aggravation.
For a taller station: Add one or two extra courses of slate if you want the faucet higher for rinsing hands, watering cans, or garden tools. Just make sure the base footprint grows a bit too, so the structure stays visually balanced and sturdy.
Stone choice: Slate gives a lovely layered look, but bluestone, flagstone, or flat limestone can work just as well if that’s what’s common in your area. I always say it’s nice when a project looks like it belongs to the land around it.
Drainage matters: If your soil holds water, deepen the basin and increase the gravel layer underneath before adding river rock. In very wet spots, you may want to run a buried drain line away from the basin altogether.
Safer footing: Choose rounded river rock that feels comfortable under bare feet, or place one broad flat stepping stone in the center for a steadier stance. Around a pool, that’s especially helpful for children and older folks.
Faucet sourcing: Vintage brass faucets have wonderful character, but check that the threads are sound and the valve still works smoothly before building them in. If you use a reproduction faucet, pick unfinished or antique brass so it still has that old-time charm.
Keep it looking natural: Vary the thickness and edge shape of the slate as you stack it so the station does not look too rigid or manufactured. The prettiest stonework, in my experience, has a little irregularity to it—just enough to feel honest.