
This harvest moon lantern post is one of those yard projects that looks like it came from a little boutique garden shop, but it’s surprisingly simple to make with a few sturdy materials and a free afternoon. I love projects like this because they add instant charm to a front yard or porch area without needing power tools for every single step, and the soft glow from the solar fairy lights makes everything feel a little more welcoming at dusk.
If you enjoy decorating your outdoor spaces in a way that feels warm, rustic, and a bit unexpected, this is a lovely project to try. I’m especially fond of pieces like this that reuse something old and weathered, and an old wooden oar has exactly that cozy, lakeside character that makes a planter display feel special through late summer and fall.
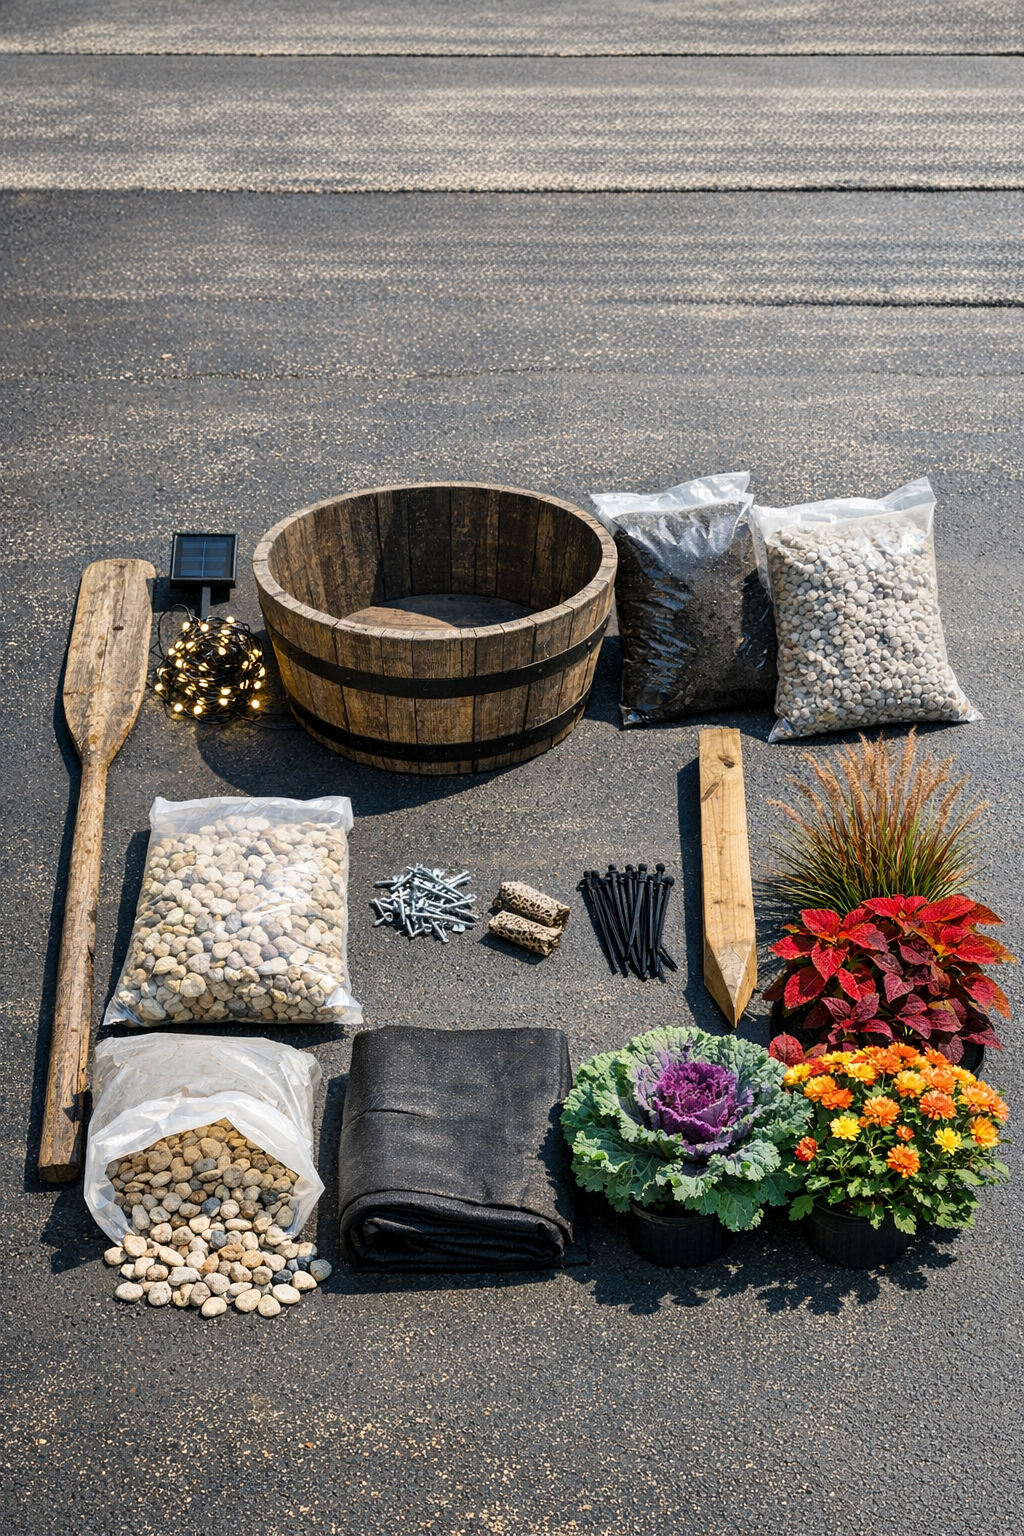
Materials
Instructions
1. Set the whiskey barrel planter where you want the finished lantern post to live, because it will be heavy once filled. Choose a spot that gets at least 6 hours of sun so the solar lights can charge well.
2. Add 3 to 4 inches of pea gravel to the bottom of the planter for drainage and weight. Lay the landscape fabric over the gravel to keep the soil from washing down into it.
3. Stand the 2x2 stake upright in the center-back area of the planter and drive or press it down firmly into the gravel layer. Add enough potting soil around it to hold it steady while you check that it is straight.
4. Position the wooden oar against the stake with the paddle end up and the handle end buried several inches into the soil. Angle it slightly if you like a relaxed cottage look, then fasten it to the stake with the mending plate or pipe straps and exterior screws.
5. Fill the planter with the remaining potting soil, packing it firmly around the base of the oar and stake so the post feels solid. Stop about 2 inches below the rim to leave room for plants and watering.
6. Arrange the plants before digging them in, placing the ornamental grasses toward the back and center, the mums around the middle, and the trailing plants near the front edge. Once you like the balance, plant everything at the same depth as their nursery pots.
7. Tuck decorative moss around the plants to cover bare soil and give the planter a finished look. If you want extra harvest charm, nestle in a few mini pumpkins or gourds around the base.
8. Starting near the base, wrap the solar fairy lights around the oar in a gentle spiral, keeping the spacing even as you move upward. Leave the solar panel lead unwrapped and secure the wire every 10 to 12 inches with small zip ties hidden at the back.
9. Add a few extra loops of lights around the paddle end so the top glows a little brighter, like a lantern. Keep the battery housing and solar panel accessible and mount the panel on its stake in the soil where it faces the sun.
10. Water the planter thoroughly, wipe away loose soil from the barrel rim, and wait until evening to check the glow. If the oar shifts at all, add more soil pressure around the base or a second brace to the back before calling it finished.
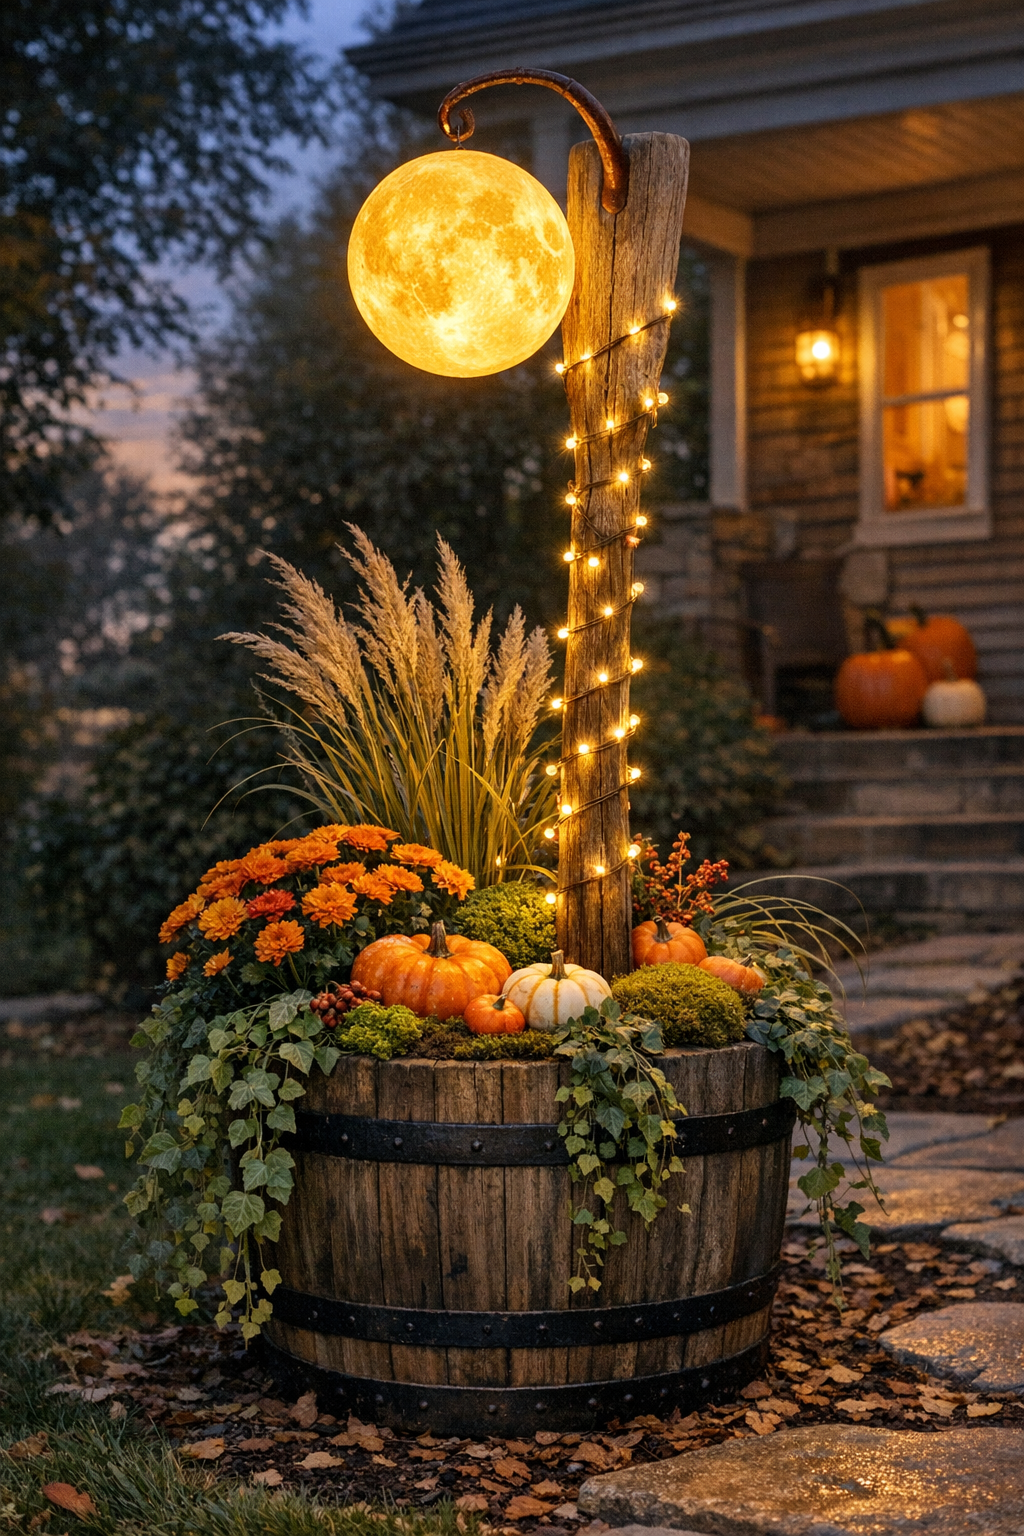
Variations & Tips
For a sturdier build: If your oar is especially heavy, use a 2x4 support instead of a 2x2 and add two braces rather than one. I always say outdoor pieces are worth overbuilding a little, especially where wind is a factor.
For picky plant preferences: If you’re like me and want something easy to keep looking nice, swap the mums for hardy kale, sedge, or faux fall stems. It gives you that full seasonal look with less fuss.
For a softer glow: Choose warm white fairy lights instead of cool white. That warmer color feels much cozier in the evening and gives the whole planter a welcoming front-porch look.
For a coastal version: Skip the pumpkins and use white flowers, ivy, and smooth stones around the base. The old oar already leans naturally into that relaxed lake-house style.
To protect the wood: If the oar is very old and fragile, brush on a clear outdoor matte sealer before installing the lights. It helps preserve the weathered finish without making it look shiny or new.
To keep lights tidy: Tuck zip ties to the back side of the oar and trim the tails flush. That small step makes the project look much more polished, which is usually what gets people asking where it came from.