
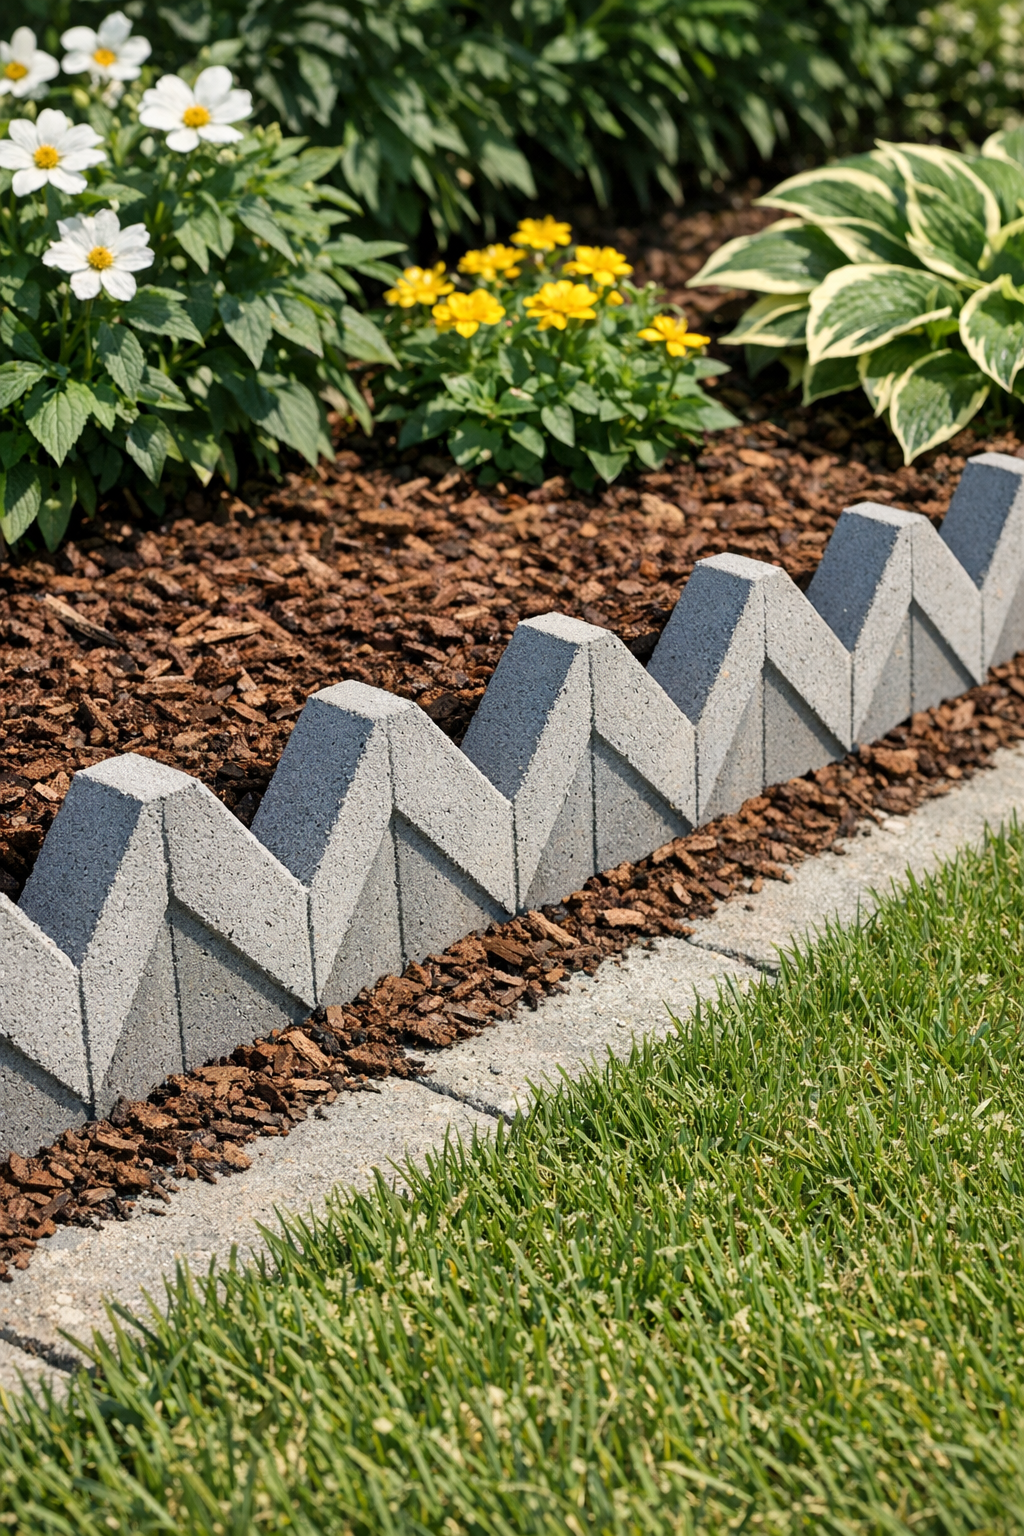
I love a garden project that looks custom but doesn’t ask for fancy tools or a big budget, and this zig-zag cement edging is exactly that kind of make. By pouring wet cement between plastic corrugated roofing panels, you can create sturdy edging pieces with a beautiful repeating pattern that makes a flower bed or walkway look neat and finished.
What I especially like about this project is that it’s practical for real family life. It helps keep mulch and soil where they belong, it stands up well to weather, and it gives you that “Where did you buy that?” result without the store-bought price. If you’re comfortable mixing concrete and working carefully in sections, this is a very doable weekend project.

Materials
2 plastic corrugated roofing panels, 26 inches x 8 feet each
Instructions
1. Set up a flat work area in the garage, driveway, or patio and cover it with a plastic sheet. A level surface matters here, because uneven forms can make the finished edging thinner on one side.
2. Cut the corrugated roofing panels into matching 36-inch lengths, or leave them longer if you want fewer but larger edging pieces. Mark your cuts with a marker and use a utility knife or fine-tooth saw, keeping the edges as straight as you can.
3. Place one panel corrugation-side up and spray the inside lightly with nonstick spray so the concrete will release more easily later. Set the second panel on top in the opposite direction so the corrugations create a repeating zig-zag channel between the two pieces.
4. Brace the panels along both sides with scrap wood boards and clamps so they stay aligned and upright. Tape the ends and any obvious gaps with duct tape to reduce leaks before pouring.
5. Mix half a bag of concrete at a time in a mixing tub, adding water slowly until it reaches a thick oatmeal-like consistency. You want it wet enough to settle into the grooves but not so soupy that it weakens or pours out of the seams.
6. Scoop the wet concrete into the open channel between the panels, filling from one end to the other in small sections. Tap the sides gently with your hand or a scrap board as you go to help air bubbles rise and the mix settle into the corrugations.
7. Smooth the top with a trowel so the back edge of the edging is fairly even. If you’d like the pieces to sit partly below ground, make the top edge slightly flat and consistent from end to end.
8. Let the concrete set until it is firm enough to hold its shape, usually according to the bag directions, then leave it undisturbed to cure for at least 24 hours. In hot or windy weather, lightly cover it with plastic so it doesn’t dry too fast and crack.
9. Remove the clamps, peel away the tape, and gently separate the plastic panels from the hardened concrete. If a little flashing or roughness remains along the edges, scrape or sand it lightly after the piece has cured more fully.
10. Repeat the process until you have enough sections for your garden bed, then let all pieces cure for 3 to 7 days before installation for best strength. I always make one extra piece if I can, just in case I need a shorter cut or a replacement later.
11. Dig a shallow trench along the garden edge about 3 to 4 inches deep and as wide as the base of your edging. Set the pieces in place with the zig-zag pattern facing out, checking every few sections to keep the line smooth and level.
12. Backfill with soil, tamp everything firmly, and add mulch or gravel to finish the bed. Once it’s settled in, the edging looks wonderfully crisp and has that handmade charm that still feels polished.
Variations & Tips
For a softer look: Use the edging around curved planting beds instead of only straight borders. Shorter sections are easier to fit into gentle curves without fighting the layout.
For picky perfectionists: If you’re the type who notices every little wobble, snap a string line before digging your trench. It helps the finished run look extra tidy and intentional.
Add color: You can mix in a concrete colorant or brush on masonry stain after curing if you want a warmer stone look. Earthy gray, tan, or charcoal tones blend especially nicely with mulch and brick homes.
Reinforce longer pieces: For sections over 36 inches long, press a length of galvanized wire mesh or a narrow strip of hardware cloth into the center of the wet concrete. This can help reduce breakage when moving the pieces.
Prevent sticking: Don’t skip the release spray. I’ve learned from plenty of kitchen and garden projects alike that a little prep saves a lot of frustration later.
Work in batches: Mix smaller amounts of concrete more often instead of one huge batch. It gives you better control, especially on warm days when the mix starts setting faster than you expect.
Make installation easier: If some pieces rock slightly in the trench, add a little sand under the low spots before backfilling. That small adjustment can make the whole border look straighter.
Use leftovers wisely: Any extra concrete can be poured into small molds for stepping stones or pot feet. I always appreciate a project that stretches materials just a bit further.