
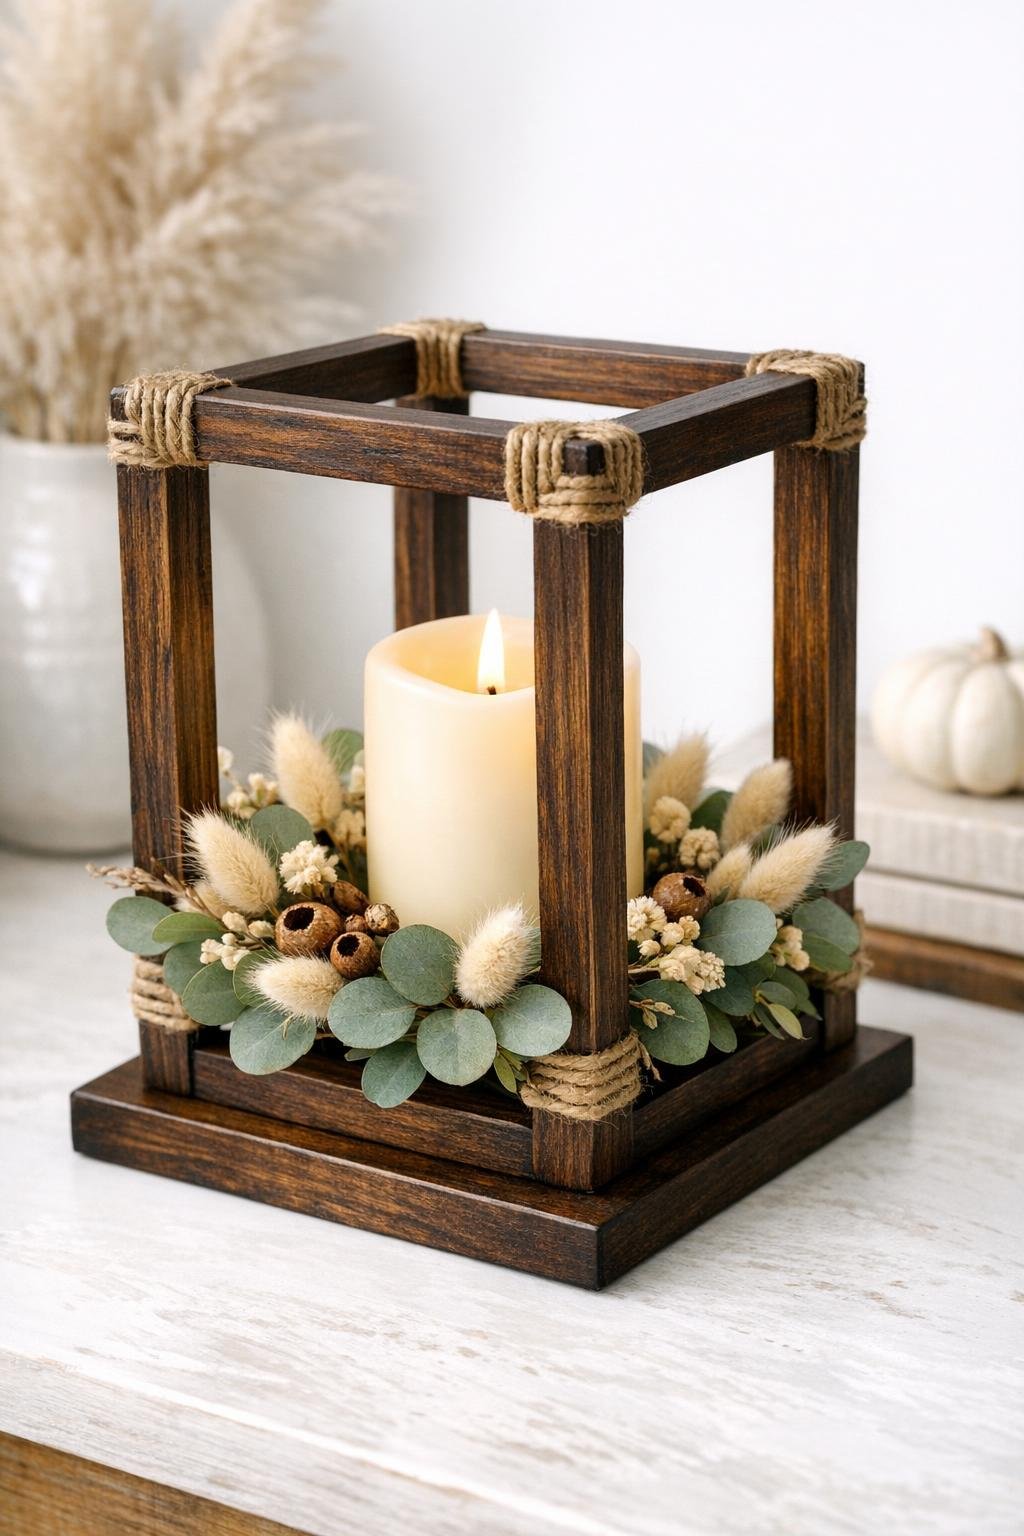
I love a project that looks far more expensive than it is, and this picture-frame lantern centerpiece is exactly that kind of win. By tying four matching wooden frames together at the corners, you get an open, cube-like lantern that feels airy, warm, and intentionally styled instead of overly crafty. It’s a smart way to use old frames if you have them, but it also works beautifully with inexpensive unfinished wood frames from the craft store.
As someone who is usually squeezing creative projects in between work, dinner, and the usual weeknight shuffle, I appreciate décor builds that come together in one evening and still look boutique on the table. This one is perfect for anyone who likes modern-rustic style, especially if you want a soft early-fall centerpiece with natural texture, a candle glow, and just enough greenery to feel finished without being fussy.
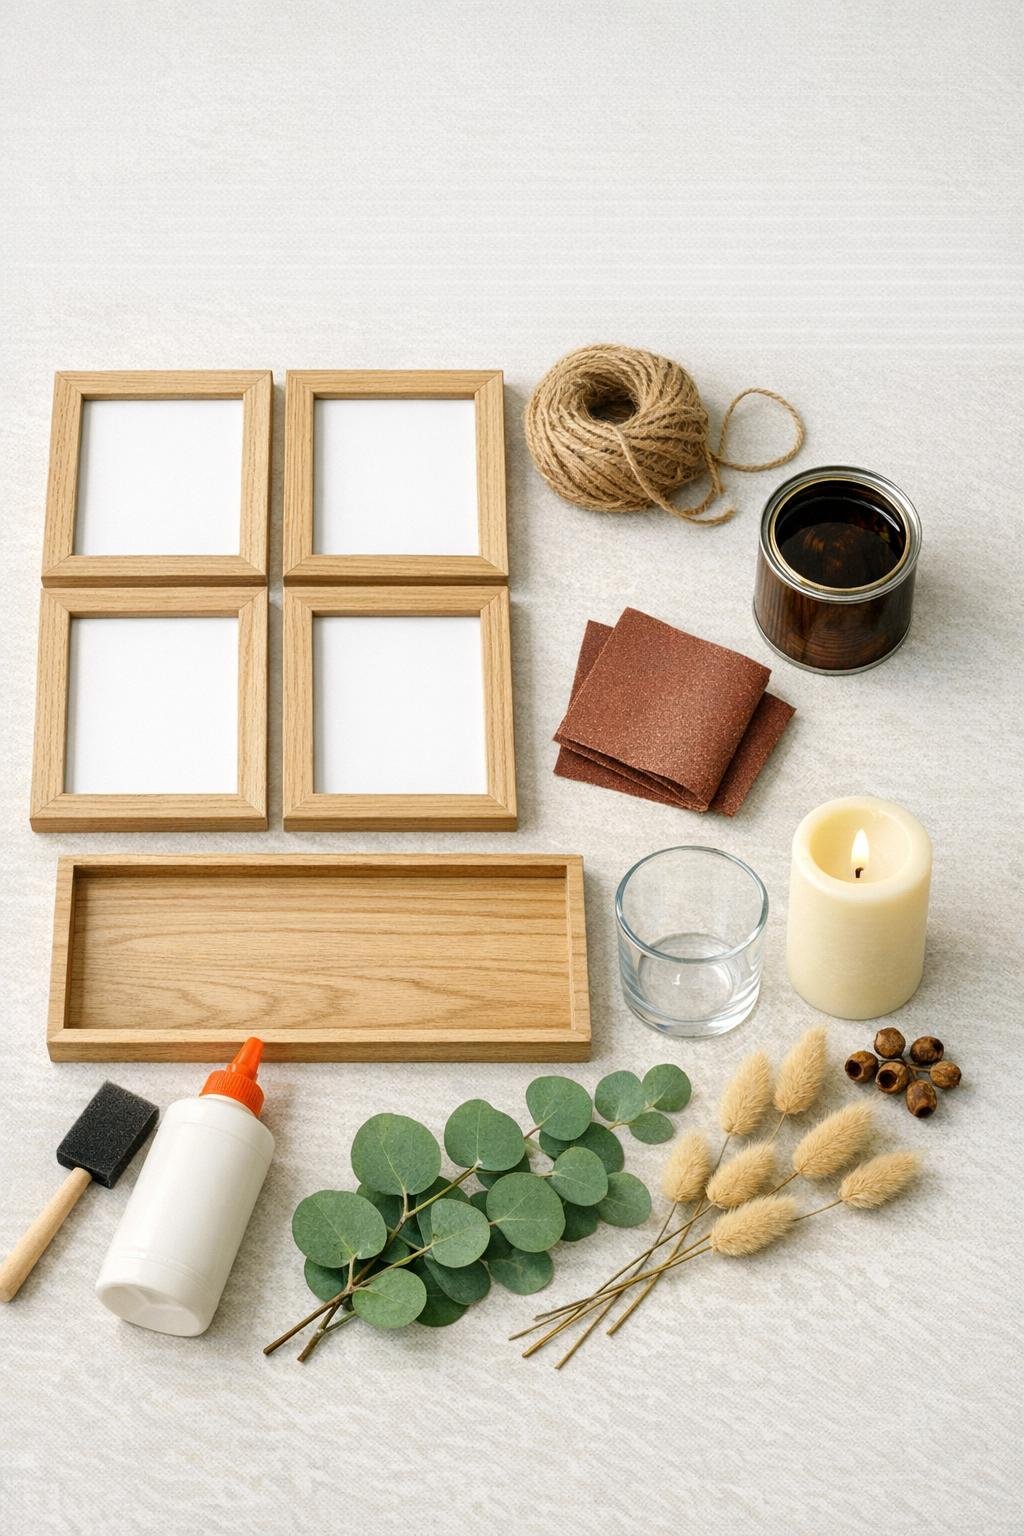
Materials
Instructions
1. Remove the glass, backing, tabs, and hanging hardware from all four frames so you’re left with clean, lightweight wood frames.
2. Sand each frame lightly with 120-grit, then smooth with 220-grit so the wood feels even and the finish will look intentional.
3. Apply your finish if desired, using a dark walnut stain for a moodier look or a natural oil finish for lighter warmth; wipe off the excess and let the frames dry completely.
4. Stand two frames upright at a right angle and align their outer edges neatly so the corners meet evenly from top to bottom.
5. Add a tiny dot of wood glue where the frames touch at the top and bottom corner, then hold them in place with one short piece of painter’s tape if needed.
6. Wrap jute or leather cord tightly around the top corner 8 to 10 times, then crisscross it 2 to 3 times and knot it discreetly on the inside; repeat on the bottom corner of the same edge.
7. Continue adding one frame at a time, lashing each new vertical edge at the top and bottom until all four frames form an open cube-like lantern.
8. Check the structure on a flat surface and adjust the spacing so the top opening looks square and the lantern sits level without wobbling.
9. If you want extra stability, center the frame cube on the wood base or tray and glue it lightly in place from the inside edge so the base stays visually slim.
10. Add felt pads under the base if you’re using one, then let any glue or sealer cure fully before styling the center.
11. Place a flameless pillar candle or a tiny glass hurricane in the center, keeping the scale low enough that the open frame still feels airy.
12. Tuck a loose ring of eucalyptus sprigs, dried bunny tails, and a few mini seed pods around the base of the candle for a soft early-fall look, leaving plenty of negative space so it reads polished rather than crowded.
Variations & Tips
Coffee table styling: I like to place this on a small stack of books or a wood tray on the coffee table so it feels anchored. Keep the filler minimal and add one other object, like a small ceramic bead strand or coaster stack, so the arrangement still breathes.
Dining table version: For a dining table, make two matching lanterns and place them down the center with plenty of space between them. The open-frame design is nice because it adds height without blocking conversation, which is always a plus in my house.
Entry console look: On an entry table, pair the lantern with a mirror, a bowl for keys, and one taller vase off to the side. I’d keep the greenery neutral here so the wood and cord details stand out the minute you walk in.
Covered porch option: This works beautifully on a covered porch as long as the frames stay dry and you use a flameless candle or enclosed glass hurricane. If you’re styling outdoors, choose sturdier seed pods and fewer delicate bunny tails so the look holds up better.
Year-round succulent display: Skip the candle and set a small potted succulent or a cluster of tiny succulents in the center instead. This version feels really clean and minimalist, and I especially like it in spring and summer when I want something simple on the kitchen table.
Cord choice: Jute gives the lantern a softer rustic look, while thin leather cord makes it feel a little more tailored and boutique. If your room leans modern, I’d personally choose the leather.
Frame match matters: The more alike your four frames are in width and color, the more elevated the finished piece will look. Mixing random frame profiles can work, but matching frames give you that intentional designer feel.
Keep the styling light: The easiest mistake is overfilling the base with too many stems or decorations. A sparse ring of natural elements usually looks more expensive, and I remind myself of that constantly when I’m tempted to keep adding “just one more thing.”
Safety note: Use a flameless candle for the simplest and safest setup, especially if you include dried materials. If you use a real candle, place it inside a proper glass hurricane and keep all foliage well away from the flame.