
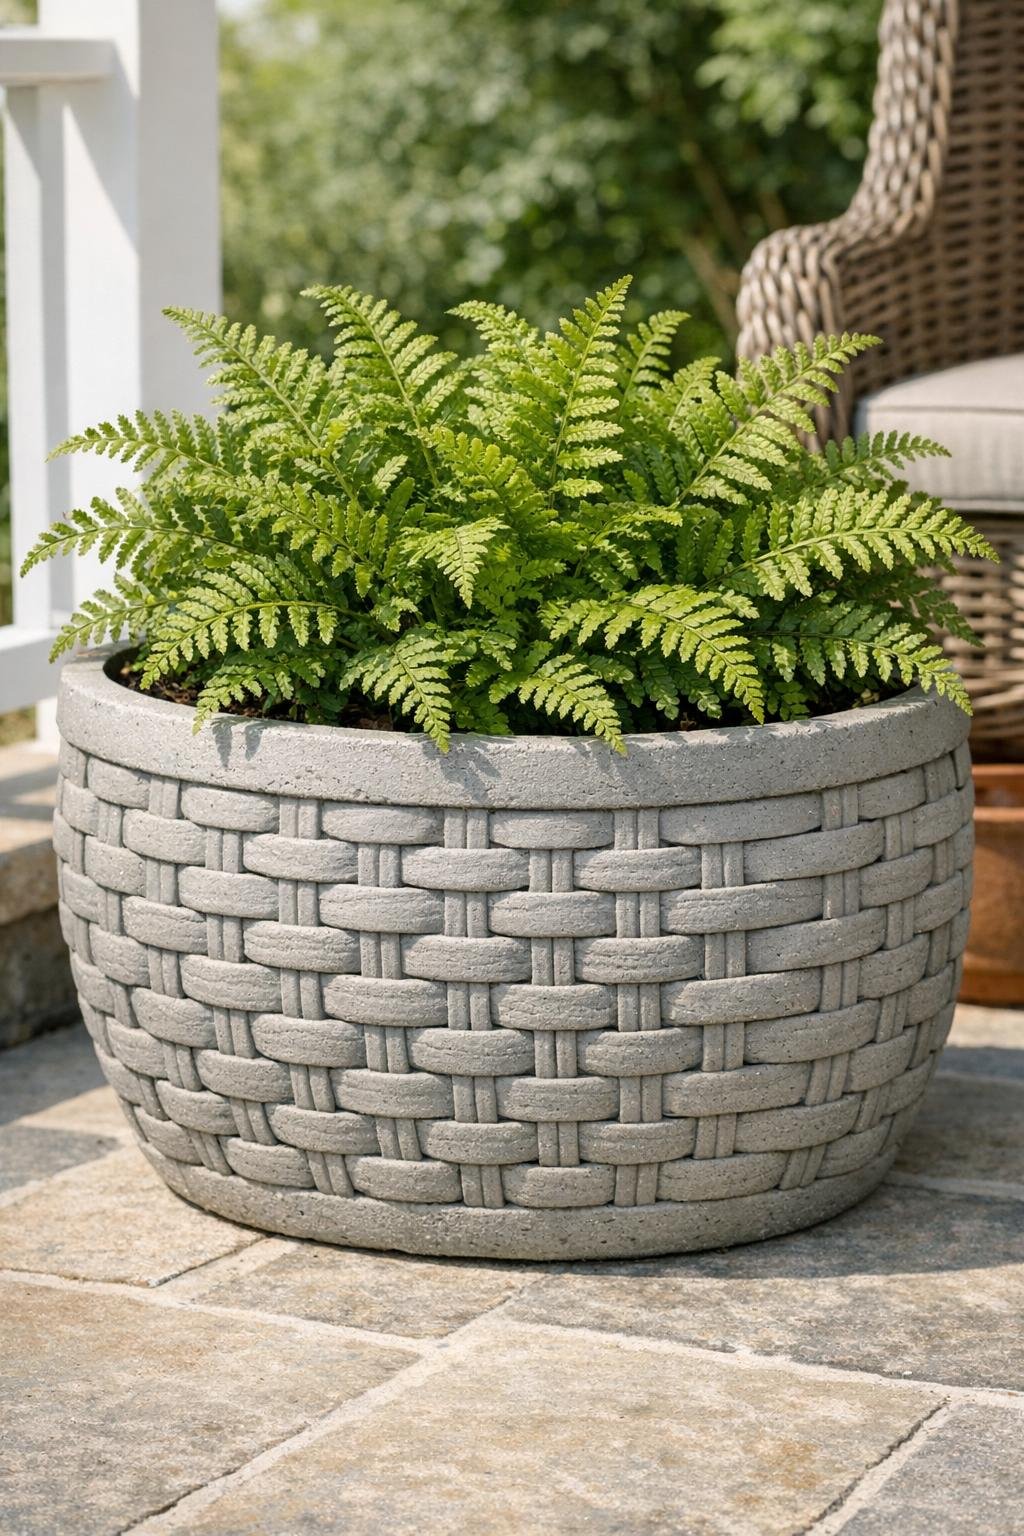
There’s something especially satisfying about making a garden planter that looks like it came from a little boutique greenhouse, only to know it started with two ordinary plastic laundry baskets and a batch of cement. This basket-weave planter has a lovely textured surface that catches the light and gives even a simple porch plant a dressed-up place to live. Around here, I’ve always believed the prettiest garden touches are often the ones made with plain old practical things from the hardware store and the back closet.
If you enjoy weekend projects that feel substantial but don’t require fancy woodworking tools, this one is a good fit. I like it for patios, front steps, and tucked beside the vegetable garden, and it’s especially nice for folks who want the look of a woven container without worrying about rot or weather damage. The first time I made one, I set it by the porch with a fern in it, and I truly did have people ask where I bought it.
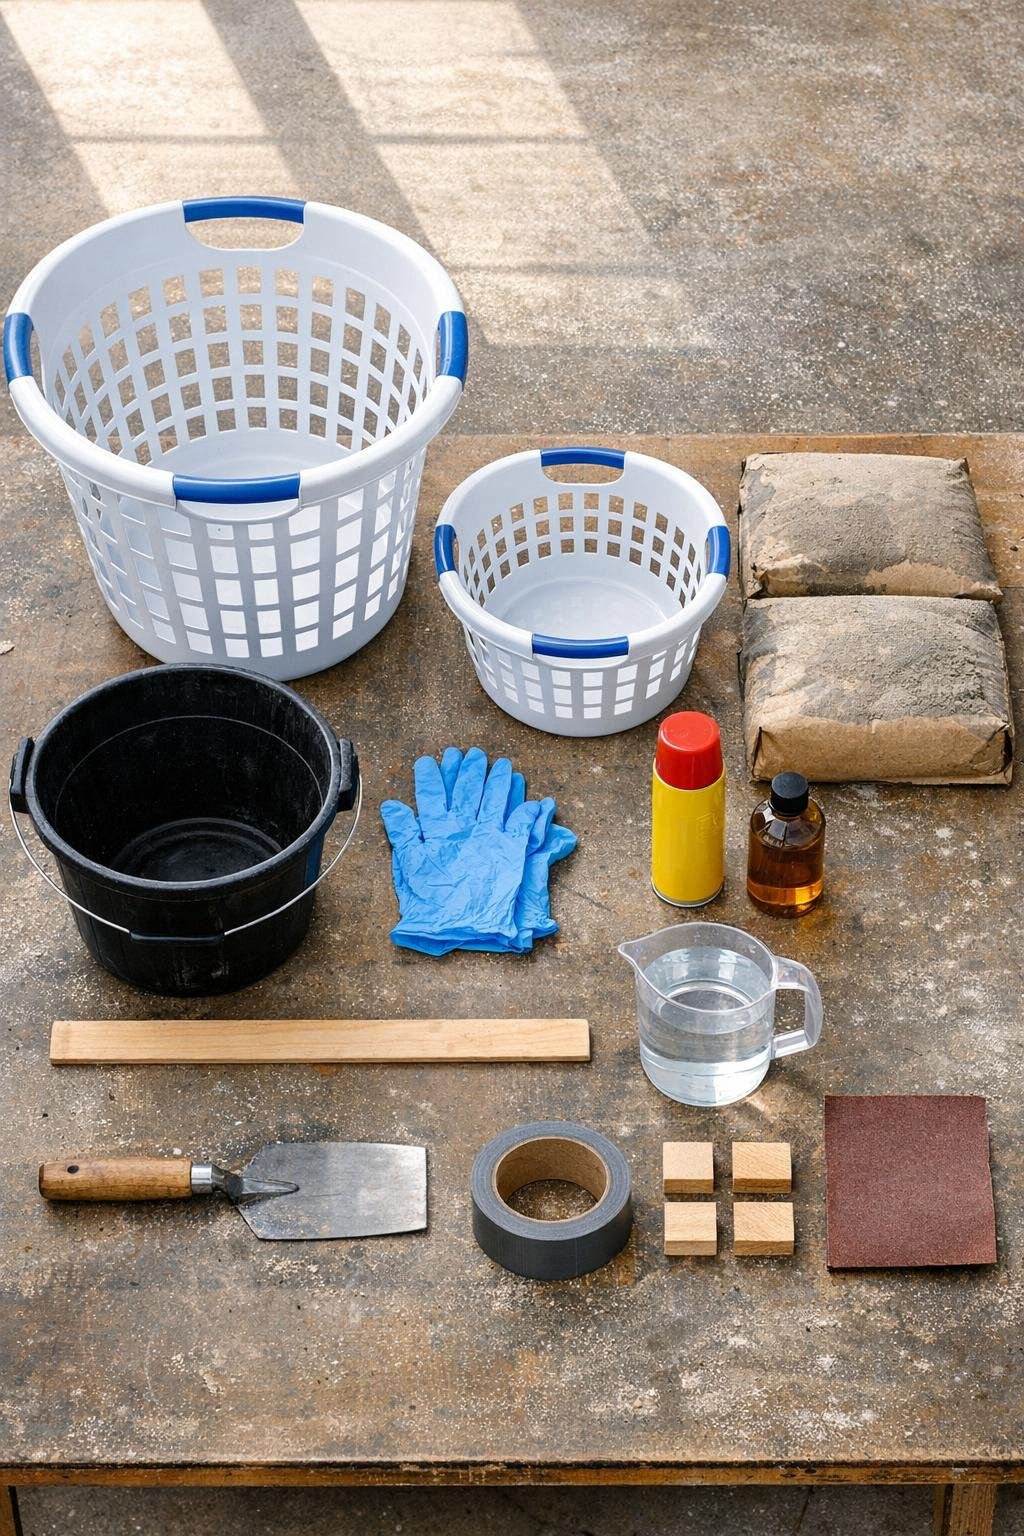
Materials
Instructions
1. Choose two plastic laundry baskets that nest together with an even gap of about 1 1/2 to 2 inches on the sides and bottom. Check that the smaller basket sits centered and doesn’t wedge in too tightly.
2. Wash and dry both baskets so the cement can pick up the weave pattern cleanly. Rub or spray a light coat of cooking spray or release oil over the inside of the large basket and the outside of the small basket.
3. Set the large basket on a level work surface outdoors or in a garage, and tape over any large holes in the bottom if the basket has wide openings. Leave the side openings uncovered so the weave texture still transfers.
4. Mix the concrete in a 5-gallon bucket according to the package directions until it reaches a thick oatmeal consistency. It should be wet enough to press into corners but stiff enough to hold the smaller basket in place.
5. Spread a 1 1/2 to 2 inch layer of concrete into the bottom of the large basket and level it with the trowel. If you want a drainage opening, press the small nursery pot or cup upside down into the center of this bottom layer.
6. Set the smaller basket into the center on top of the bottom layer, using the wood spacer blocks to keep the gap even around the sides. Press gently until the inner basket is seated level.
7. Fill the space between the two baskets with concrete a few inches at a time, packing it firmly with the trowel or gloved hand to remove air pockets. Work all the way around evenly so one side doesn’t bulge or shift.
8. Tap the outside of the large basket lightly with your hand as you go to help settle the mix into the weave pattern. Smooth the top rim with the trowel once the side walls are filled to the height you want.
9. Place a little weight inside the smaller basket, such as a brick or a bag of sand, so it stays put while the concrete sets. Let the planter rest undisturbed for 24 to 36 hours, or until fully firm.
10. Remove the weight, pull out the smaller basket, and peel away the outer basket carefully. If any plastic sticks in the texture, trim or pull it free gently.
11. Twist out the drainage cup from the bottom if you used one, then let the planter cure for another 5 to 7 days before planting. Cement gets stronger with time, so this extra patience is worth it.
12. Sand any rough rim edges lightly and brush away the dust. Once cured, fill the planter with potting mix and your choice of flowers, herbs, or a fern for a finished look.
Variations & Tips
For a deeper planter: Use taller baskets with the same even gap between them, but keep in mind the finished piece will be much heavier, so build it where you plan to use it.
For easier drainage: If you’d rather not form one center hole, you can drill several drainage holes with a masonry bit after the planter has fully cured.
For a softer aged look: Brush the outside with diluted plain yogurt or buttermilk and let it sit in a shaded damp spot for a weathered finish over time. That old-fashioned garden patina suits this project beautifully.
For a smoother rim: Run a damp gloved finger around the top edge before the cement sets hard. It gives the finished planter a cleaner, more intentional look.
For strength: Don’t make the walls thinner than about 1 1/2 inches, especially if the basket has a bold open weave pattern. Thin spots can crack when you unmold it.
For planting success: Start with a layer of potting mix rather than garden soil, since it drains better and keeps the planter from getting unnecessarily heavy after rain.
For cold climates: Let the planter cure completely before leaving it outdoors in freezing weather. I also like to keep it raised slightly off the ground with pot feet or bricks so winter moisture can drain away.