
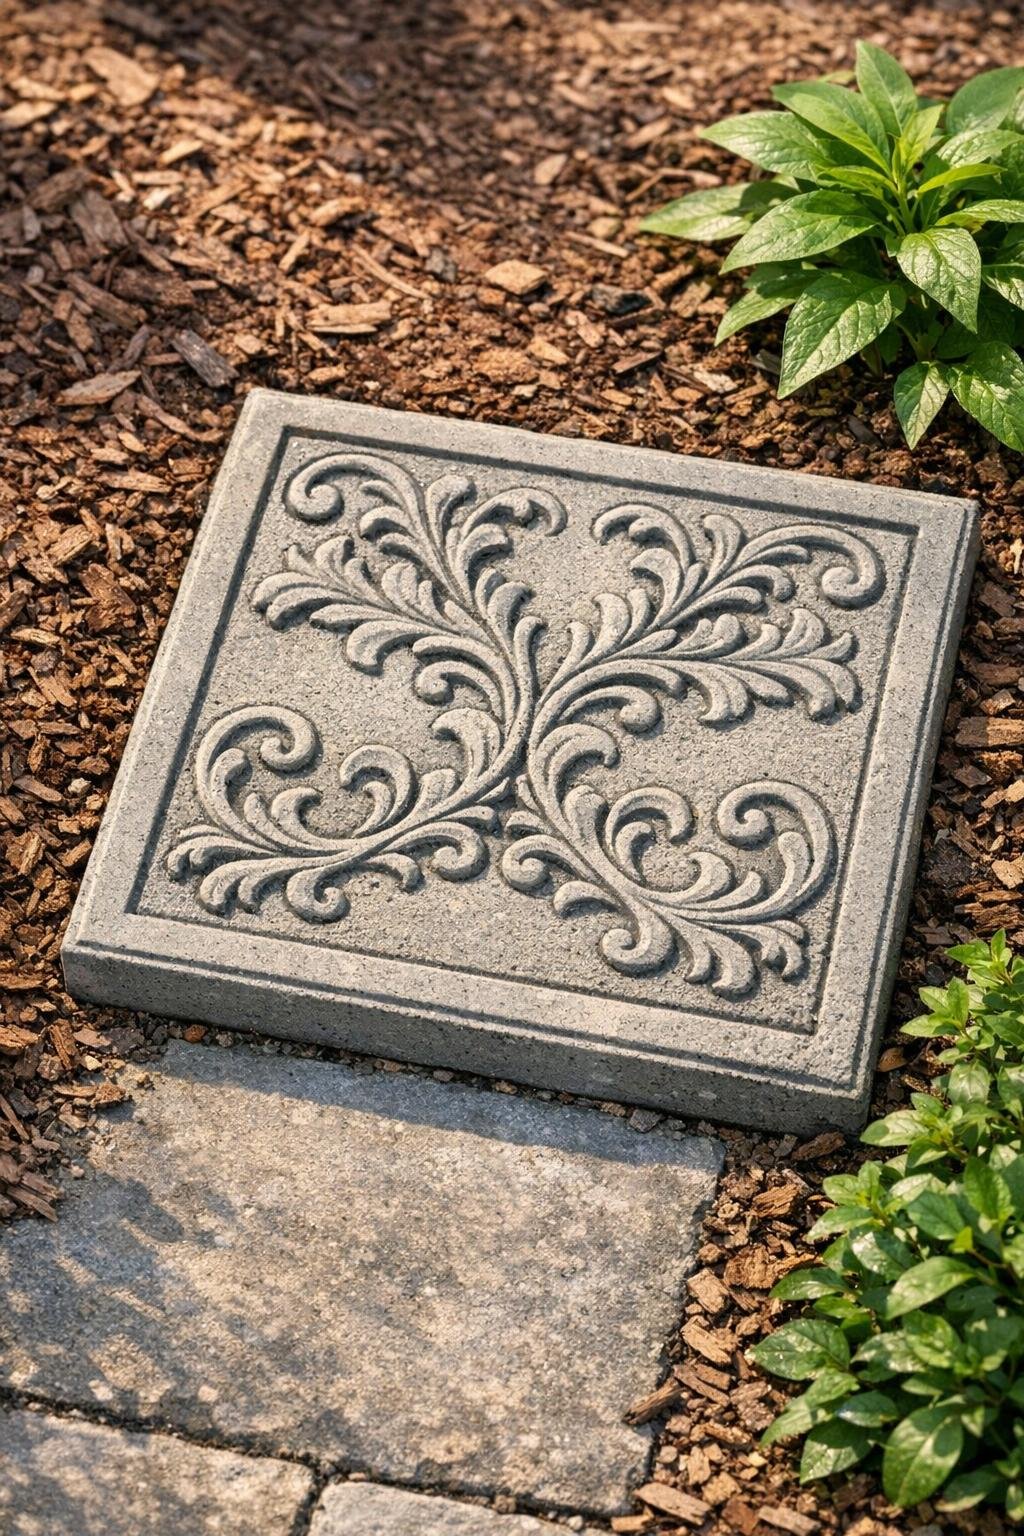
I love a weekend project that makes the yard feel polished without asking for a full landscaping budget, and these scrollwork patio stones do exactly that. By pressing a decorative rubber welcome mat into wet cement, you can make custom garden stepping stones with a raised pattern that looks much more expensive than it is. The finished slabs add charm along a path, around a flower bed, or right outside a back door where things tend to get muddy.
What I especially like about this project is that it is very doable for beginners. If you can mix concrete and smooth it into a simple mold, you can make these. I’ve always been drawn to projects that make outdoor spaces feel more welcoming for family and friends, and this one gives you that “finished garden” feeling in just a weekend.
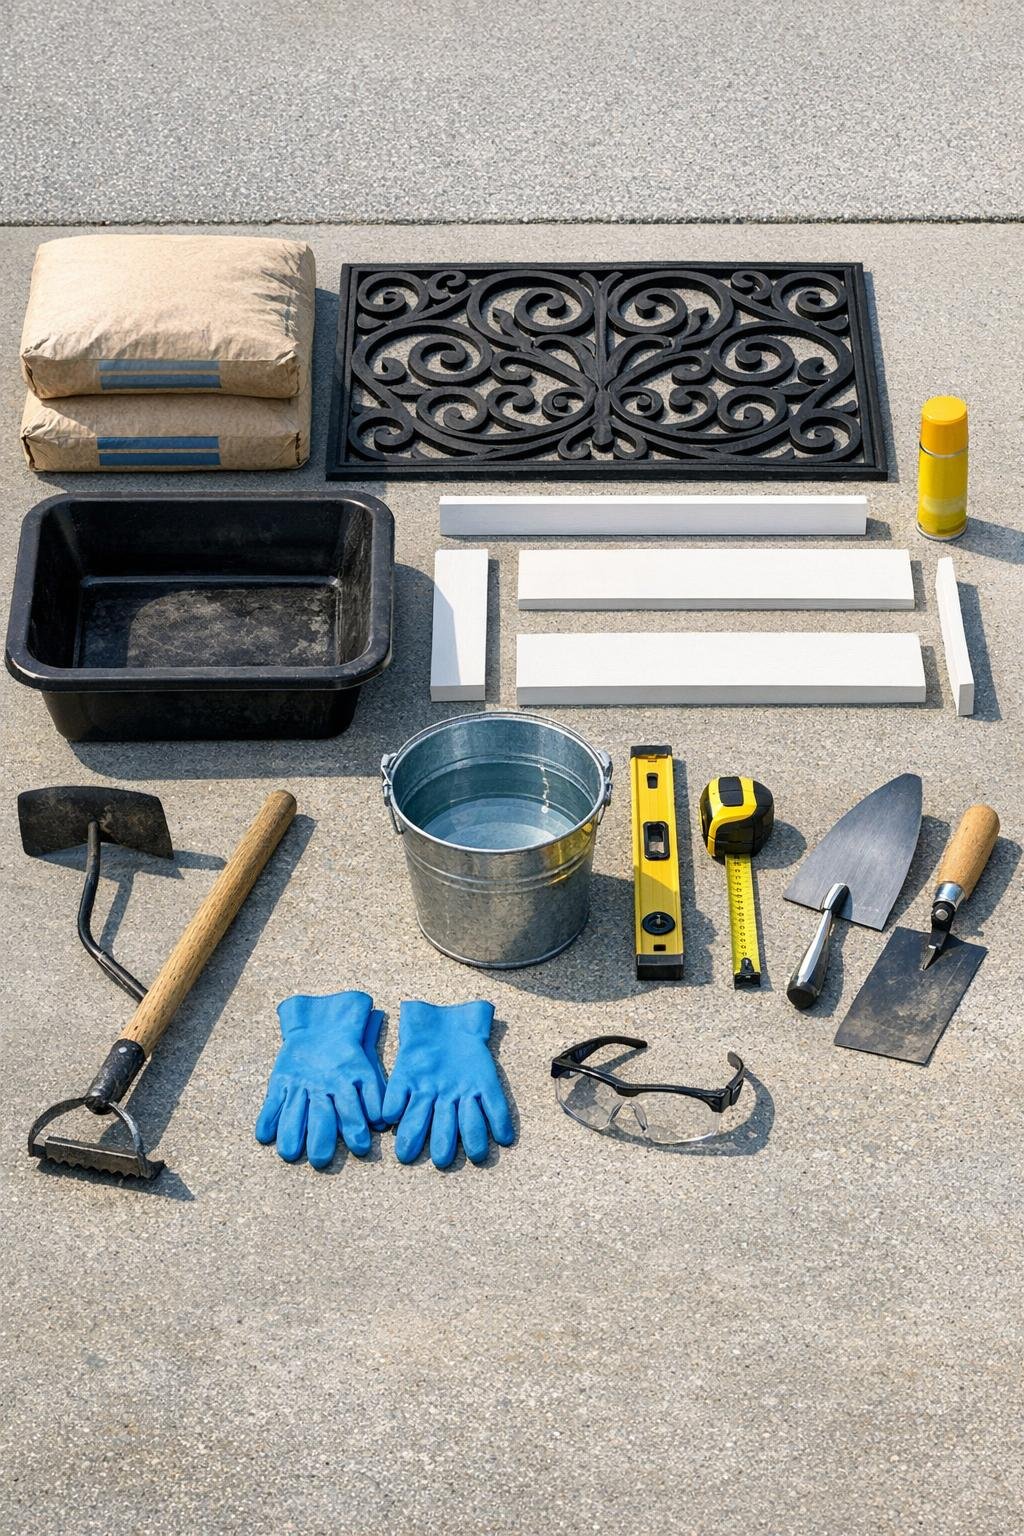
Materials
Instructions
1. Set up your work area on a flat driveway or patio and spread out a tarp to catch splashes. Make sure the surface is level so your finished stones cure evenly.
2. Build a simple square mold by screwing the 1 x 3 boards around the 24 x 24 inch base. Check the corners and set the mold where you plan to pour because it will be heavy once filled.
3. Spray the inside of the mold lightly with cooking spray or release spray so the slab comes out cleanly later. Also spray the face of the rubber mat that will touch the cement.
4. Mix the concrete in a tub or wheelbarrow according to the bag directions, adding water a little at a time until it reaches a thick brownie-batter consistency. It should hold its shape when scooped but still spread easily.
5. Shovel the wet concrete into the mold until it is about 2 inches deep. Tap the sides with your hand or a rubber mallet to release trapped air bubbles.
6. Smooth the top with a trowel or straight scrap board, then check the mold with a level. A fairly even surface gives you a much cleaner pattern when you press the mat in.
7. Let the concrete sit for 10 to 20 minutes, just until the surface starts to firm up slightly. If you press too soon, the pattern can slump; if you wait too long, it will not take the imprint well.
8. Lay the sprayed rubber mat carefully onto the concrete, pattern side down, and line it up where you want the design. Press evenly across the whole mat with your hands so the scrollwork sinks into the surface.
9. Lift one corner of the mat slowly to check the depth of the impression, then press again if needed. Once the pattern looks crisp, remove the mat straight up to avoid smearing the design.
10. Clean up any rough edges with a trowel and leave the slab undisturbed to cure for at least 24 to 48 hours. If the weather is hot or windy, cover it loosely with plastic after it sets to slow drying and help prevent cracks.
11. Remove the mold carefully after the slab has hardened, then let the stone continue curing for several more days before moving it into the garden. Heavy slabs are easiest to carry with two people, and I always call in help for that part.
Variations & Tips
For smaller stones: Use a smaller mat or cut a large rubber mat into sections, then make several stepping stones instead of one big slab. This is a nice option if you want to space them through a flower bed.
For a weathered look: After the stones cure fully, brush on a diluted gray or stone-colored concrete stain to bring out the recessed pattern. I like subtle color because it settles into the grooves and makes the design easier to see.
For picky gardeners and busy families: Place these stones where foot traffic already happens, like near the hose, grill, or back steps. Projects that solve a muddy-shoe problem tend to get appreciated most at my house.
To prevent sticking: Do not skip spraying both the mold and the mat. If your mat has a deep pattern, give it a second light coat so it releases cleanly.
To reduce cracks: Keep each slab a consistent thickness and avoid adding too much water to the mix. A stronger, slightly stiffer mix usually gives a sharper imprint too.
For easier installation: Set the cured stones on a thin bed of sand or packed soil so they sit flat in the garden. If one corner rocks, scrape away or add a little base material until it feels steady.