
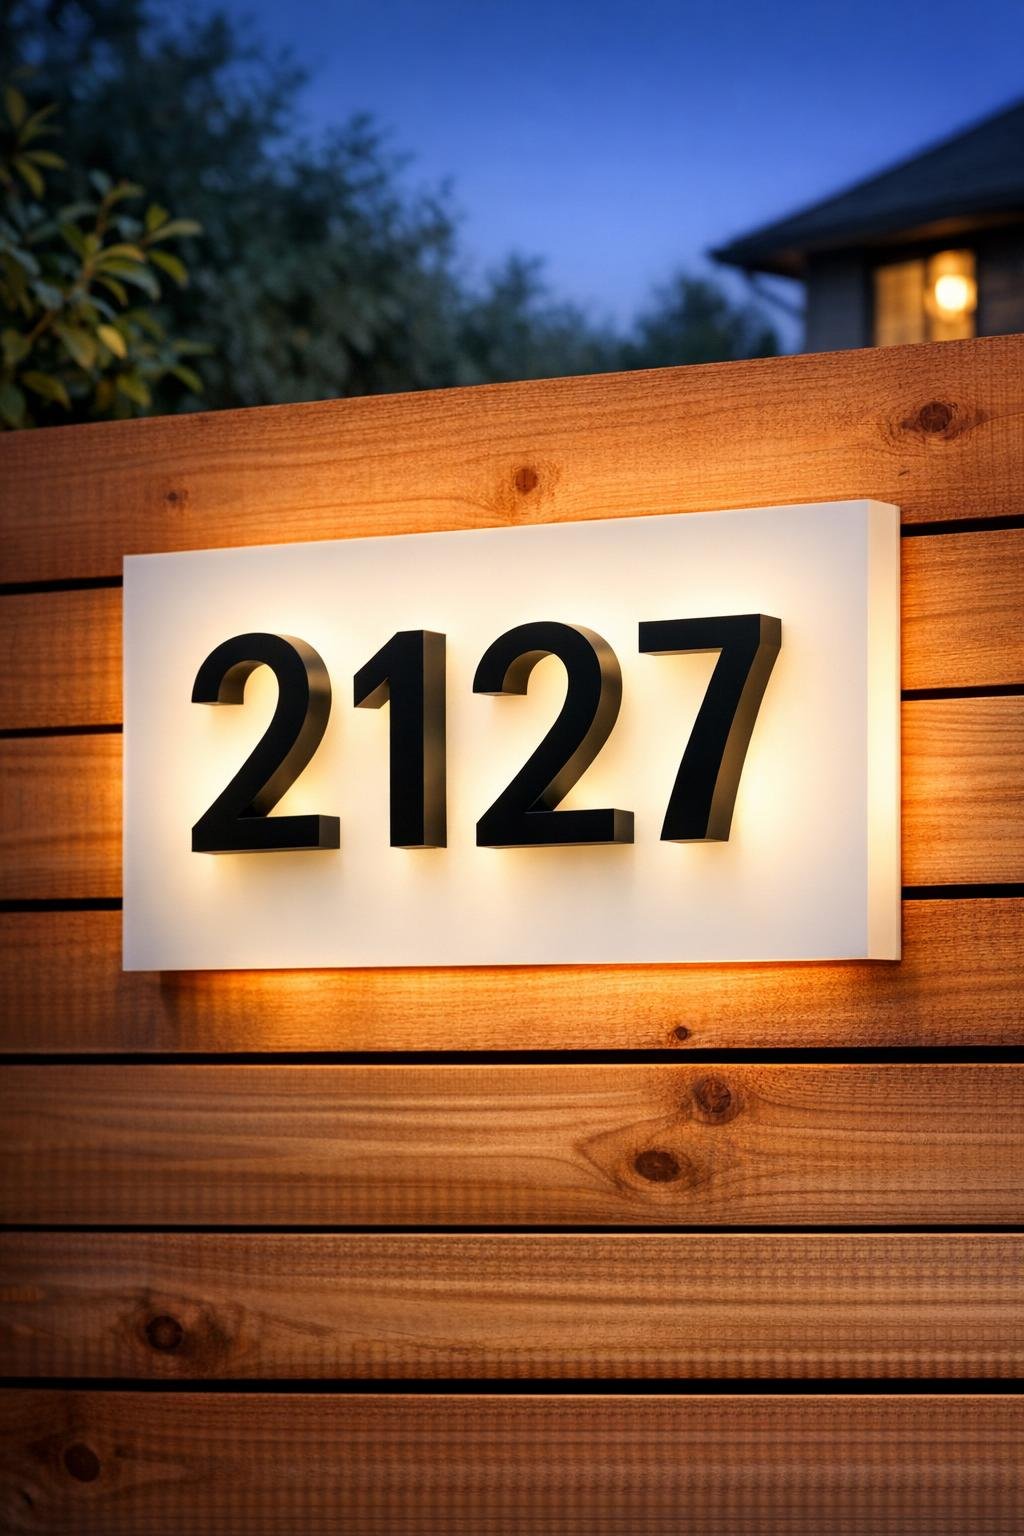
A glowing address wall is one of those projects that looks custom and expensive, but it’s very doable with basic tools and careful measuring. In this version, I’m mounting black metal house numbers over a frosted acrylic panel and adding soft backlighting so the numbers stand out beautifully against a cedar fence, day and night.
I love projects like this because they sit right at the intersection of curb appeal and function. As someone who spends plenty of time thinking about presentation in the kitchen, I approach outdoor projects the same way: contrast, balance, and clarity matter. If your current house numbers are hard to see from the street, or your entry feels a little flat after dark, this is a smart upgrade that makes the front yard look polished without rebuilding the whole fence.
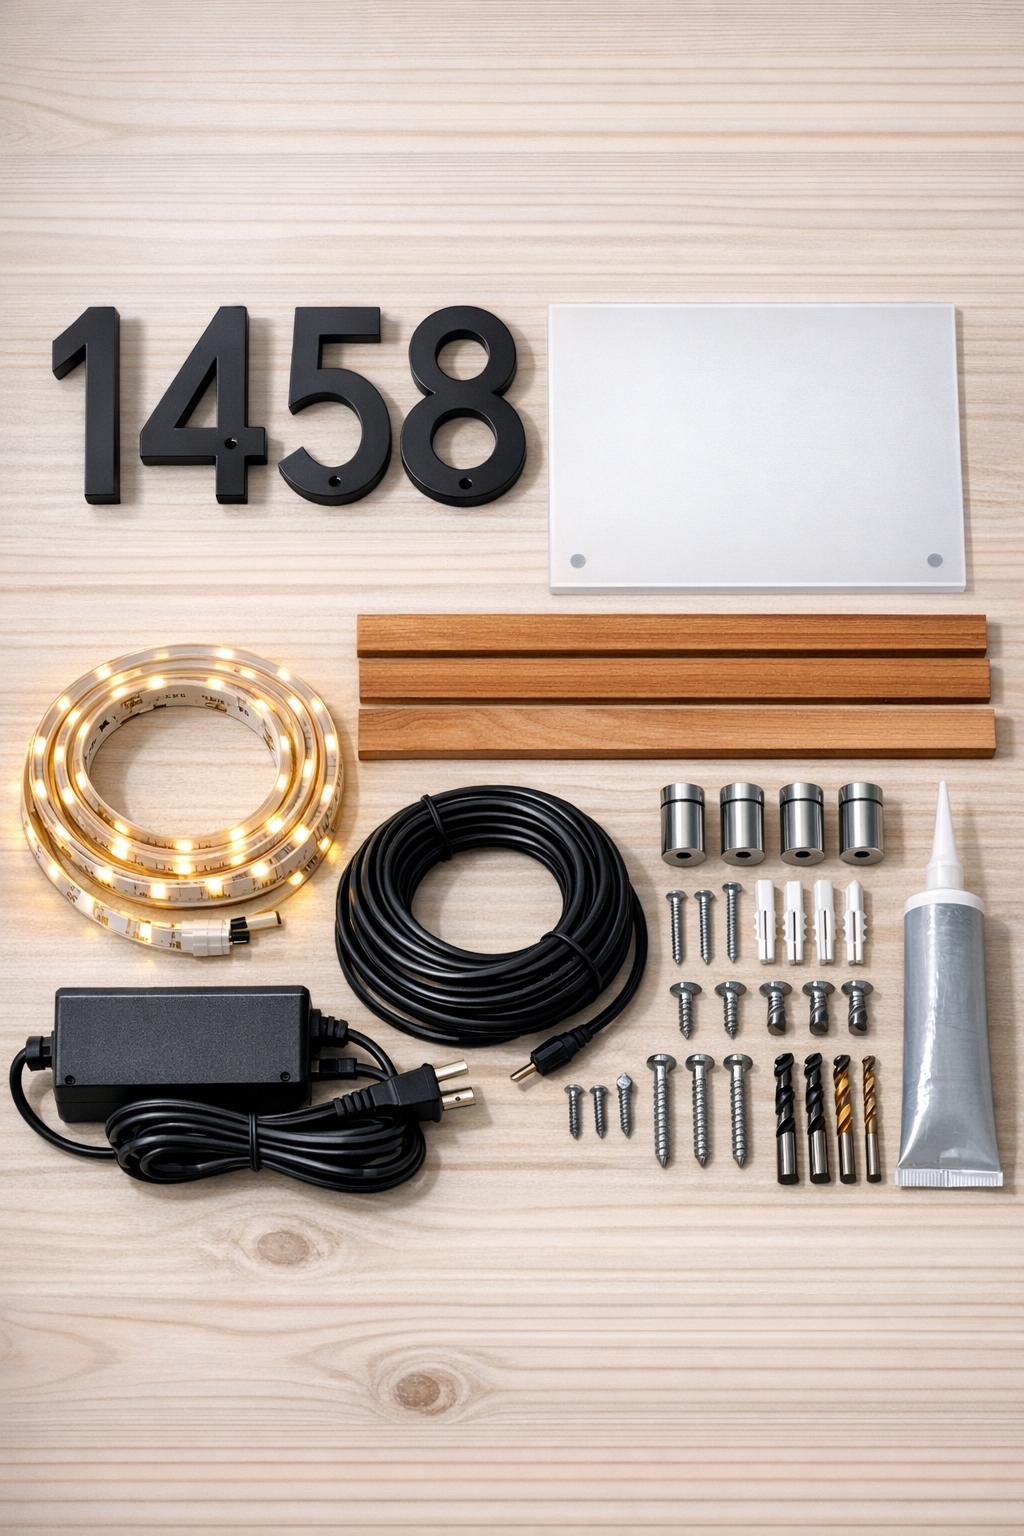
Materials
1 frosted acrylic panel, 24 x 36 inches, 1/4-inch thick
Instructions
1. Measure the fence area where the address wall will hang and confirm it is visible from the street and near a power source. Mark a finished panel size that leaves a clean border around the numbers and suits the scale of the fence.
2. Cut the cedar 1 x 2 boards into a simple rectangular backer frame, or prepare mounting cleats that will support the acrylic off the fence. Dry-fit the pieces behind the acrylic so you create a hidden cavity for the backlighting.
3. Sand any rough cedar edges lightly, then wipe the acrylic and cedar clean with a dry cloth. Clean surfaces help the final assembly look crisp and keep dust from showing through the frosted panel.
4. Make a full-size template on kraft paper or cardboard and arrange the house numbers until the spacing looks balanced. I like to step back several times here, just as I would when plating a dish, because a half-inch shift can make the whole composition look better.
5. Tape the template to the acrylic and mark the number mounting holes carefully. Drill the acrylic slowly with the correct bit, supporting it fully underneath to avoid cracking.
6. Attach the cedar frame or cleats securely to the fence with 2-inch exterior screws, checking for level as you go. This framework should hold the acrylic panel slightly away from the cedar fence so the light can glow evenly behind it.
7. Install the outdoor LED strip around the inside of the cedar frame or along the rear perimeter, facing inward toward the center of the panel. Keep the strip set back from the acrylic edges so you get a soft halo instead of harsh visible dots.
8. Run the low-voltage wire neatly to the power supply location and secure it with cable clips. Test the LEDs before covering anything so you can confirm the color, brightness, and any connection points.
9. Apply a small bead of clear exterior silicone where needed to protect wire entry points and help manage moisture. Let the sealant skin over according to the product directions before final assembly.
10. Mount the frosted acrylic panel over the frame using standoff spacers, washers, and stainless hardware. Tighten just enough to hold the panel firmly without stressing the acrylic.
11. Install the black metal house numbers through the predrilled holes, using their included studs or mounting hardware so they float slightly off the acrylic. That small gap adds shadow during the day and makes the glow more dramatic at night.
12. Turn on the lighting after dark and make any final adjustments to brightness, wire routing, or hardware alignment. Wipe fingerprints off the acrylic, then enjoy a front-yard feature that is both practical and striking.
Variations & Tips
Size adjustment: If you have a long address or a wide fence bay, increase the panel to 24 x 48 inches so the numbers do not feel crowded.
Light color: Warm white looks inviting against cedar, but cool white gives a more modern look if your home has darker trim or metal accents.
Power option: If wiring to an outlet is awkward, you can use a low-voltage outdoor lighting transformer tied into existing landscape lighting, as long as the wattage is compatible.
Weather protection: In wetter climates, add a simple drip edge above the panel or place the power connection in a weatherproof junction box for extra durability.
Acrylic choice: Frosted acrylic diffuses light better than clear acrylic, so I would not skip that finish unless you want a more transparent effect.
Number visibility: Choose taller numbers if your house sits far back from the street; readability matters just as much as style.
Fence mounting tip: If your cedar boards are uneven, shim the backer frame slightly so the acrylic panel sits flat and the glow remains consistent.
Cleaning tip: Use a soft cloth and mild soap on the acrylic rather than harsh cleaners, which can dull the surface over time.