
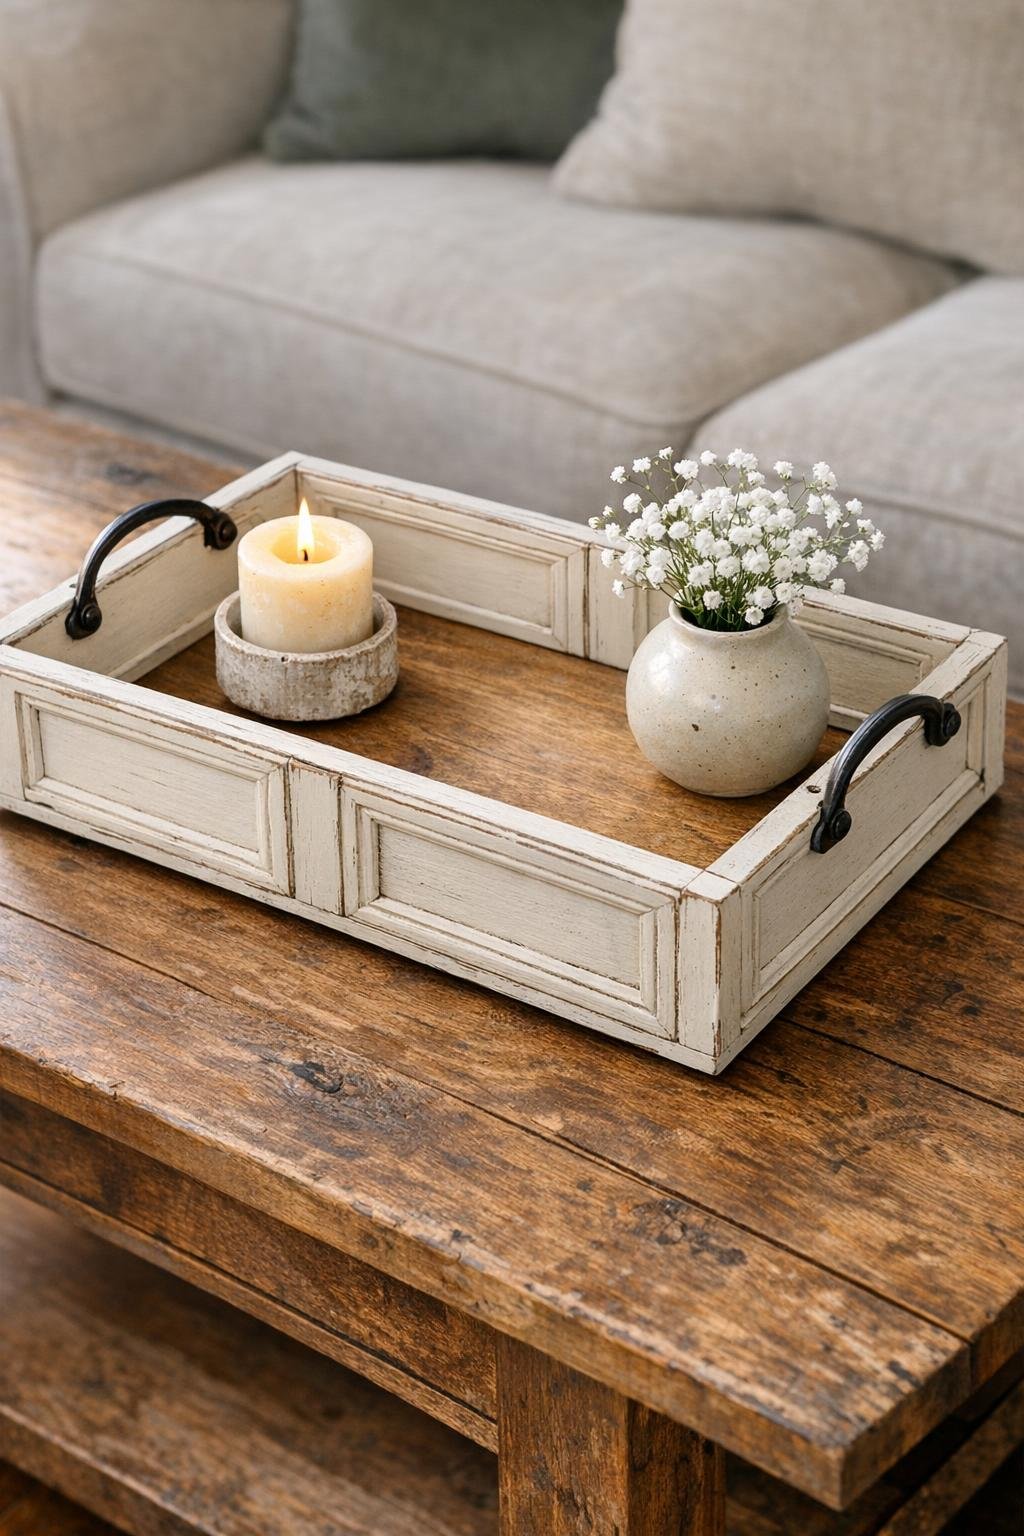
I’m a sucker for thrift store finds that look a little rough around the edges but still have good bones, and old cabinet doors are one of my favorite things to scoop up. This project turns four small cabinet doors into a rustic picture frame tray that looks charming on a coffee table, kitchen island, or entryway bench. It has that collected, vintage feel, but it’s still practical enough to use every day for candles, mugs, napkins, or even corralling mail.
What I love most about this build is that it feels approachable, even if your DIY time happens in small windows after work or on a weekend afternoon. If you’ve ever looked at a pile of old doors at a thrift store or Habitat ReStore and wondered what on earth you’d do with them, this is one of those projects that makes the answer obvious pretty quickly.
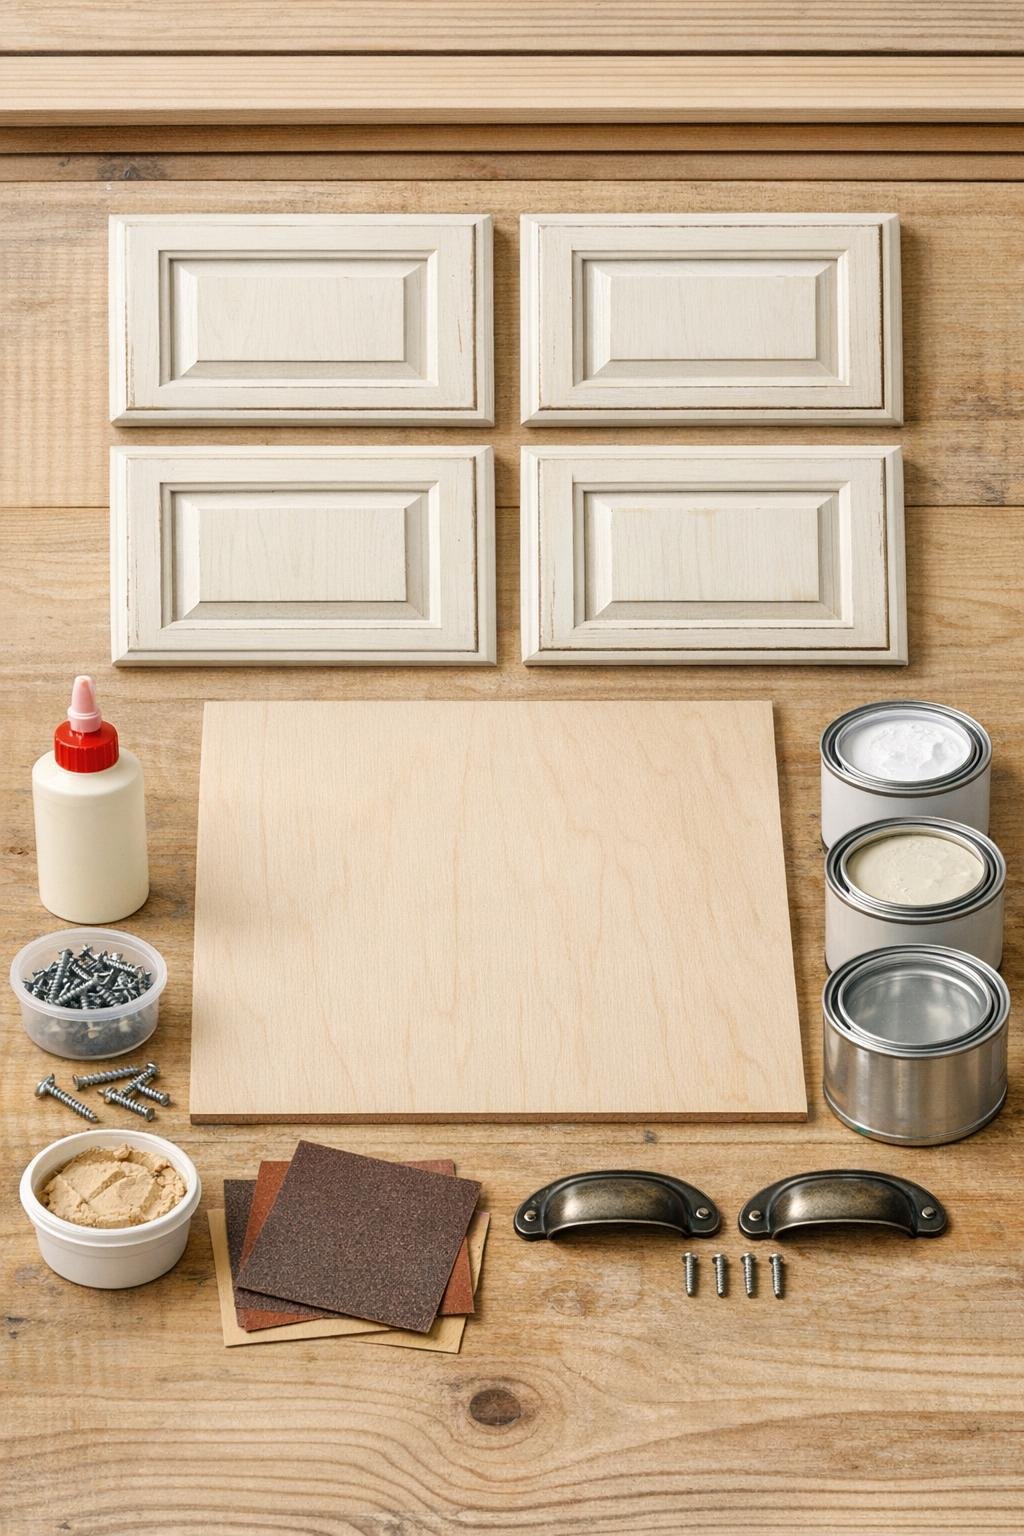
Materials
4 small thrift store cabinet doors, approximately 10 x 12 inches each, with similar thickness
Instructions
1. Clean the cabinet doors well with warm soapy water or a degreasing cleaner, then let them dry completely. Thrifted kitchen pieces almost always have a little hidden grime, and starting clean makes the finish hold up so much better.
2. Remove any old hinges, knobs, and hardware from the doors, then scrape off loose paint or peeling finish. Fill old hardware holes or chipped spots with wood filler and let it dry.
3. Sand all four doors first with 120-grit sandpaper, then smooth them with 220-grit. Wipe away all dust so the primer goes on evenly.
4. Lay the doors on edge to form a rectangle, with the decorative fronts facing outward so they create the tray’s exterior sides. Check that your overall dimensions match the 20 x 24 inch plywood base, trimming the base if needed.
5. Apply wood glue along the meeting edges of the doors and clamp or hold them square as you drive in 1 1/4-inch wood screws at the corners. Use two to three screws per corner, depending on the door rail width.
6. If the doors feel a little uneven or you want a sturdier tray for heavier décor, attach a corner brace or mending plate inside each corner with 1/2-inch screws. This extra step is especially helpful with older thrifted wood that may have dried out over time.
7. Center the plywood base on the bottom of the assembled frame, run a bead of wood glue around the lower edges, and set the frame onto the plywood. Drive the remaining 1 1/4-inch screws through the plywood into the door frames, spacing them every 6 to 8 inches.
8. Fill visible seams, screw heads, or gaps with a thin layer of wood filler, then sand those spots smooth once dry. Don’t worry about making it look factory-perfect; a little character is part of the rustic charm.
9. Apply one coat of bonding primer to the entire tray, including the inside, outside, and top edges. Let it dry fully, then lightly sand with 220-grit for a smoother painted finish.
10. Paint the tray with one to two coats of matte or chalk-style paint, allowing proper dry time between coats. For a more weathered look, lightly distress the edges after the paint cures.
11. Seal the painted surface with clear polyurethane or furniture wax, especially if you plan to use the tray in the kitchen. Once dry, attach the drawer-pull handles to the shorter sides, centering them about halfway down the panels.
12. Add felt pads to the bottom corners of the plywood base, then style the tray with a small stack of coasters, a candle, or a tiny vase. That’s usually the point where I forget I made it from thrift store castoffs and start wondering why I ever pay full price for décor.
Variations & Tips
Keep the original finish: If your cabinet doors have beautiful aged wood or chippy paint that is stable, skip the full paint job and just sand lightly before sealing with clear topcoat.
Use glass-free picture frame style doors: Some cabinet doors have inset trim that already looks like a picture frame, which gives this tray even more dimension without extra work.
Add a stenciled base: If you want more of a farmhouse look, paint or stencil the plywood bottom before sealing it. I’d keep the design subtle so the tray still feels versatile.
Match your room: Black handles and deep charcoal paint feel more modern rustic, while cream, sage, or dusty blue lean cottage-style. I usually choose whatever works with the throw pillows already living on my couch.
Check door thickness first: Try to buy four doors with the same thickness so the tray sits level and the corners line up cleanly. It saves a lot of fiddling later.
Make meal-time use easier: If you plan to use the tray for coffee service or snacks, choose a water-resistant sealer and let it cure fully before use. That’s one of those practical steps that matters when real life includes spills.