
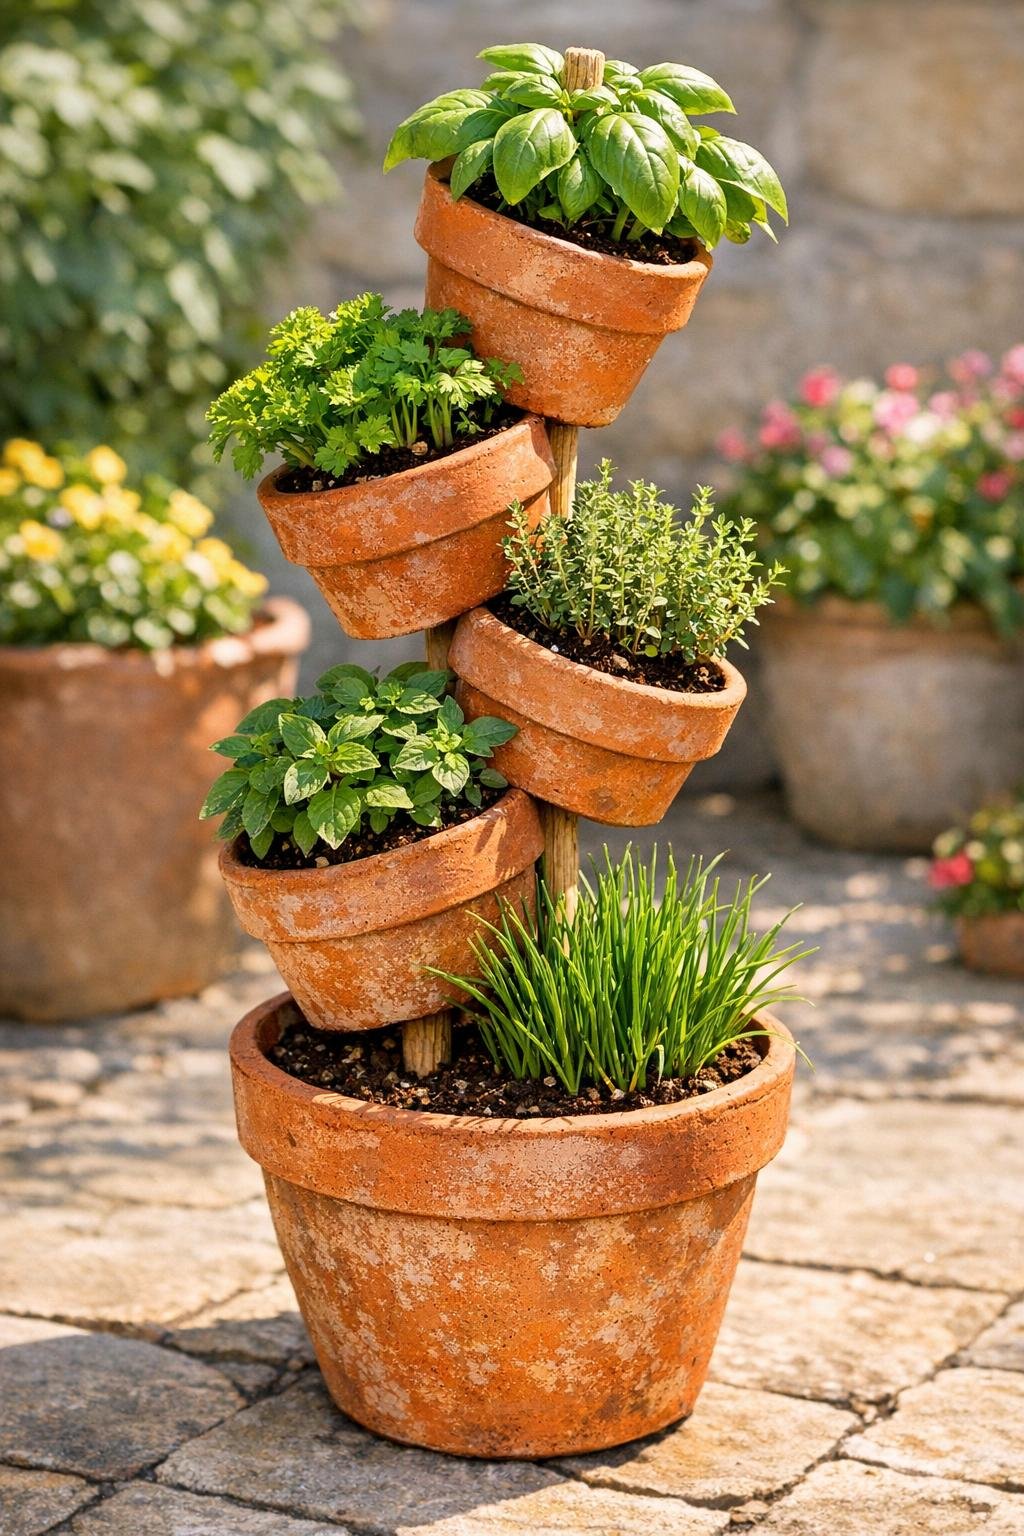
I love a project that turns something destined for the trash pile into a hardworking little garden feature, and this tiered herb planter does exactly that. By stacking five mismatched terracotta pots on a sturdy wooden dowel, you can create a vertical planter that fits a surprising amount of fresh herbs into a very small footprint. Hairline cracks and cosmetic chips in the pots are perfectly fine here, which makes this a smart upcycling project as well as a charming one.
If you cook the way I do, with basil snipped at the last minute and parsley used far more generously than recipes admit, this kind of planter is especially useful. It is a good beginner project for patios, balconies, front steps, or a sunny corner near the kitchen door, and it comes together in an afternoon with simple materials.
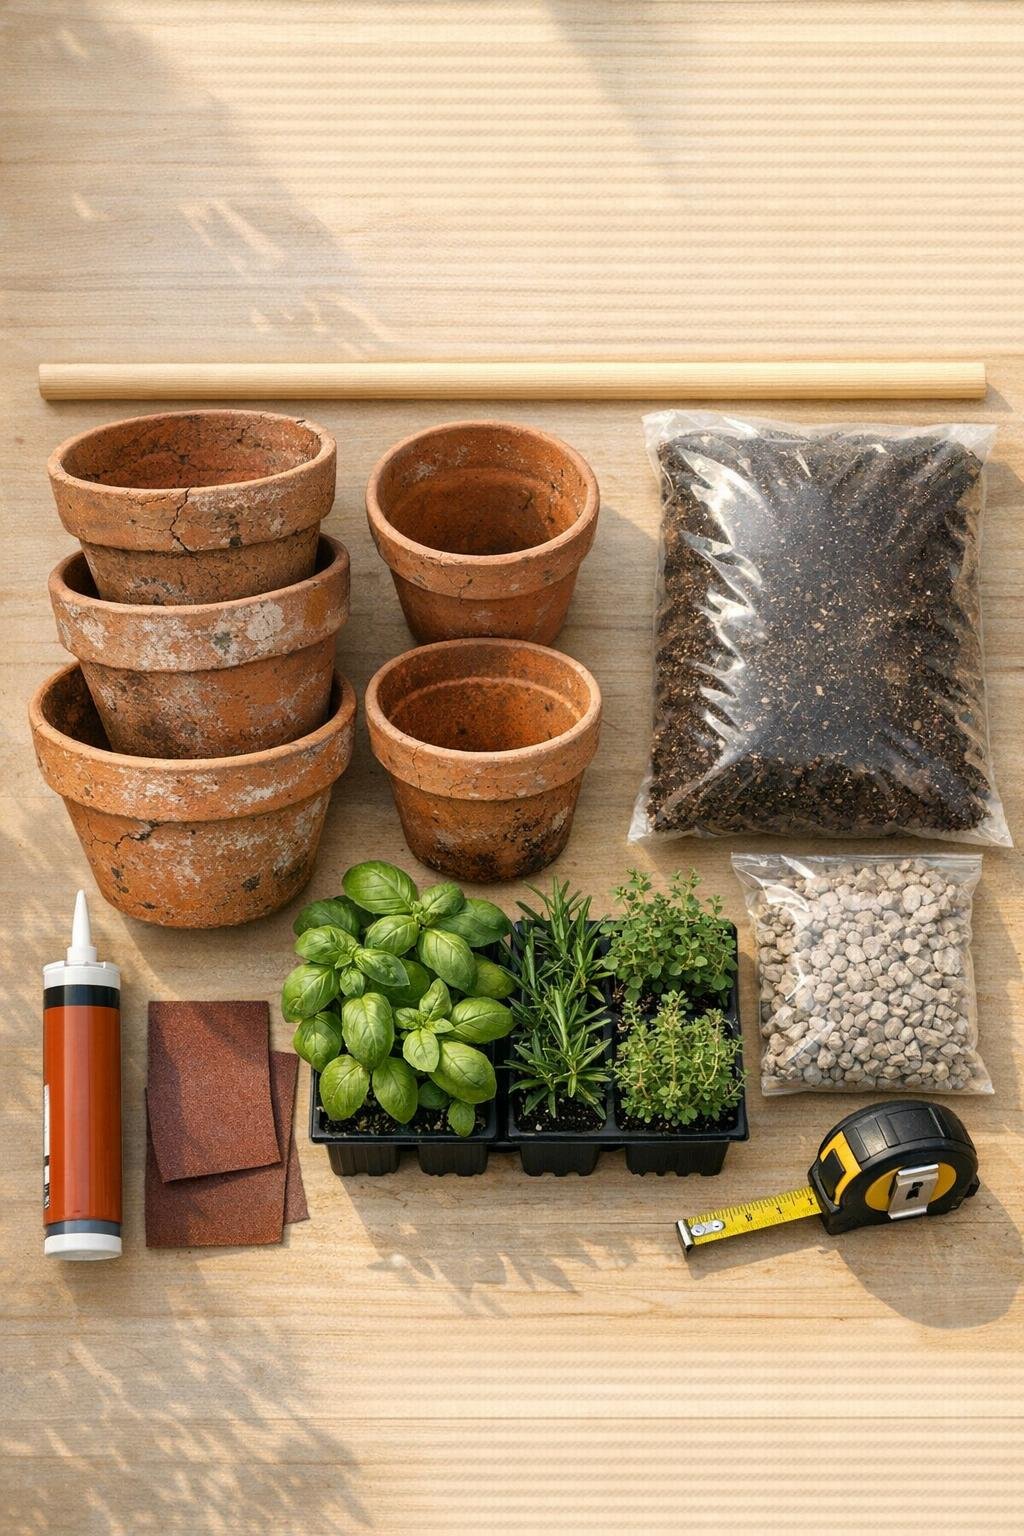
Materials
5 terracotta pots with drainage holes, mixed sizes from 4-inch to 10-inch diameter, each with only minor cracks or chips
Instructions
1. Sort your five terracotta pots by size, keeping the largest for the bottom and the smallest for the top, and set aside any pot with a crack that runs fully through the rim to the base. Light cosmetic cracks are fine, but the pot still needs to hold soil without collapsing.
2. Sand the rim and any chipped edges of each pot with 120-grit sandpaper so there are no loose flakes. This takes just a few minutes and makes the finished planter safer to handle.
3. Choose the location before assembly, ideally a level spot that gets 6 to 8 hours of sun, because the finished planter is heavy once filled. I learned that lesson the hard way after building one on my potting bench and then wrestling it across the patio.
4. Add 2 cups of gravel to the largest pot, then fill it about two-thirds full with potting mix. Press the 48-inch dowel straight down through the center drainage hole and into the soil until it stands upright and feels stable.
5. Thread the second-largest pot onto the dowel through its drainage hole and tilt it slightly to one side. Add a small dab of exterior adhesive where the pot touches the soil or rim of the lower pot, then fill it with gravel and potting mix.
6. Repeat with the third pot, tilting it in the opposite direction for balance and visual interest. Keep the opening accessible enough that you can still plant and water comfortably.
7. Slide on the fourth pot, angle it to create another planting pocket, and secure it with a small amount of adhesive if needed. Fill it with gravel first, then potting mix, without packing the soil too tightly.
8. Add the fifth and smallest pot at the top, keeping it only slightly tilted so it does not dry out too quickly. Fill it with a little gravel and enough potting mix to support a compact herb like thyme or chives.
9. Plant one herb in each pot, loosening the roots gently before setting each plant into the soil. Tuck potting mix around the roots and leave about 1 inch of space below each rim so water does not run off immediately.
10. Top exposed soil with a thin layer of sphagnum moss or decorative pebbles if you like, especially in the more tilted pots. This helps slow moisture loss and keeps soil from washing out during watering.
11. Water slowly from the top pot down, allowing moisture to trickle through each layer and settle the soil. Add more potting mix anywhere the level drops significantly after the first watering.
12. Check the stability of the whole tower, then rotate or nudge the pots slightly before the adhesive fully sets if you want to refine the shape. Let the planter sit undisturbed for 24 hours before moving it or giving it a deep second watering.
Variations & Tips
Best herbs for each level: Put thirstier, leafier herbs like parsley and basil in the lower, larger pots where they hold more soil. Reserve the top and smaller pockets for Mediterranean herbs like thyme or oregano that do not mind drying a bit between waterings.
Working with cracked pots: Avoid pots with large missing sections around the drainage hole, since that is the stress point in this build. Small side cracks are usually fine once the pots are supported by soil and stacked at an angle rather than bearing full weight on one weak edge.
If your dowel feels loose: Use a slightly thicker dowel if your drainage holes are oversized, or wrap the dowel once with exterior tape where it passes through a loose pot. The fit does not need to be perfect, but it should not wobble dramatically.
Watering tip: Tiered planters dry out faster than standard pots, especially in midsummer wind. I check mine daily in hot weather, and I water in the morning so the herbs stay perky by dinner time.
Color and finish option: If you want a more polished look, dry-brush the pots with exterior mineral paint before assembly. I still like the natural terracotta best because it ages beautifully and suits almost any herb garden.
Small-space version: If you only have a narrow balcony, make a three-pot version using a 36-inch dowel and smaller containers. The same method works, and you will still get a lovely vertical burst of green without taking up much floor space.