
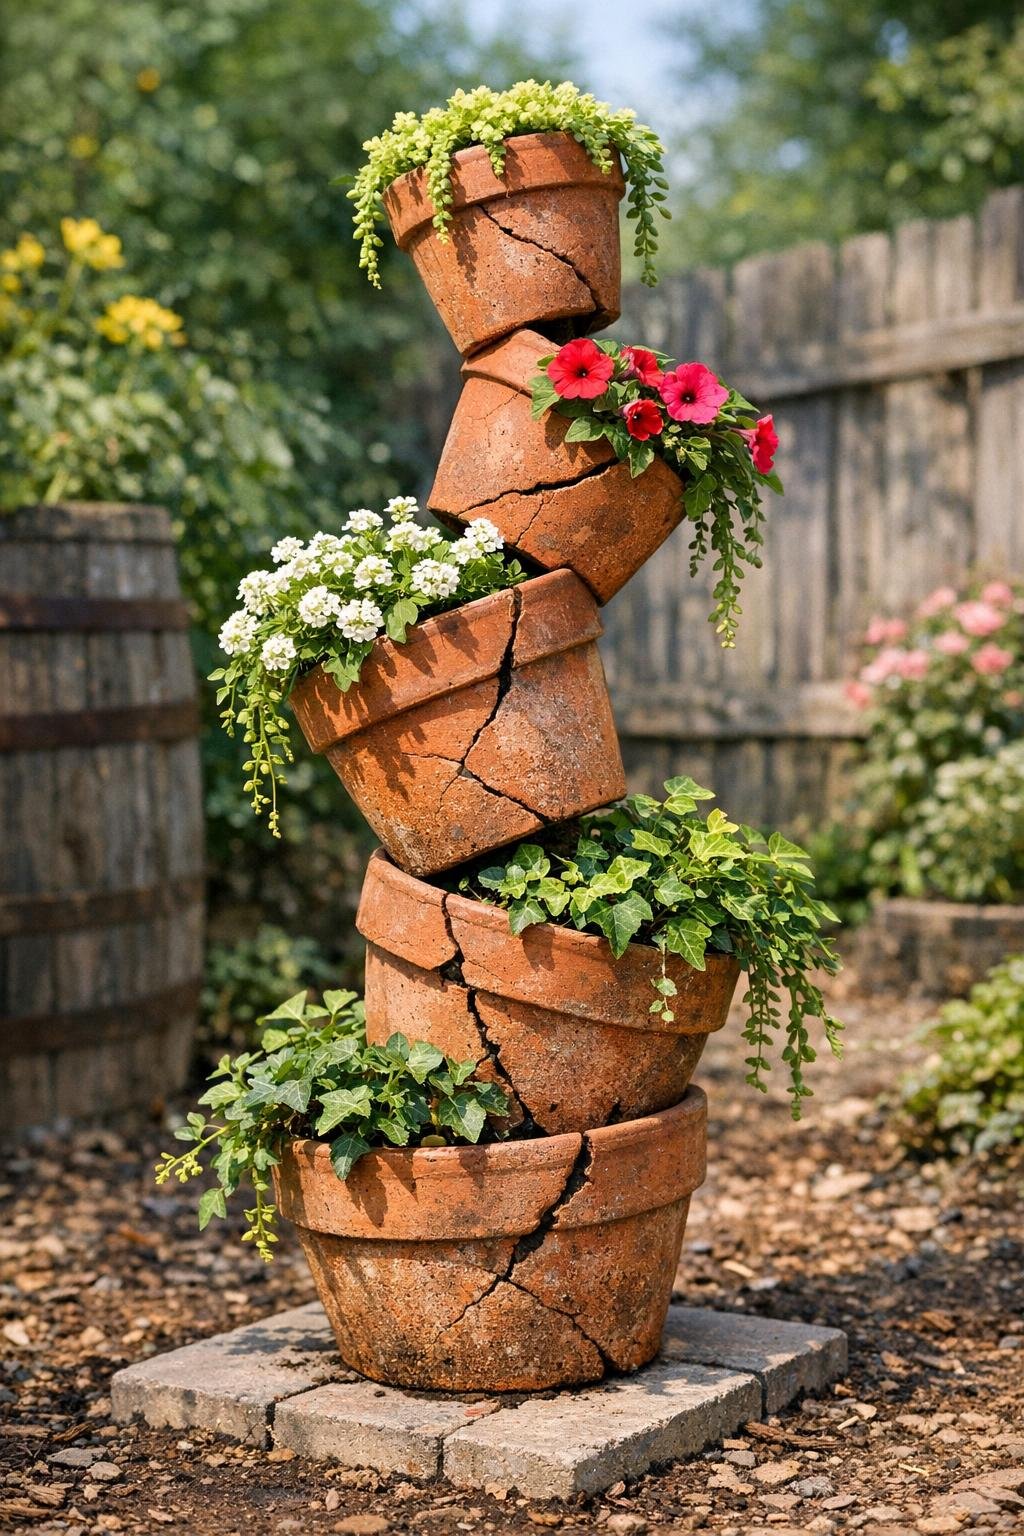
I used to be the person who looked at a stack of cracked terracotta pots and thought, well, that’s a shame. Then I saw a simple stacked garden totem made from broken pots, and it completely changed how I looked at the little pile of “junk” sitting by the garage. This project turns four damaged terracotta pots into a sculptural garden accent that feels rustic, playful, and genuinely useful for filling an empty corner in a flower bed or next to a patio.
If you like easy outdoor projects that don’t require perfect materials, this one is especially satisfying. It’s great for beginners, it works with thrifted or chipped pots, and you can finish it in an afternoon. I love projects like this because they give me that creative reset after a long workweek, and unlike some DIYs that end up tucked in a closet, this one actually makes the yard look more finished.
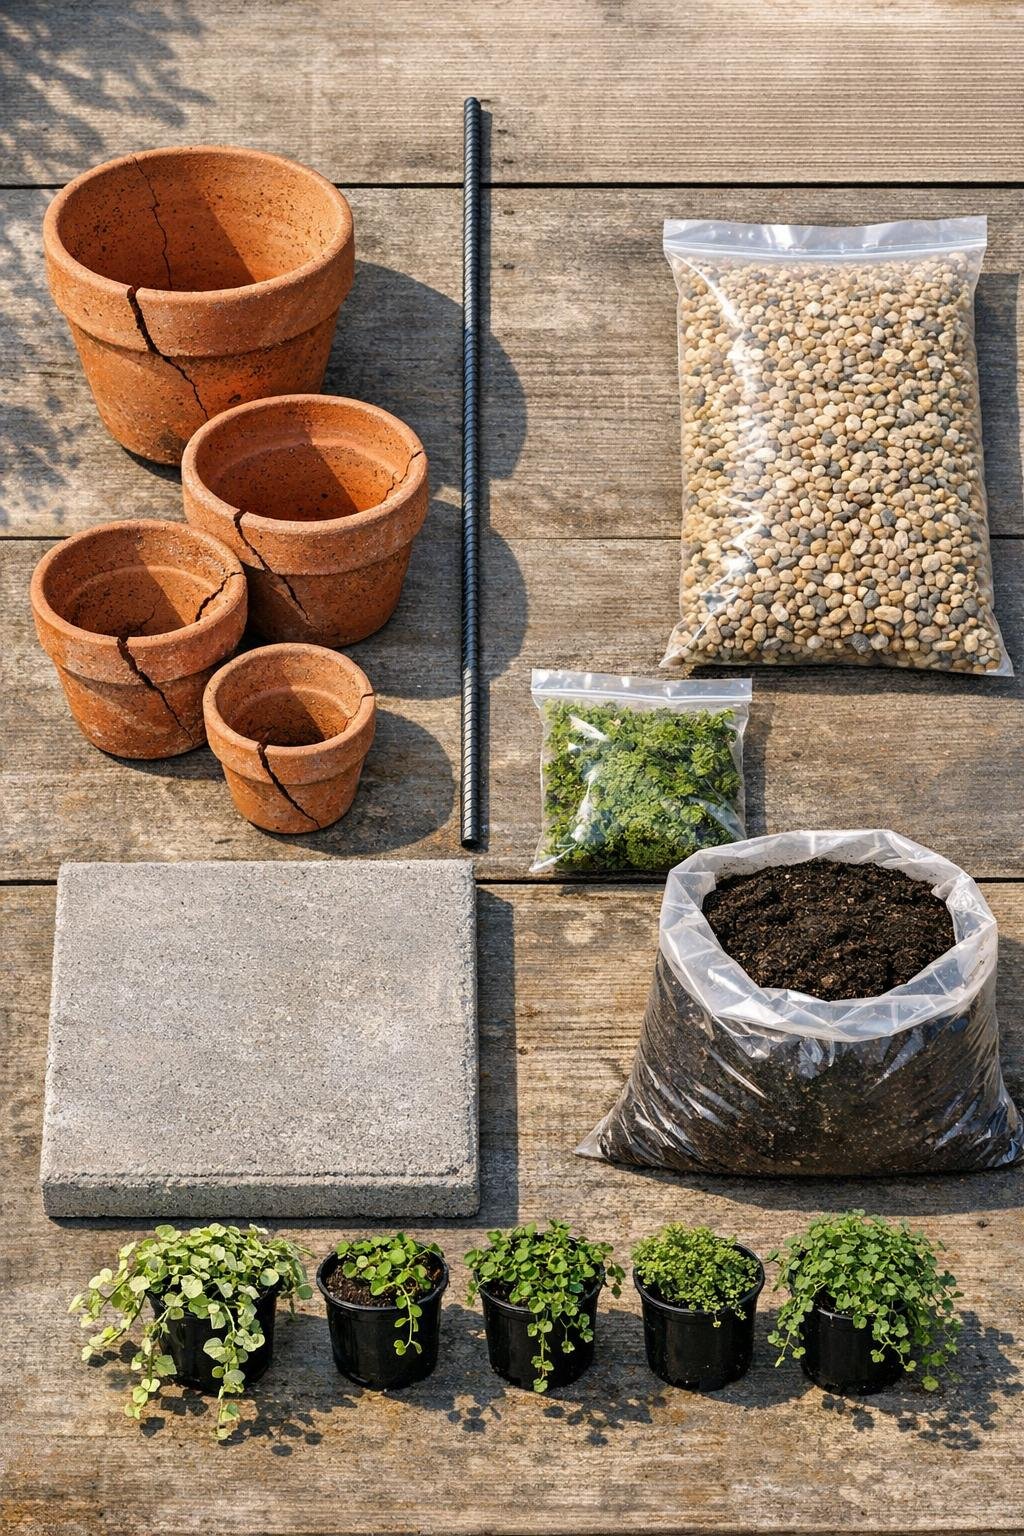
Materials
4 cracked terracotta pots, graduated sizes: 12-inch, 10-inch, 8-inch, and 6-inch diameter
Instructions
1. Pick the location for your totem before you assemble anything, because once it’s built and filled, it gets heavy fast. Choose a flat garden spot with at least 18 inches of clearance around it so the tilted pots can show off.
2. Set the concrete paver on the ground and scrape away any mulch until it sits as level as possible. Check it with a small level and shim with a little soil if needed.
3. Put on gloves and safety glasses, then drive the 48-inch rebar stake straight down through the center area of the paver using a rubber mallet. Leave about 36 inches of rebar above the base so all four pots will fit on the stake.
4. Brush loose dirt off the cracked pots and test-fit them from largest to smallest on the rebar. Turn each pot until the crack or missing section faces outward in a way that looks intentional and balanced.
5. If you want to seal the terracotta, spray or brush on a light coat of clear outdoor sealer and let it dry fully. I like this step when I’m using older pots because it helps them hold up a little better through our very dramatic Midwest weather shifts.
6. Add 3 to 4 inches of pea gravel to the bottom of the 12-inch pot, then thread it onto the rebar and tilt it slightly. Pack a little potting soil on the higher side to help lock the angle in place.
7. Squeeze a few dabs of exterior construction adhesive where the rim of the second pot will touch the first pot, then add gravel to the 10-inch pot and slide it onto the rebar at the opposite angle. Adjust it until the stack looks playful but stable.
8. Repeat the process with the 8-inch pot, adding gravel first, then a little adhesive at the contact points, and turning the broken edge outward. Keep checking the silhouette from a few feet back so the stack spirals instead of leaning awkwardly.
9. Fill the top 6-inch pot with gravel, add adhesive where it rests, and slide it onto the rebar with a slight tilt. Make sure at least 1 inch of the rebar remains hidden inside the top pot for a cleaner look.
10. Add potting soil to each pot, stopping about 1 inch below the rim on the intact side. Press the soil gently into the lower corners of the tilted pots so it stays put.
11. Remove each plant from its nursery pot, loosen the roots lightly, and plant one in each terracotta pot. Angle trailing plants toward the open cracked sections so they can spill out naturally as they grow.
12. Tuck preserved moss over any exposed soil near the broken edges and water the whole totem slowly until the soil is evenly moist. Give the adhesive the full cure time listed on the tube before nudging or moving the structure.
Variations & Tips
Plant choice: Use drought-tolerant plants like sedum or hens-and-chicks if the totem will sit in full sun. If your spot gets part shade, ivy and creeping jenny are very forgiving.
Color variation: Leave the terracotta natural for a classic garden look, or dry-brush the rims with white or sage green outdoor paint for a softer cottage-style finish.
Extra stability: If your pots are especially wide or heavily broken, add more pea gravel to the bottom of each one before the soil. The extra weight makes a big difference on windy days.
Crack placement: Face the prettiest broken edges outward and rotate each pot in a different direction. That little detail is what makes the stack look designed instead of accidental.
Low-maintenance option: If you do not want to water often, use faux outdoor-safe greenery or fill the pots with moss only. It still gives you the sculptural look without the upkeep.
Seasonal refresh: Swap the plants out through the year with pansies in spring, petunias in summer, and mini mums in fall. This is one of those projects I love because the base stays the same, but it can look new every season.