
This two-piece autumn lantern project is exactly the kind of front porch DIY I love: affordable, quick to put together, and impressive enough that people assume you spent way more than you did. By stacking dollar store glass hurricane vases onto simple wooden candle pillars, you get a pair of tall, cozy lantern-style decorations that bring height and warmth to a porch without needing power tools or a full weekend.
As someone who is usually squeezing craft time in between work, dinner, and trying to keep my house from looking like total chaos, I really appreciate projects like this one. If you want fall porch decor that looks polished but is still beginner-friendly, this is a great one to make, especially if you like neutral wood tones, flickering candlelight, and seasonal filler like mini pumpkins, pinecones, or leaves.
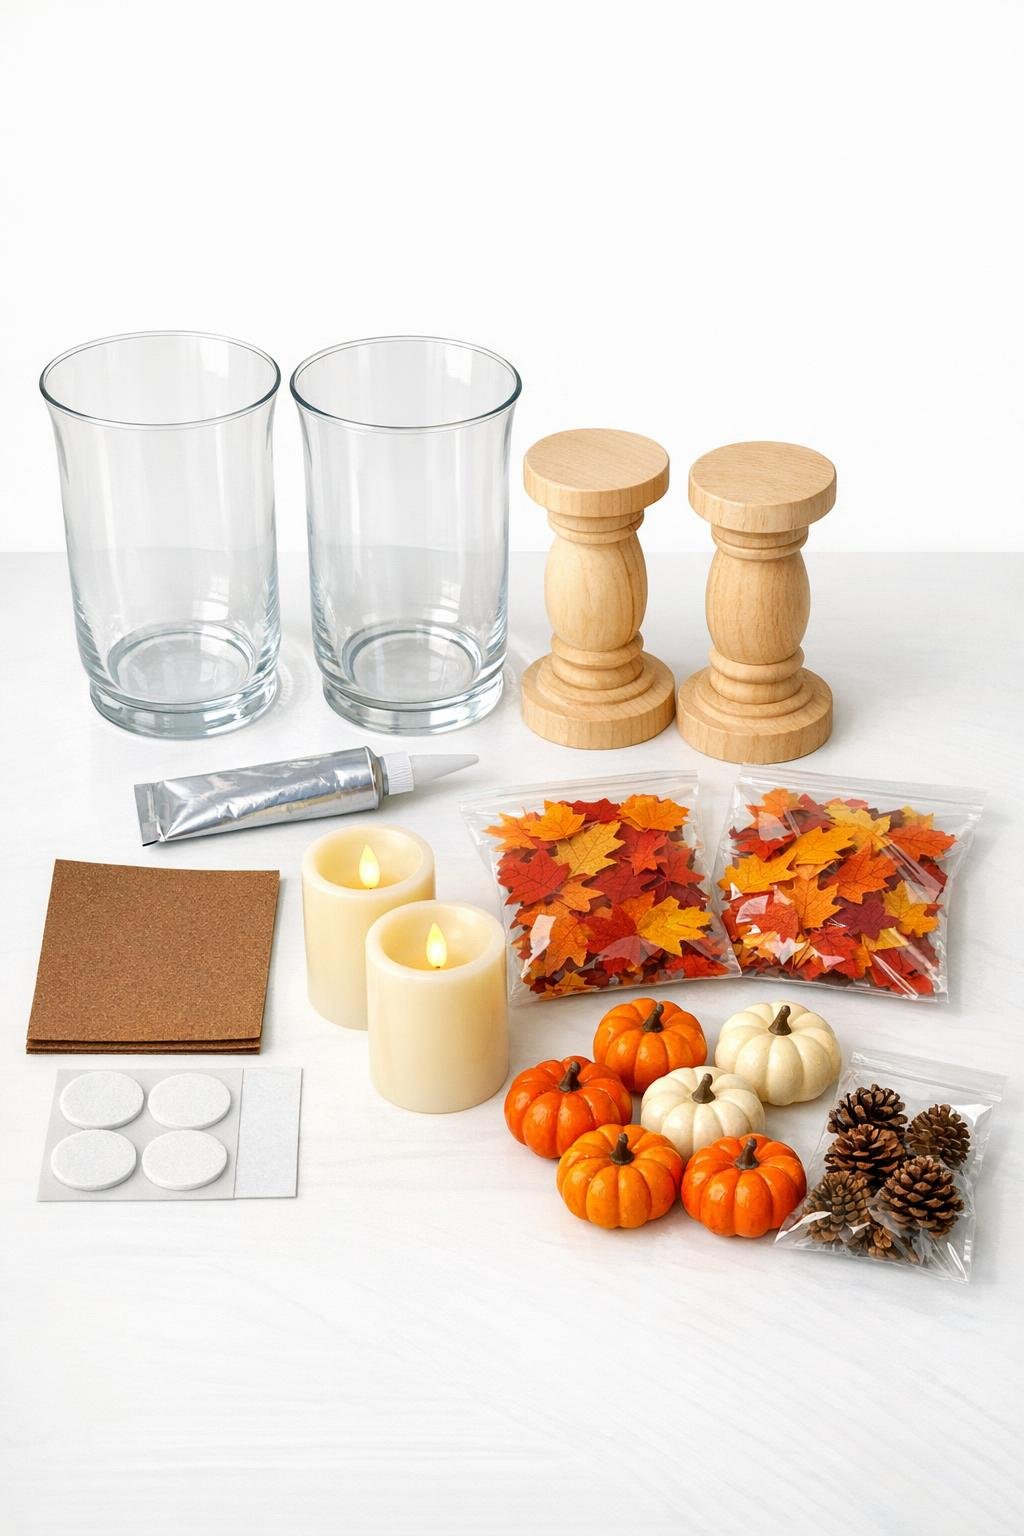
Materials
2 clear glass hurricane vases, 8 to 10 inches tall and about 4 to 5 inches wide
Instructions
1. Wipe the glass hurricane vases clean and dust off the wooden pillars so the adhesive will bond well. If the tops of the wooden pillars feel rough, sand them lightly until smooth.
2. If you want a more finished look, apply a coat of matte sealer to the wooden pillars and let them dry completely. I like keeping the wood natural for fall because it works with almost any porch color scheme.
3. Run a generous ring of clear adhesive around the top edge of one wooden pillar, staying slightly in from the outer edge. Center one hurricane vase on top and press it down gently so the glass sits flat.
4. Repeat with the second wooden pillar and hurricane vase, then leave both pieces undisturbed to cure according to the adhesive instructions. This is the hardest part for me because I always want to style things immediately.
5. Add adhesive felt pads to the bottoms of the wooden pillars once the glue is set. This helps protect your porch surface and keeps the lanterns from scraping if you move them around.
6. Place one LED pillar candle inside each hurricane vase. Make sure the candle sits level and leaves enough room around it for your seasonal filler.
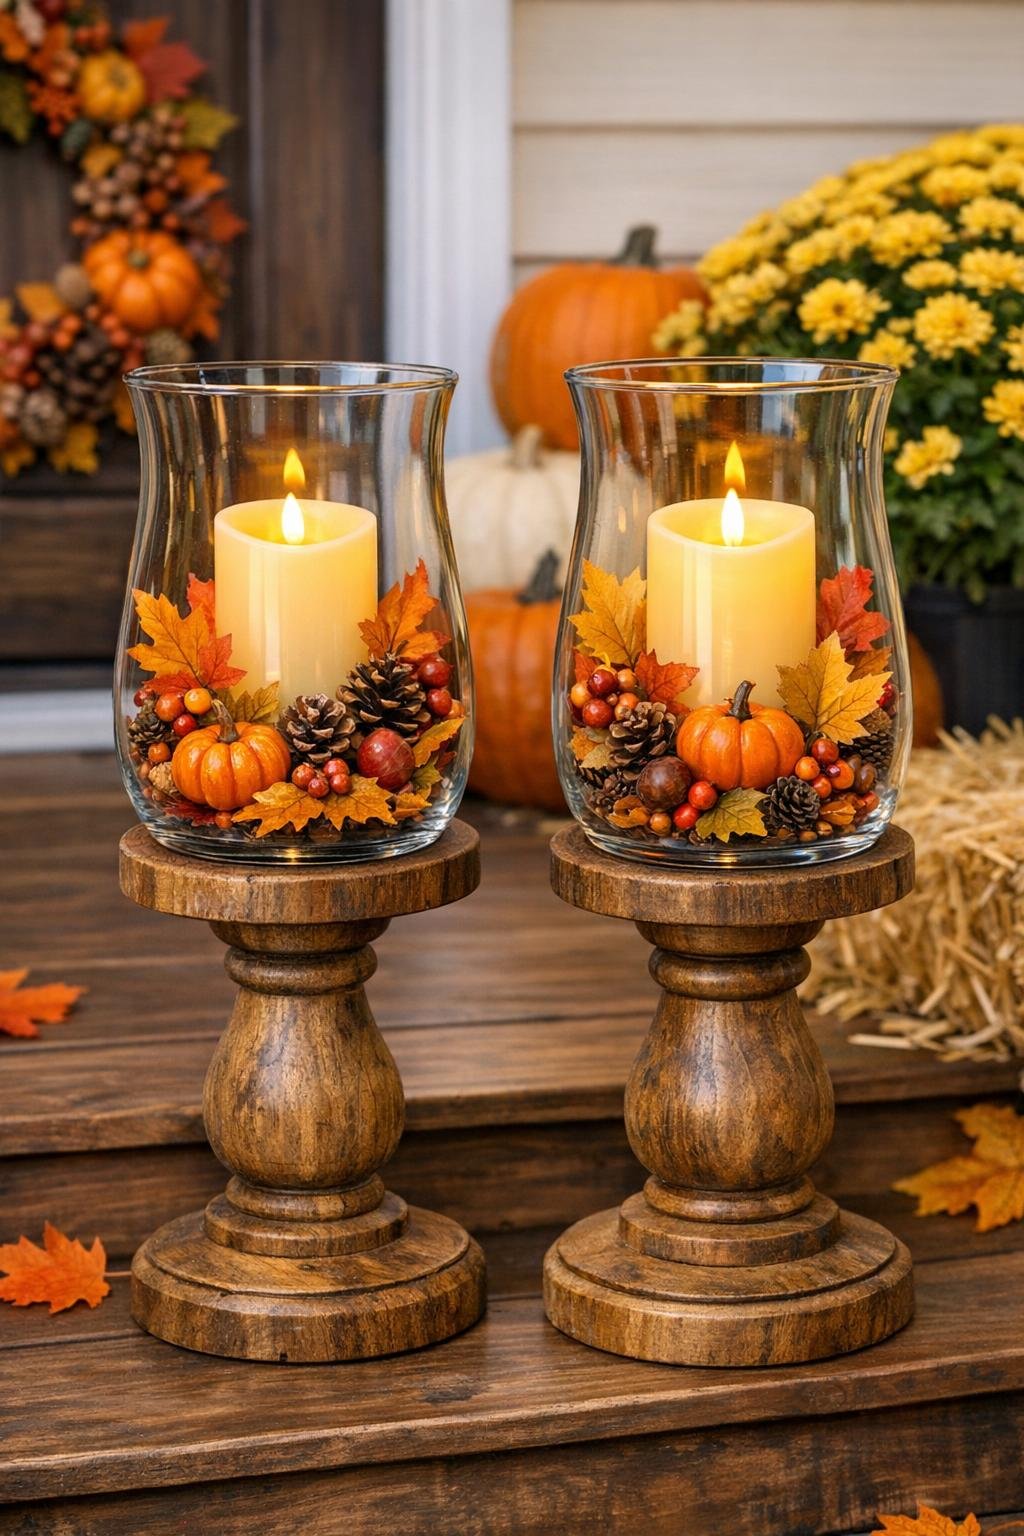
7. Tuck faux leaves, mini pumpkins, and a few pinecones around the base of each candle inside the glass, keeping the candle centered and visible. If you are using berry stems or wheat picks, trim them short and nestle them in last for a fuller look.
8. Set the finished lanterns on your front porch, ideally flanking the door, steps, or a bench for a balanced look. Turn on the candles at dusk to get that cozy fall glow without worrying about open flames.
Variations & Tips
Painted base option: If unfinished wood does not match your porch, paint the candle pillars matte black, cream, or deep brown before attaching the glass. A darker base gives the lanterns a more traditional look.
Real pumpkin look: If your porch is covered and dry, you can swap in a few real mini pumpkins around the outside of the lanterns instead of placing them inside. I would still keep faux filler inside so the setup lasts all season.
Battery candle tip: Use a timer LED candle so the lanterns switch on automatically each evening. This is one of those little upgrades that makes seasonal decorating feel much easier on busy weekdays.
Adhesive reminder: Choose a glue rated for both glass and wood, and always allow full cure time before moving the lanterns. Rushing that step can make the glass shift or loosen later.
Sizing tip: Before gluing, set the vase on the wooden pillar dry to make sure the top of the base is wider than the vase opening. A properly matched base makes the finished lantern look intentional and stable.
Holiday transition: Once fall is over, empty the filler and restyle the same lanterns with winter greenery, ornaments, or pine sprigs. I love a project that can stay in rotation past one season.