
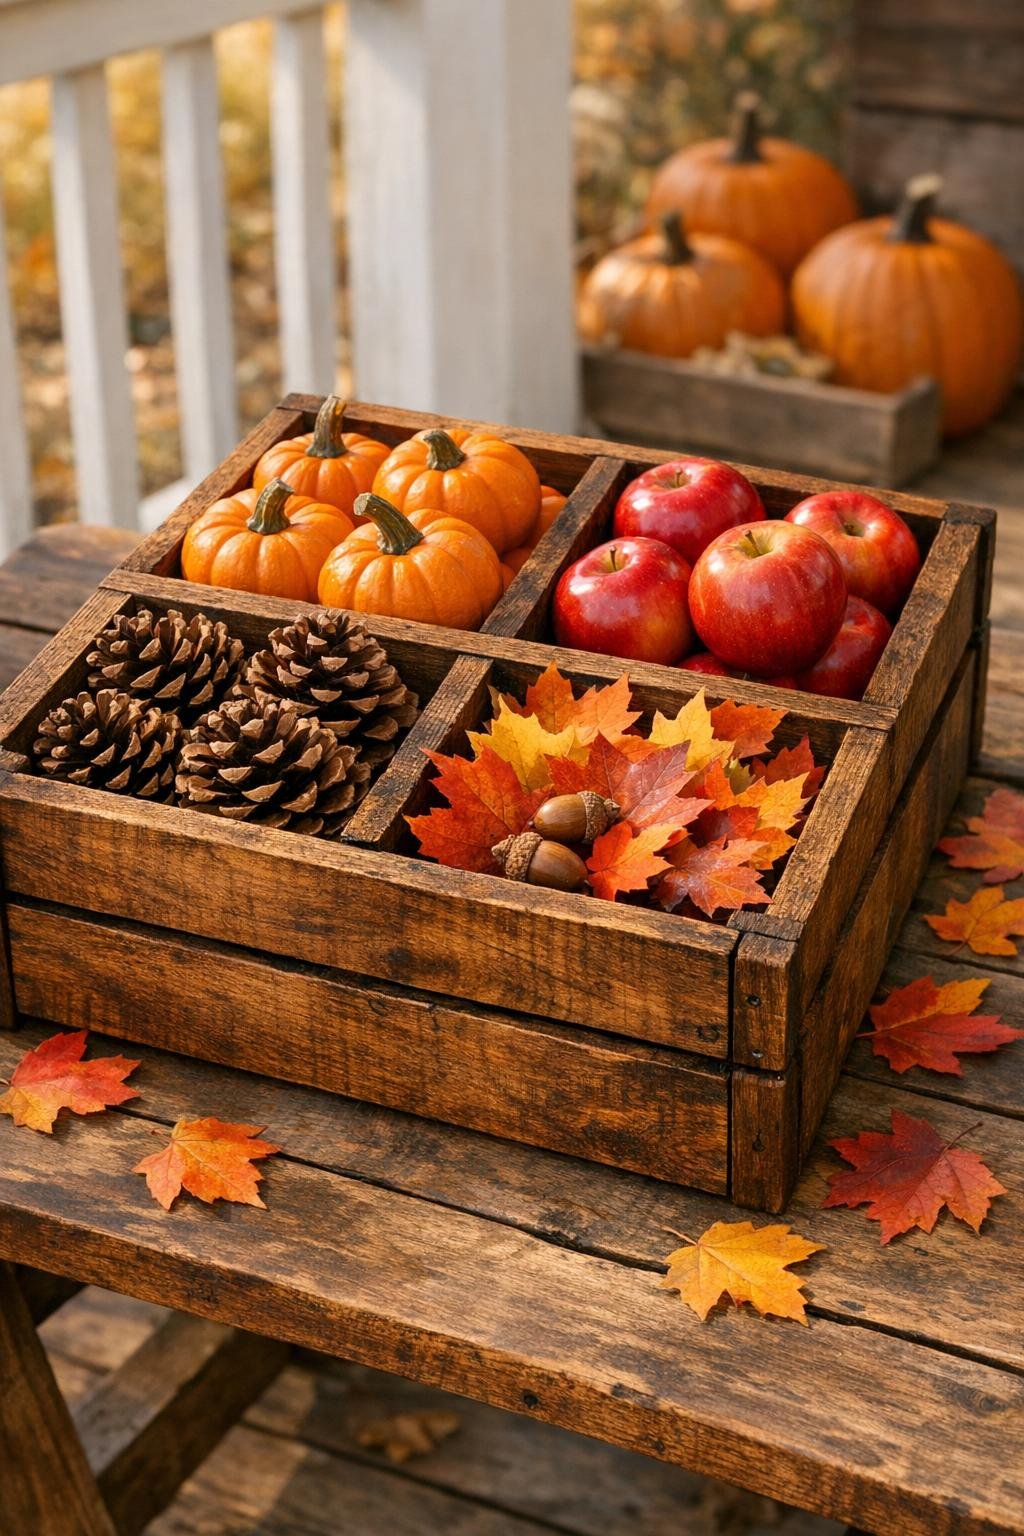
There’s something about old pallet wood that takes me right back to farm sheds, produce stands, and cool autumn afternoons when every crate and basket seemed to have a purpose. This fall harvest crate is a simple way to turn rough old pallets into something sturdy, useful, and charming, whether you fill it with mini pumpkins, canned goods, pinecones, or a few market vegetables from the porch.
I like this project for folks who want a rustic piece without spending much money. If you can measure carefully and take your time with a saw and drill, you can make a handsome 4-item crate that looks right at home in a farmhouse kitchen, on a front step, or in the center of a harvest table.

Materials
2 old wooden pallets, enough to yield at least 14 usable slats and 4 thicker support pieces
Instructions
1. Break down the pallets carefully with a pry bar and hammer, then remove every nail or staple from the boards. Choose the straightest, least cracked boards for your crate sides, bottom, and dividers.
2. Cut your pallet wood to size: four 18-inch side boards, four 12-inch boards, six 16 1/2-inch bottom and divider boards, and four 10 1/2-inch support cleats. Keep the cuts as square as you can so the crate goes together neatly.
3. Sand each board first with 80-grit and then with 120-grit sandpaper, smoothing splinters while keeping some of that old-weathered character. Wipe away all the dust with a dry rag.
4. Build the outer box by fastening two 18-inch boards and two 12-inch boards into a rectangle, using the 10 1/2-inch support cleats inside each corner. Apply wood glue at each joint, then secure with 2-inch screws.
5. Turn the frame upside down and attach the six 16 1/2-inch bottom slats across the base, leaving small gaps of about 1/4 inch between them. Use wood glue and 1 1/4-inch screws to fasten each slat into the frame.
6. Stand the crate upright and measure the inside length so you can divide it into four equal sections. Mark positions for three dividers, spacing them about 4 1/8 inches apart across the 18-inch length.
7. Install the divider boards upright inside the crate, securing each one to the bottom and through the outer sides with glue and 1 1/4-inch screws. Check each divider with a square so the compartments stay even.
8. Test the crate on a flat surface and trim or sand any uneven edges if it rocks. If you like, round over the top corners lightly with sandpaper so it feels good in the hand.
9. Apply your stain with a rag or brush, working it into the grain and wiping off the excess after a few minutes. Let it dry fully, then brush on a coat of matte polyurethane or outdoor sealer for protection.
10. After the finish cures, add felt pads or rubber feet if the crate will sit on a table or indoor floor. Fill the four sections with small pumpkins, gourds, apples, jars, or fall leaves and enjoy a project that’s as practical as it is pretty.
Variations & Tips
Add rope handles: If you plan to carry the crate often, drill a hole near each end and knot a short length of 3/8-inch rope through both sides. It gives the piece that old orchard feel and makes it easier to move when full.
Change the compartment size: For larger pumpkins or mason jars, make just two or three sections instead of four. I’ve found it’s best to decide what you’ll store before setting the divider spacing.
Keep the rustic look: Don’t oversand pallet wood until it looks brand new. A few saw marks and weathered patches are part of the charm, much like old produce crates I remember seeing tucked beside barn doors.
Use safe pallet wood: Only use pallets that are clean, dry, and free from chemical spills or strong odors. For indoor decorating, I avoid boards that are badly stained, moldy, or crumbly.
Try a painted finish: A soft cream, sage green, or barn red milk-paint style finish looks lovely for fall decorating. You can distress the edges lightly after painting if you want that timeworn country look.
Make it porch-ready: If the crate will live outdoors, use exterior screws and an outdoor-rated sealer. That little extra effort helps it hold up through damp mornings and chilly evenings.