
I love a project that looks high-end but starts with the kind of supplies I already have in the kitchen or garage, and these fluted concrete harvest planters are exactly that. By shaping crumpled aluminum foil into bowls and using a simple pantry item—cooking spray—you can make a pair of textured concrete planters that look like something from a boutique garden shop.
This is a wonderful weekend project for anyone who wants seasonal porch décor, handmade hostess gifts, or a pretty way to display mums, herbs, or faux fall stems. I’m especially fond of projects like this because they feel a little magical: humble materials go in, and something surprisingly elegant comes out.
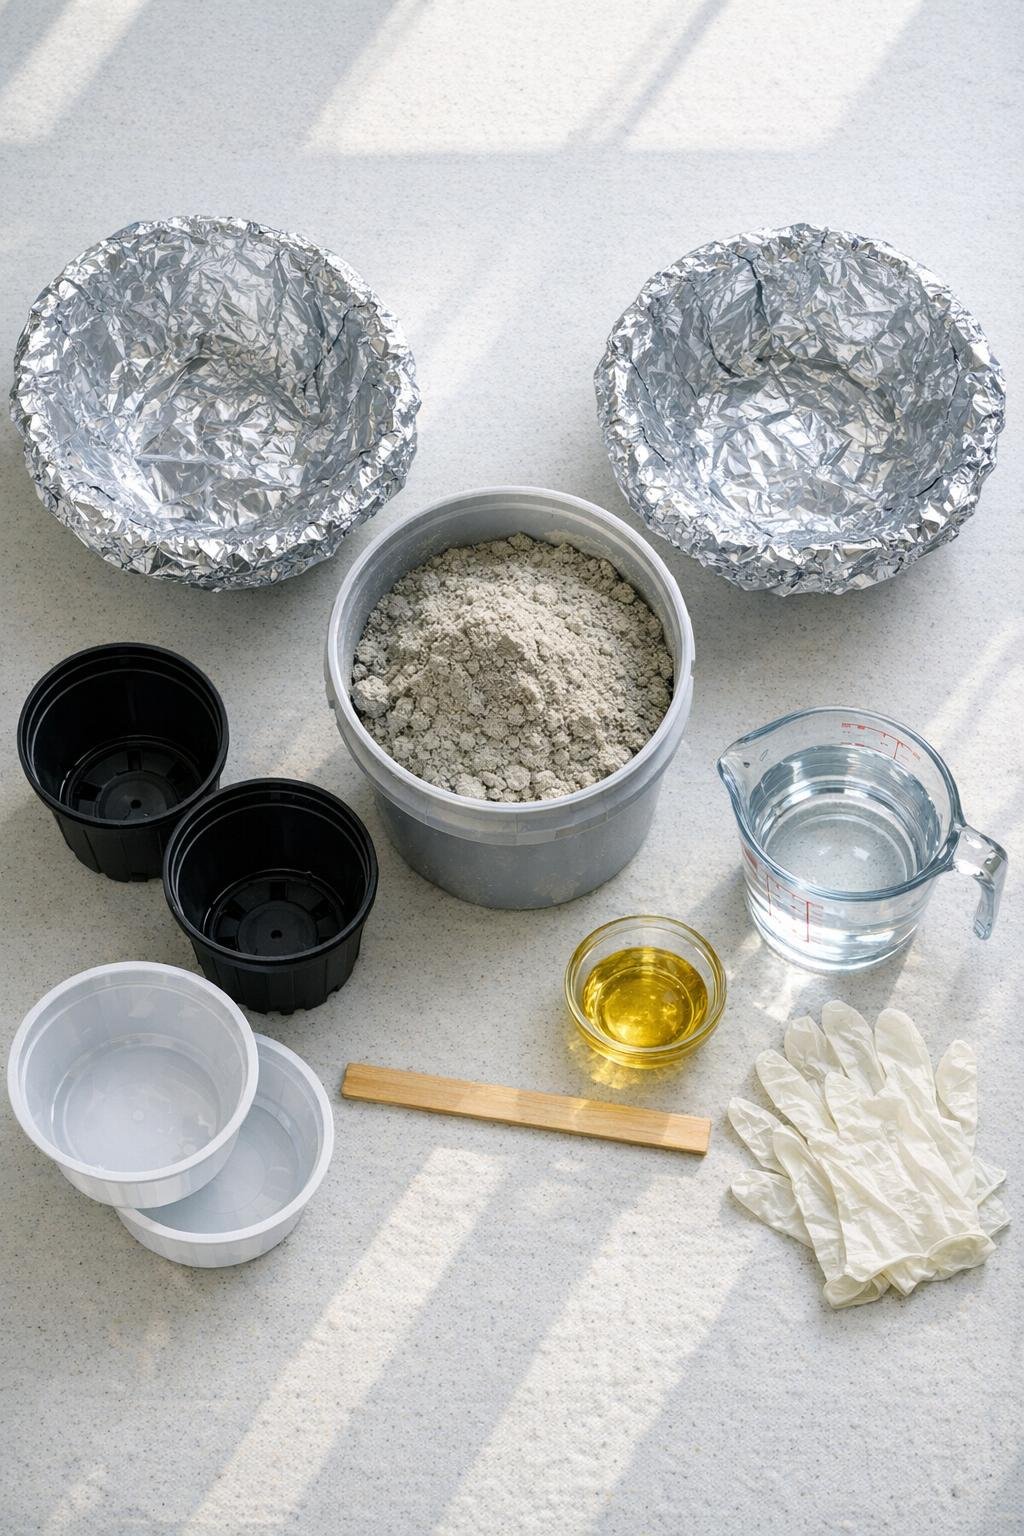
Materials
Instructions
1. Cover your work surface with a drop cloth or cardboard, then put on gloves. Concrete can be messy, so I like to set everything out before mixing.
2. Tear off two large sheets of heavy-duty foil and loosely shape each one into a bowl about 8 to 9 inches across. Crumple and press vertical ridges around the sides to create the fluted texture.
3. Spray the inside of each foil bowl generously with cooking spray, making sure to reach into all the folds. This helps the concrete release more cleanly once it cures.
4. In a mixing tub, combine 4 cups of dry concrete mix with about 1 to 1 1/4 cups of water for the first planter. Stir until it feels like thick brownie batter and holds its shape when scooped.
5. Spoon the wet concrete into the first foil bowl until it is about two-thirds full. Tap the bowl gently on the table a few times to settle the mix and reduce air pockets.
6. Spray the outside of one plastic nursery pot or bowl with cooking spray, then press it down into the center of the wet concrete. Leave at least 3/4 inch of concrete around the sides and bottom to form a sturdy planter.
7. Add a little more concrete around the outer edge if needed, then place a small weight inside the inner mold to keep it from lifting. Check that the inner mold stays centered.
8. Repeat the mixing and molding process for the second planter. Try to keep both bowls similar in size so they look like a matched set.
9. Let the planters cure undisturbed for 24 hours, or according to your concrete mix directions. If your space is very dry, I sometimes drape a loose piece of plastic over the top so the concrete doesn’t dry too fast.
10. Gently remove the inner plastic molds, then peel away the foil from the outside. If a few little bits stick in the creases, use your fingers or a dry brush to pull them free.
11. Let the planters continue curing for another 24 to 48 hours before planting. If you want a softer finish, lightly sand any sharp rim edges once the concrete is fully firm.
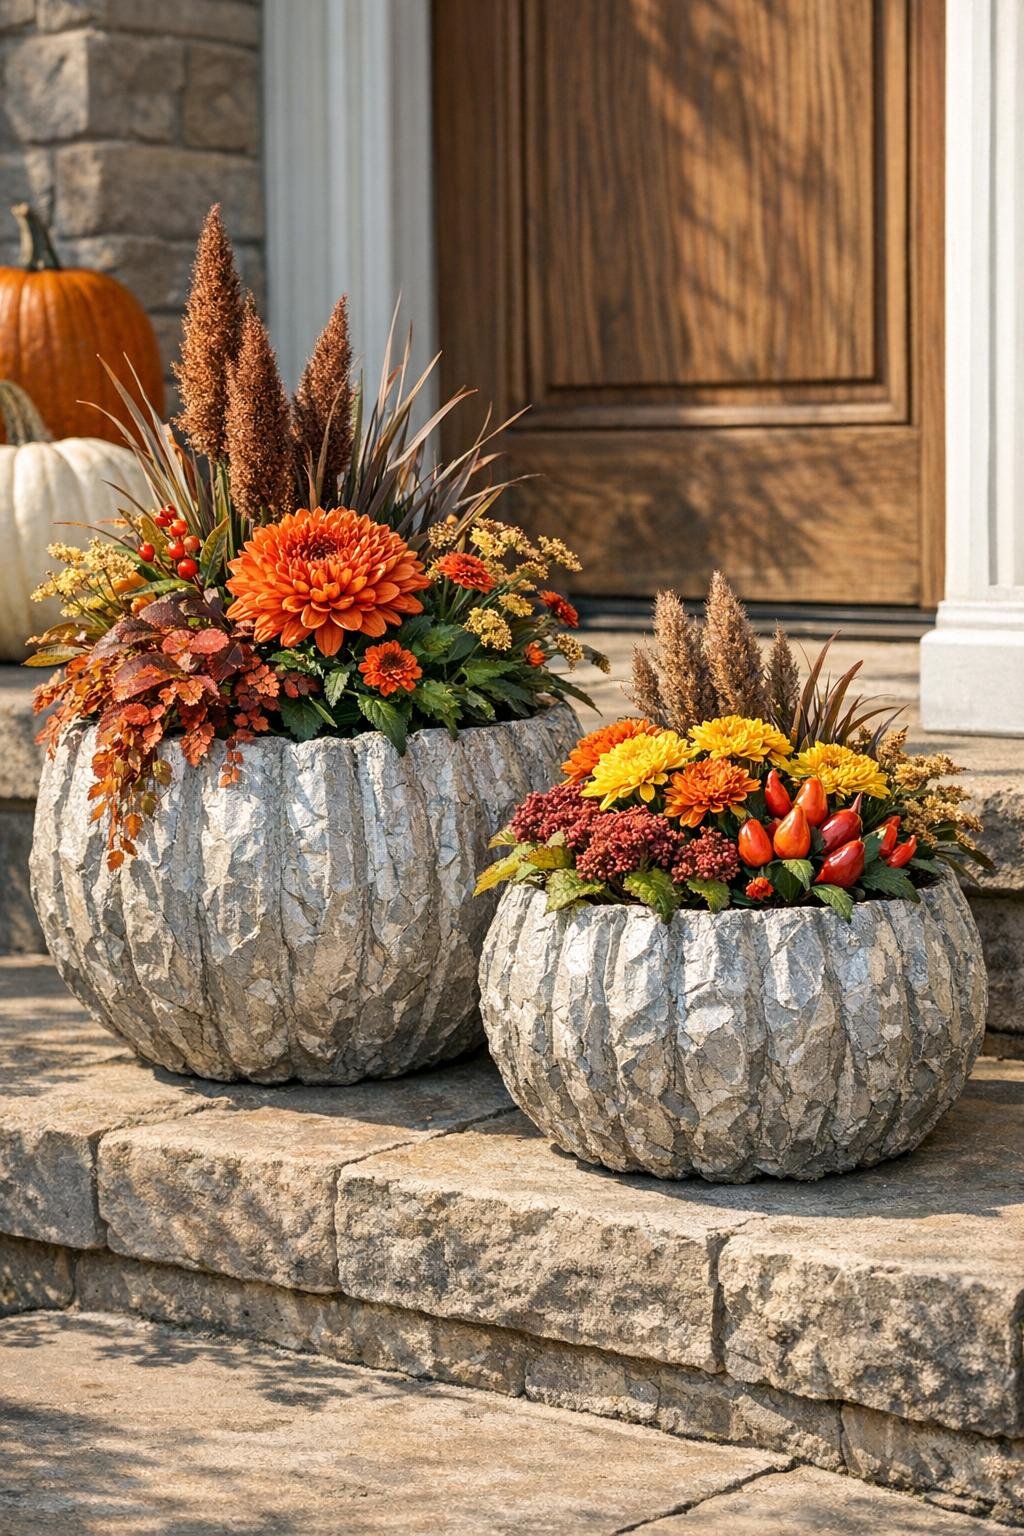
12. Add your favorite potted plants, dried stems, or faux harvest arrangement and display the pair together. I think they look especially pretty near a front door where the texture catches the light.
Variations & Tips
For drainage: If you want to plant directly into the concrete, press a straw or pencil through the bottom center before the mix fully sets, then remove it to create a drainage hole.
For picky decorators: Not everyone in the family likes the same seasonal look, so I often make one planter for real mums and one for faux stems or mini pumpkins. That way you get a matching pair with a little personality.
For a smoother finish: Use less crumpling on the foil if you want gentler flutes. Deep wrinkles make the finished planter look more rustic and dramatic.
For color changes: Once fully cured, you can dry-brush the ridges with white, taupe, or soft terracotta paint for a more collected, vintage look.
For easier shaping: Set each foil bowl inside a cereal bowl or mixing bowl while filling it. That extra support helps the sides keep their shape while you work.
For outdoor use: Seal the cured planters with a concrete sealer if they will live outside through wet or freezing weather. That little extra step helps them last much longer.