
There’s something about a row of glowing jars on a porch that takes me right back to cool Midwestern evenings, when the garden was winding down and we’d linger outside just a little longer to watch the last of the light fade. These vintage harvest lanterns are a simple 3-item project made from mason jars, copper chain, and warm amber fairy lights, and they give off that soft, welcoming glow that makes a house feel lived in and loved.
I especially like this project for folks who want a handmade porch accent without hauling out a full workshop. If you can thread a chain, twist a lid, and tuck in a light strand, you can make these. They’re lovely for porches, shepherd’s hooks, fence posts, or even hanging from a sturdy branch for a fall gathering.
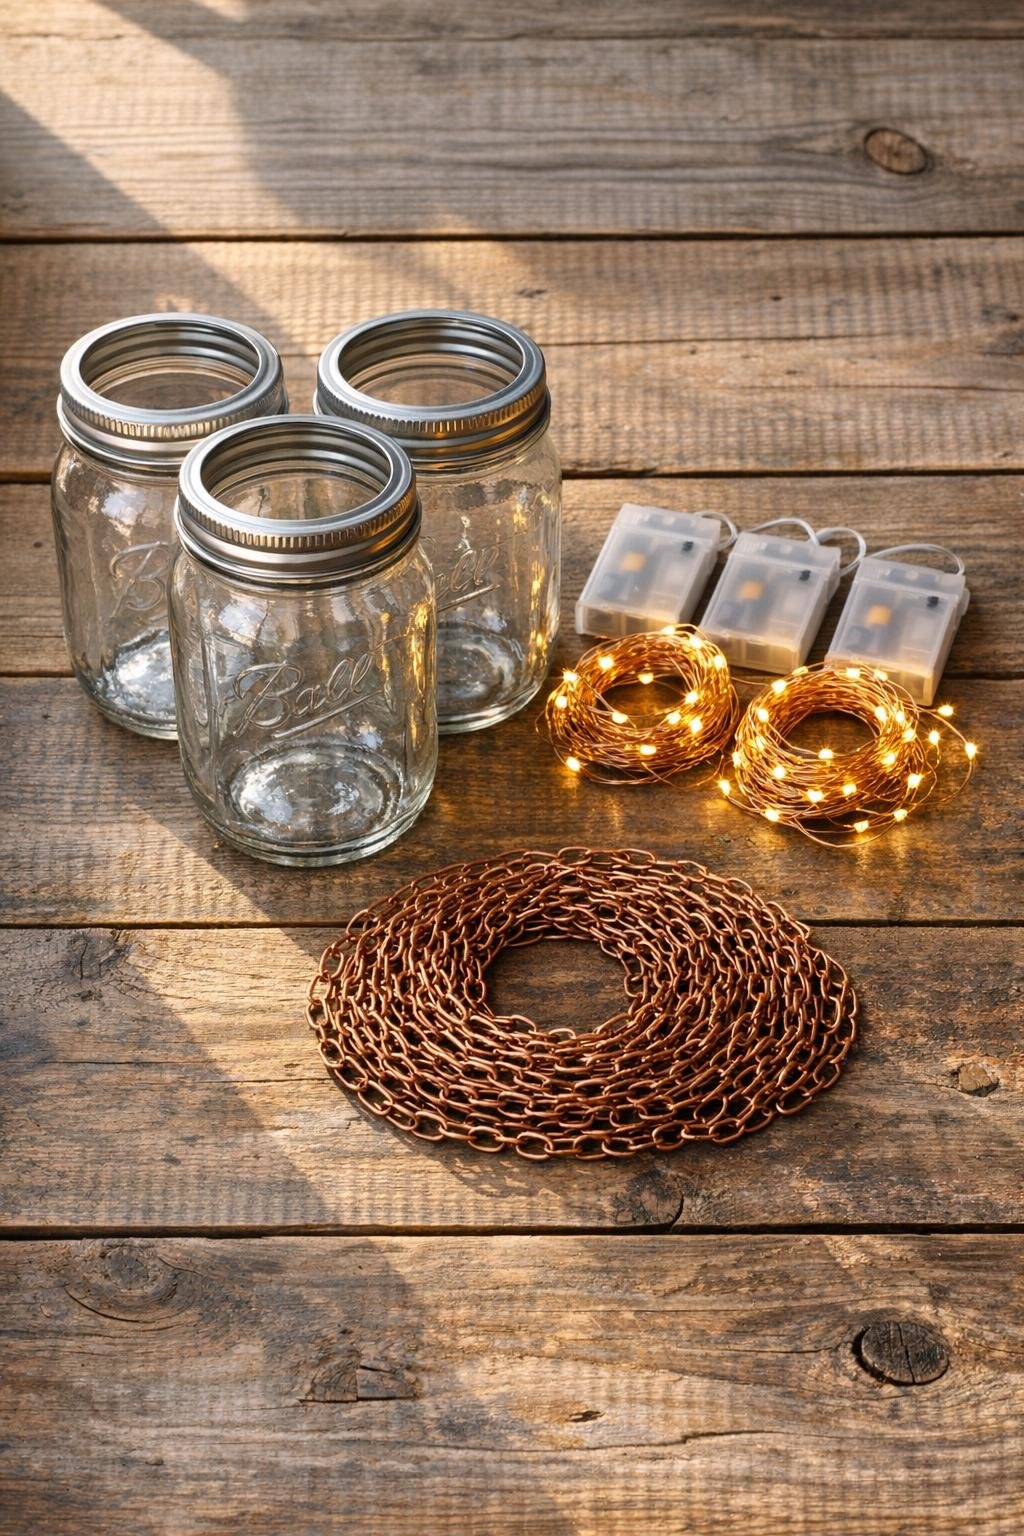
Materials
3 clear quart-size mason jars with screw bands and flat lids
Instructions
1. Wash and dry the mason jars, lids, and bands so the glass is clear and dust-free.
2. Cut the copper chain into three equal 4-foot lengths if it is not already pre-cut.
3. Unscrew each mason jar band and remove the flat lid insert so you’re left with the threaded band only.
4. Thread one end of a copper chain through the mason jar band, loop it back on itself by about 2 inches, and secure the loop by twisting the end tightly around the chain links.
5. Repeat with the other end of the same chain on the opposite side of the band to make a balanced hanging handle.
6. Test the balance by lifting the band from the top of the chain; adjust the loops until the ring hangs level.
7. Coil one amber fairy light strand loosely into a mason jar, starting with the lighted end first and keeping the battery pack near the jar opening.
8. Fit the band with the attached chain onto the jar and tighten it so the battery pack stays tucked just inside the top without pinching the wire hard.
9. Turn on the fairy lights and check that the glow fills the jar evenly; spread the wire a bit inside if the lights are clumped in one spot.
10. Make the remaining two lanterns the same way so the set matches in height and brightness.
11. Hang the lanterns from two sturdy porch staples or hooks, spacing them evenly and making sure each chain supports the jar securely.
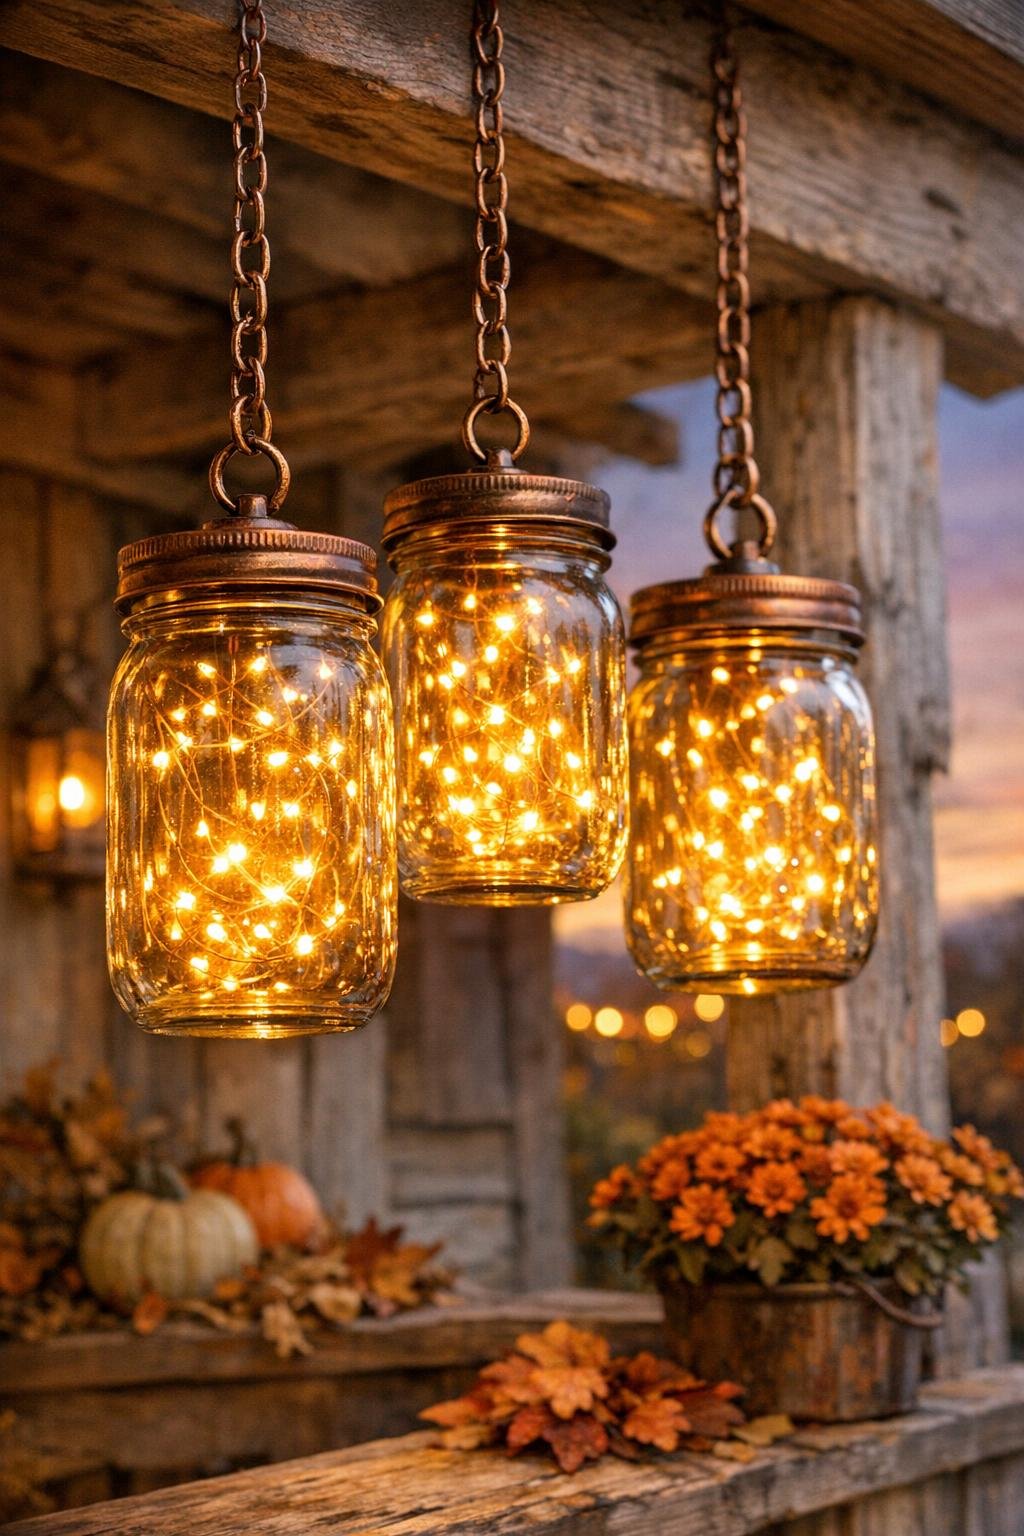
12. Step back after dark and fine-tune the chain lengths or spacing until the trio looks even and gives that soft vintage harvest glow.
Variations & Tips
For a frostier look: Lightly spray the outside of the jars with frosted glass spray before assembling if you want a softer, hazier glow.
For fuller light: Use 7-foot strands instead of shorter ones if your jars are quart-size and you want them to look extra abundant and cozy.
For easier battery changes: Leave the battery pack tucked just under the band rather than deep in the jar; I’ve learned the hard way that this saves a lot of fiddling once the weather turns chilly.
For outdoor use: Keep these under a covered porch unless your fairy light battery packs are specifically rated for wet weather.
For a more antique finish: Rub the jar bands gently with a little brown craft wax or matte bronze paint so the metal looks more timeworn beside the copper chain.
Hanging tip: If your porch staples sit at different heights, shorten one chain by a link or two before twisting it closed so the jars hang in a pleasing line.
Seasonal idea: In late fall, I sometimes nestle a tiny handful of faux preserved-looking leaves around the inside edge near the top, keeping them well away from the battery switch, just to make the lanterns feel even more like harvest time.