
I’ve brought home more “maybe someday” thrift-store finds than I care to admit, and chipped enamelware plates are exactly the kind of thing that can stump even a seasoned scavenger. They’re charming, they’ve got that worn farmhouse character, but once the edges are too chipped for serving food, they often wind up forgotten in a cabinet. This little project gives them a second life as a vintage-style tiered tray that looks right at home on a kitchen counter, coffee bar, or dining table.
What I like most about this build is that it’s simple, affordable, and forgiving. If you can measure the center of a plate and tighten hardware, you can make it. I’m using three enamelware pieces from the thrift store to create a classic three-tier stand, and the result is equal parts practical and decorative—perfect for anyone who loves upcycling with a bit of old-fashioned kitchen charm.
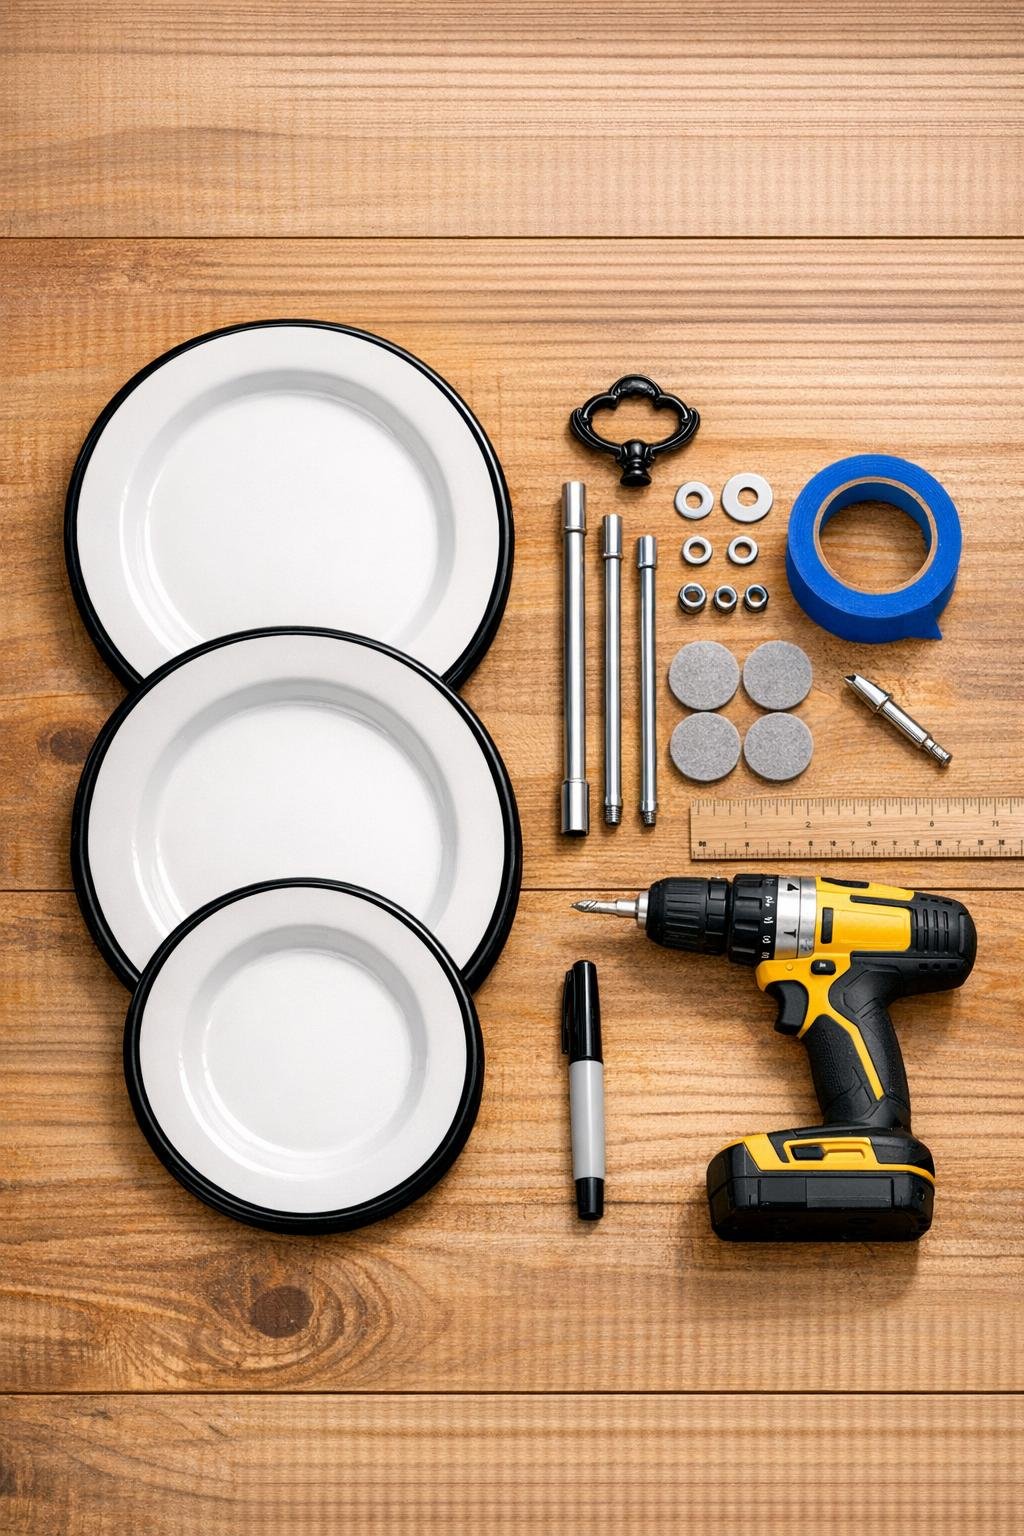
Materials
1 large thrifted enamelware plate, 11 to 12 inches wide
Instructions
1. Wash and dry all three enamelware pieces, then inspect them for loose rust, sharp chips, or cracks that run inward from the rim. A little edge wear is fine, but skip any piece that feels unstable or has flaking metal where food would have touched.
2. Arrange the three pieces from largest to smallest and decide which side you want facing up. I usually put the prettiest plate on the bottom and a slightly bowl-shaped piece on top so small wrapped treats or tea bags stay put.
3. Find the center of each piece by measuring across the diameter in two directions and marking the midpoint with a dot on painter’s tape. The tape helps the drill bit grip and makes your mark easier to see on glossy enamel.
4. Place the first plate on the cardboard or folded towel and drill a slow, steady hole through the center using the bit recommended for metal-enamel surfaces. Let the drill do the work and stop as soon as the bit passes through so you don’t enlarge the hole by accident.
5. Repeat the drilling process for the medium and small pieces, keeping each one well-supported underneath. If any edge around the hole feels rough, smooth it gently with fine sandpaper or cover it with a washer during assembly.
6. Thread the bottom plate onto the tiered tray rod first, adding a washer above and below the plate if your hardware kit does not already include cushioned separators. Tighten the bottom nut just enough to hold the plate firmly without stressing the enamel.
7. Add the center separator, then install the medium plate with washers as needed, followed by the next separator and the top plate. Keep checking from the side that the tiers look level and evenly spaced before fully tightening.
8. Attach the top handle and give every connection a final gentle tightening by hand or with the included tool. I avoid over-tightening here, because enamelware is tough in the kitchen but surprisingly easy to crack under pressure in one focused spot.
9. Stick felt pads underneath the bottom plate wherever the metal might touch your table. Set the tray on a flat surface and adjust the hardware slightly if it wobbles.
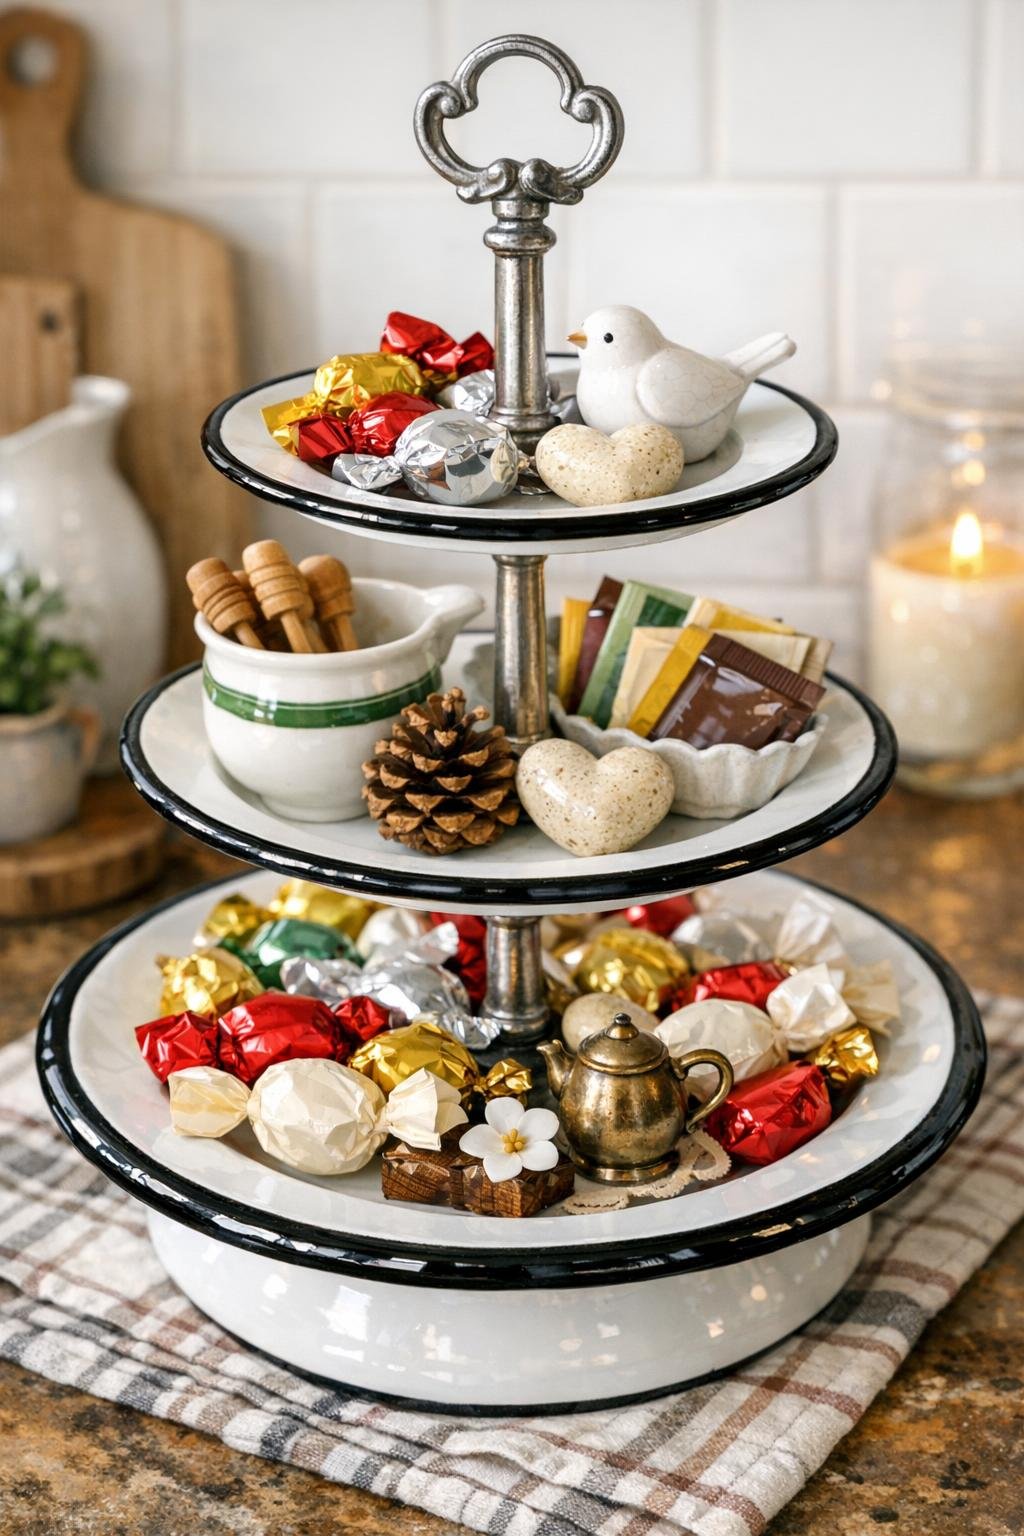
10. Style the finished tray with lightweight items such as wrapped candies, tea packets, faux fruit, napkins, or seasonal décor. If you’re using chipped enamelware like I did, treat the tray as decorative storage rather than a food-safe serving piece.
Variations & Tips
Mix your shapes: A shallow bowl or pie tin can work beautifully as the top tier if you want a little more containment. I especially like this for packets of sugar or little cookies wrapped for gifting.
Use matching washers: Rubber or silicone washers are my first choice because they cushion the enamel and help prevent cracks around the drilled holes. If your hardware kit only includes metal washers, sandwich a small felt pad between the washer and plate.
Keep the weight light: This tray is best for lightweight décor and pantry-style items, not heavy mugs or canned goods. Vintage enamelware is durable, but old chips and thin spots can make it less predictable under load.
Try a color story: White with black rims gives that classic farmhouse look, but splatter enamelware or soft pastel pieces can be lovely too. If the plates coordinate in tone rather than matching exactly, the tray often looks more collected and authentic.
Make it holiday-ready: I rotate mine through the seasons with citrus in summer, wrapped caramels in fall, ornaments in winter, and seed packets in spring. It’s one of those projects that earns its counter space because it keeps adapting.
Check for food safety: If the enamel is chipped where food would rest, use the tray for packaged items or décor only. That’s the safest choice, and honestly, it still looks every bit as charming.