
If you’ve got a few old garden hose offcuts tucked in the shed, this is one of those satisfying little garden fixes that feels almost too simple to work until you turn on the water and see it in action. In this project, I’ll show you how to turn short pieces of old hose plus two inexpensive dollar store items into a drip irrigation ring that waters right at the base of a plant, where it’s needed most.
I especially love this kind of project for busy gardeners, container growers, and anyone trying to stretch their watering time in the heat of summer. Around my house, anything that keeps plants happier and saves me a few trips back and forth with the watering can is a win, and this setup is easy to make, easy to move, and gentle enough for tender roots and young plants.
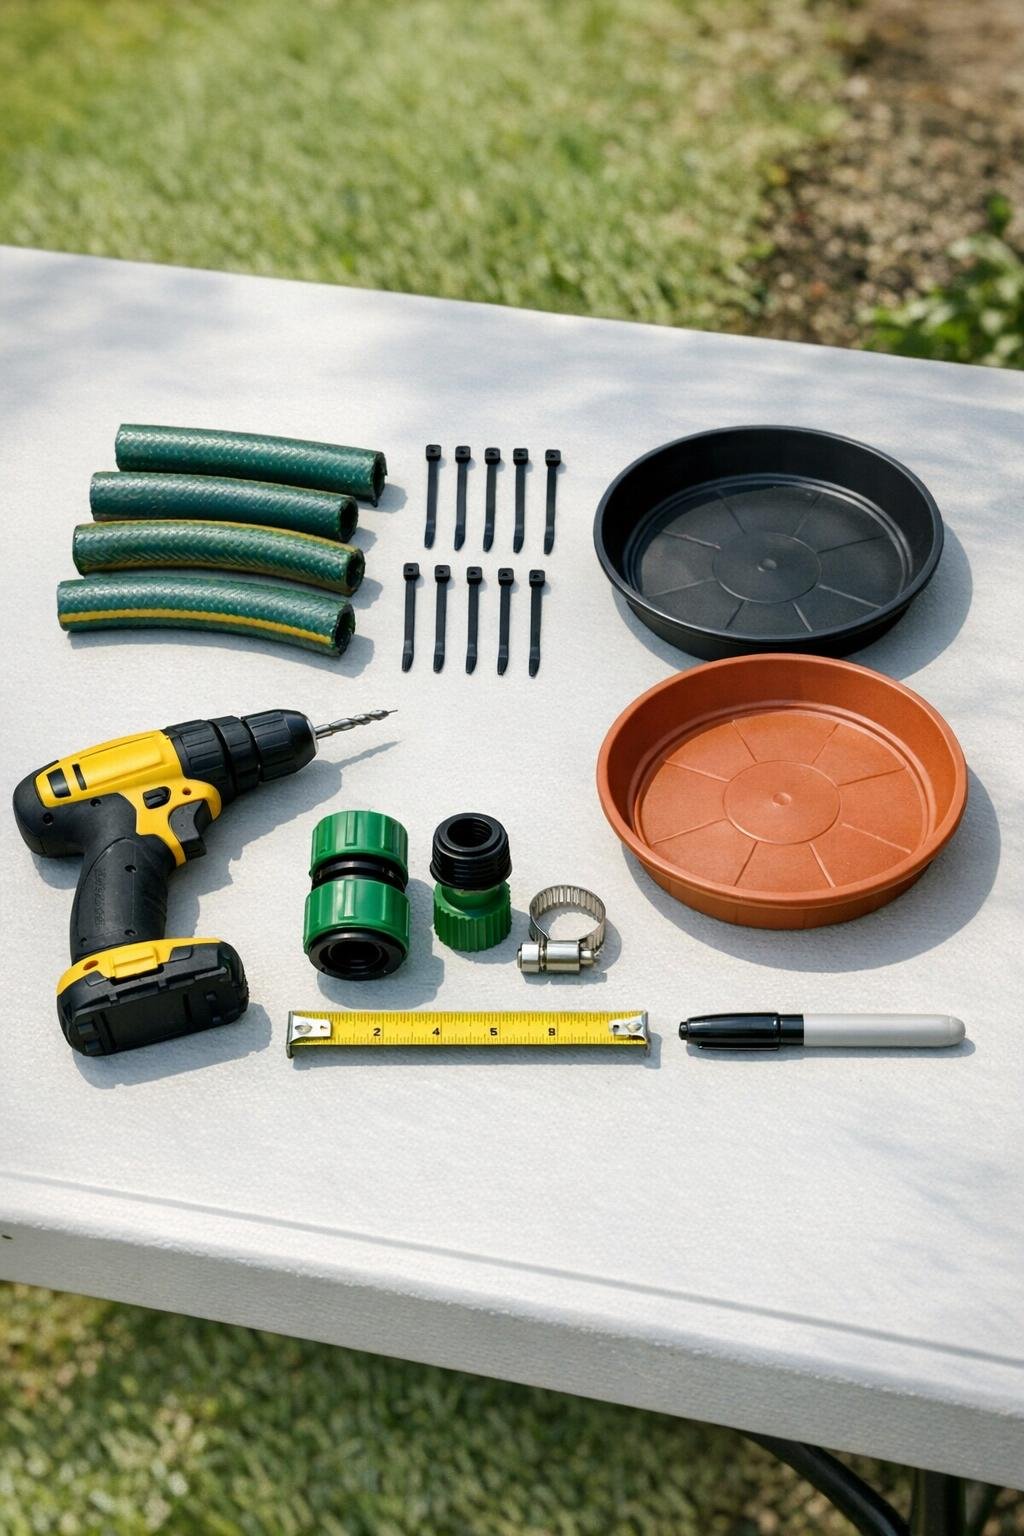
Materials
Old garden hose offcuts — 2 pieces, 18 inches long each
Instructions
1. Cut your hose offcuts to equal lengths, about 18 inches each, and rinse out any dirt hiding inside so the water can flow freely.
2. On one hose piece, mark drill points every 1 inch along one side, stopping 2 inches before each end; this will be your watering ring section.
3. Drill small holes at each mark using a 1/16-inch drill bit, keeping the holes on the same side of the hose so the water will spray evenly downward later.
4. Join the two hose pieces with the straight barbed coupler so they form one longer length, then curve the hose into a ring sized to fit around your plant.
5. Attach the female hose-end connector to one free end and secure it with the hose clamp; cap or fold the opposite end back on itself and tighten it with 2 zip ties to stop water from escaping.
6. Turn the two plastic plant saucers upside down and drill 4 evenly spaced holes near the rim of each one for zip ties; these will act as simple support bases to hold the ring in place.
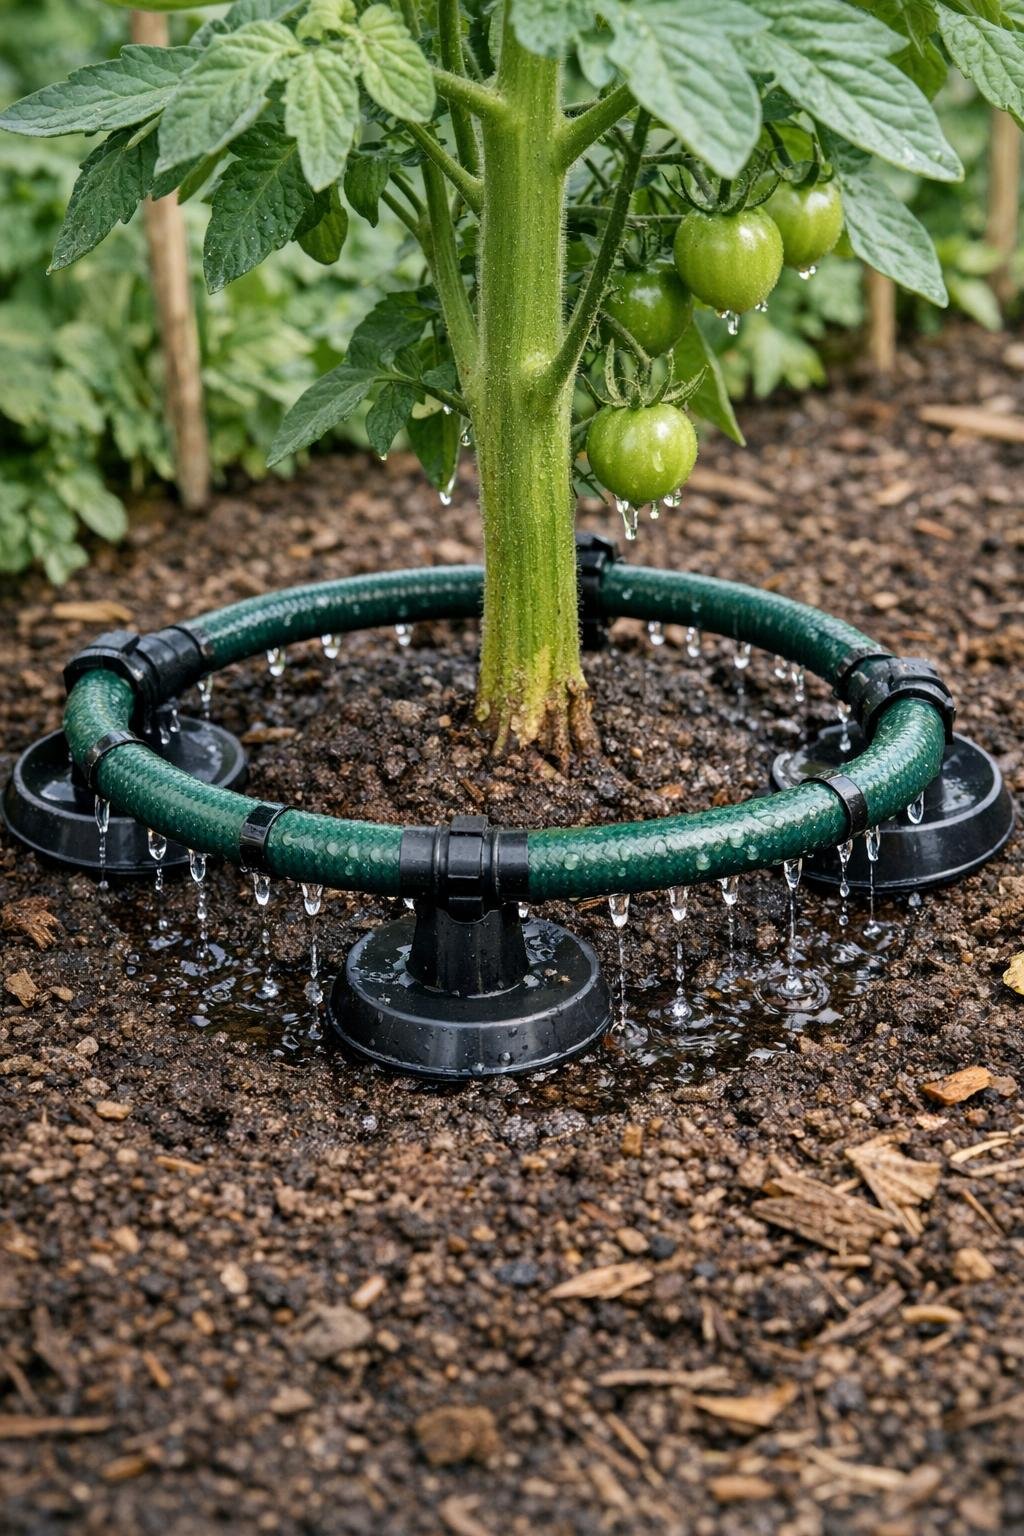
7. Zip-tie the hose ring lightly to the upside-down saucers so the drilled holes in the hose face inward and slightly downward toward the plant’s root zone.
8. Set the ring around your plant, connect it to the garden hose, and turn the water on slowly until you see a gentle drip or soft trickle from each hole; if needed, widen or add holes one at a time.
9. Test the watering pattern for 5 to 10 minutes and rotate the ring or plug any overly strong holes with a dab of silicone sealant if one side is getting too much water.
Variations & Tips
For bigger plants: Use longer hose pieces to make a wider ring for tomatoes, peppers, zucchini, or small shrubs. I like to leave a little extra room so the water reaches the root zone as the plant grows.
For containers: Make a smaller ring with shorter hose sections and fewer holes so potted plants don’t get soggy too quickly. This works especially well for large patio pots that dry out fast in summer.
For picky plants: If some plants like drier leaves or are prone to mildew, this root-level watering method is especially helpful because it keeps moisture off the foliage. It’s a good gentle option when overhead watering causes trouble.
To control flow: Start with fewer holes than you think you need. You can always drill one or two more, but it’s much harder to undo holes that are too large.
To prevent clogging: Rinse the hose before assembly and check the drilled holes every couple of weeks for mineral buildup or bits of dirt. A toothpick or pin is usually enough to clear them.
To make it last longer: Keep the drilled side facing down, and avoid blasting full water pressure through the ring. A slow, steady flow gives better soaking and puts less stress on the homemade connections.