
There’s something deeply satisfying about turning a stack of plain old soup cans into something that looks thoughtful and store-bought, especially when the method is this simple. Out here, we’ve always had a habit of saving what we can use again, and this project fits that old Midwestern thrift perfectly. These punched tin can luminaries are made by freezing water right inside the cans first, then tapping a nail through the metal to create a clean little pattern without all that frustrating denting.
I like this project for just about anyone who enjoys easy seasonal decorating, upcycling, or a hands-on craft that doesn’t require fancy tools. If you can draw a simple dot pattern and swing a hammer carefully, you can make these. They’re especially nice for a porch table, steps, or a quiet corner indoors, and once folks see them glowing, they tend to assume they came from a little boutique instead of the kitchen recycling bin.
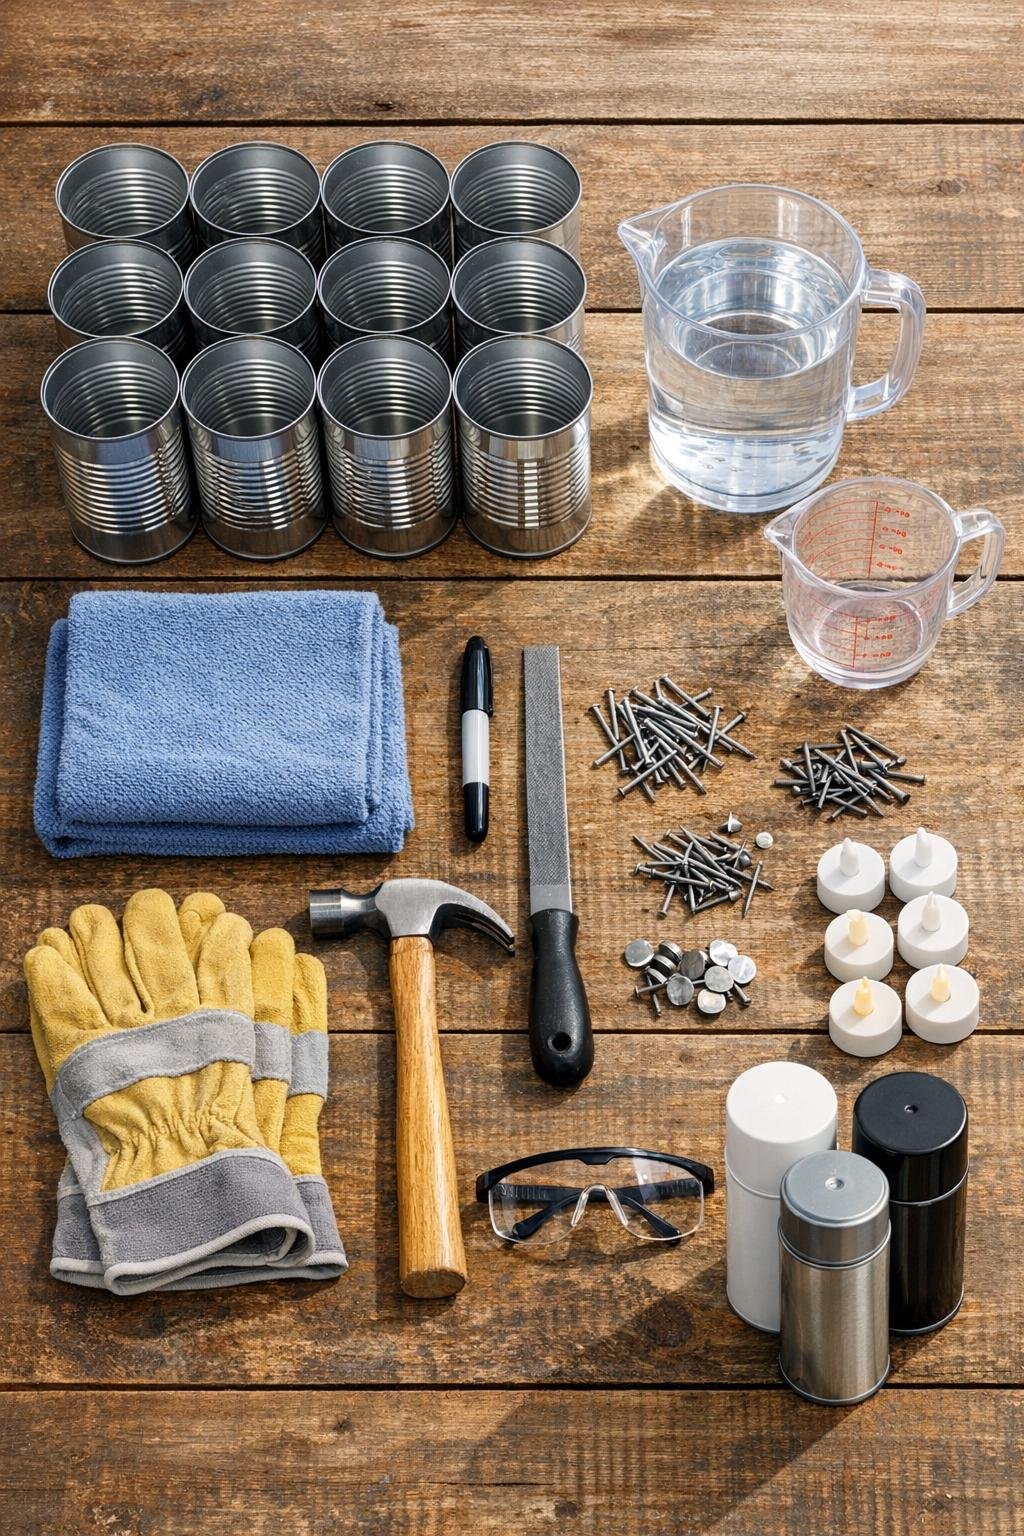
Materials
Instructions
1. Wash the 12 soup cans well, remove all paper and glue residue, and check that the top edges are smooth enough to handle safely.
2. Fill each can with water to about 1/4 inch below the rim, then set them upright in the freezer for 24 hours until frozen solid.
3. Take out one can at a time and use the permanent marker to draw a simple dot pattern on the outside, such as stars, leaves, or a basic pumpkin face.
4. Fold the towel into a thick pad and lay it on your work surface, then place the frozen can on its side or hold it steady upright on the towel so it does not slip.
5. Put on safety glasses, set the tip of the small nail on one marked dot, and tap straight down with the hammer just hard enough to punch through the metal cleanly.
6. Continue punching along the marked dots, turning the can as you go and spacing the holes evenly so the design stays clear.
7. Switch to the medium nail if you want a few larger accent holes, but keep the pattern simple so the can stays sturdy.
8. Repeat the marking and punching process for the remaining cans, working while each one is still frozen firm.
9. Stand the finished cans upright and let the ice melt completely, then pour out the water and dry each can inside and out with a towel.
10. Run the metal file lightly over any sharp burrs around the holes or rim, especially inside the can where fingers may brush when placing a light.
11. If you want color, spray the cans with a light coat of primer and let it dry, then add 1 to 2 light coats of spray paint and dry fully according to the can directions.
12. Place one tea light or LED votive inside each finished can and use them as light-duty porch or table décor.
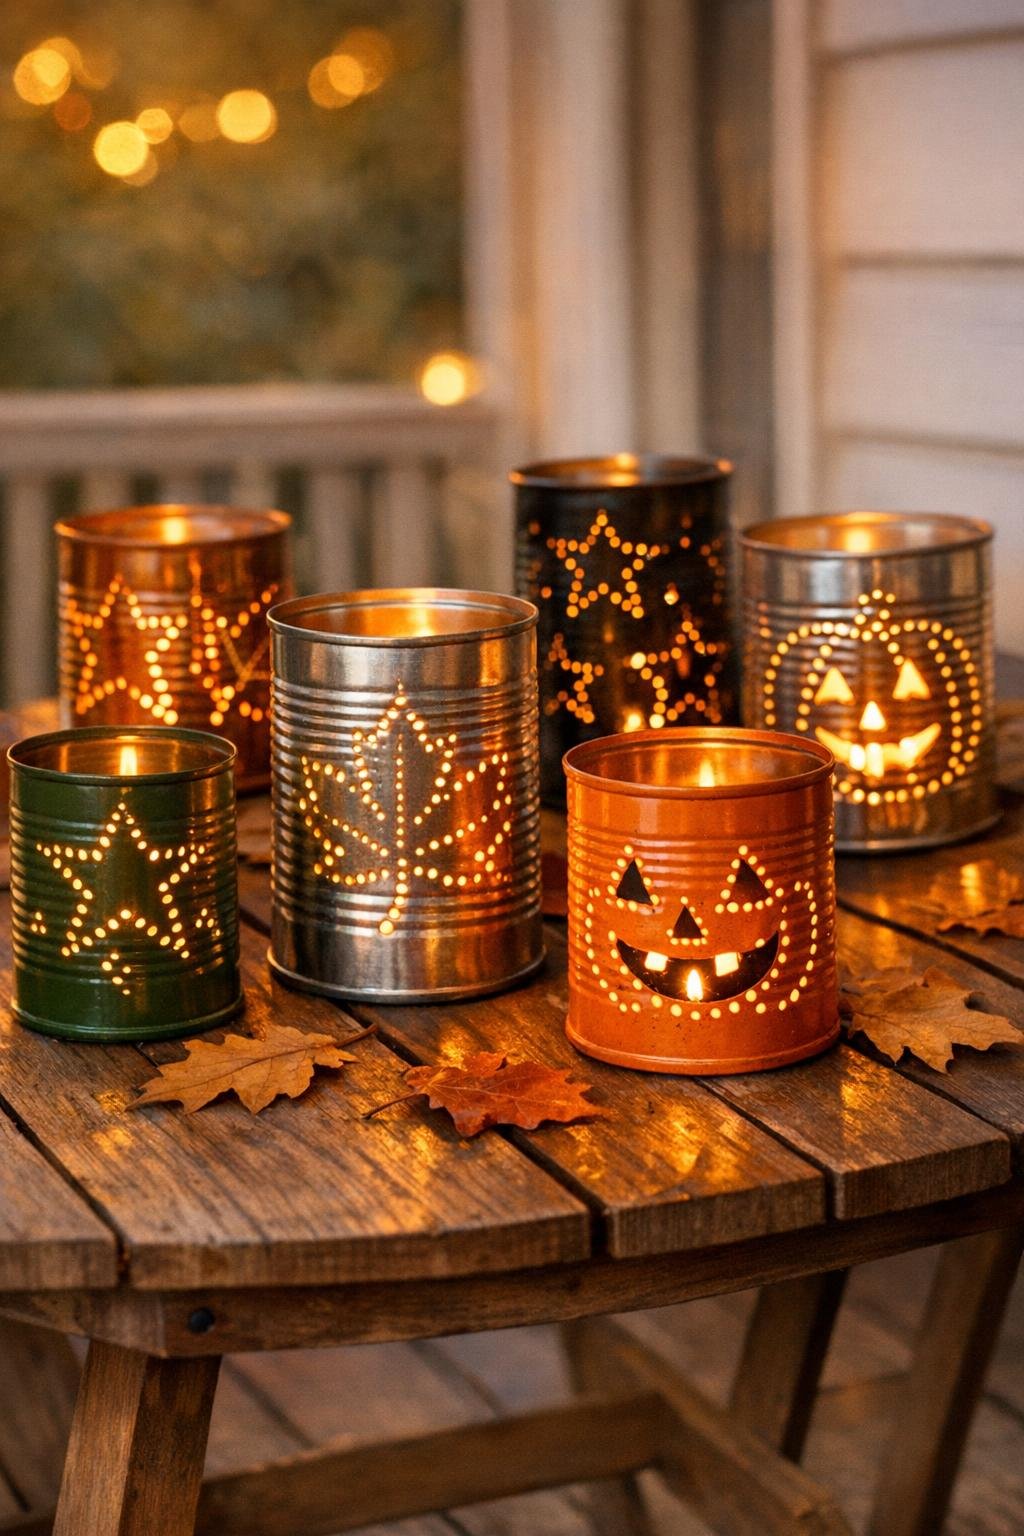
Variations & Tips
Classic silver finish: Leave the cans unpainted if you like a simple farmhouse look. The plain metal has an honest, old utility-room charm that I’ve always found appealing.
Seasonal designs: Stars work year-round, leaves are lovely in fall, and a simple pumpkin face is especially cheerful for October. Keep your designs dotted and uncomplicated so they’re easy to punch cleanly.
Pattern transfer tip: If you’re nervous about drawing freehand, make dots first with evenly spaced marks before you start hammering. That little bit of planning saves a lot of lopsided lines.
Freeze thoroughly: The 24-hour freeze matters more than people think. The ice is what supports the thin can walls so the nail punches through instead of collapsing the metal.
Work one can at a time: I’ve found it easiest to leave most of the cans in the freezer and only bring out the next one when I’m ready. A fully frozen can behaves much better under the hammer.
Safety first: Watch your fingers while holding the nail, and always file sharp edges after punching. These are light-duty decorative luminaries, not heavy-use lanterns, so handle them with a little care.
Lighting choice: LED votives are the easiest option if children, pets, or breezes are part of the picture. If you use tea lights, keep the cans on a stable, heat-safe surface and never leave them unattended.