
If your entryway collects unopened envelopes, school forms, coupons, and the random receipt you swore you needed, this little hallway mail sorter is such a smart fix. For this project, I’m turning vintage metal loaf pans into vertical mail pockets and mounting them onto a narrow floating shelf so everything has a tidy landing spot without eating up much space.
I love projects like this because they solve a real everyday problem and still look charming. As someone who is always trying to keep a busy workweek from spilling all over the house, I’m a big fan of anything that helps me sort incoming paper fast. This is a beginner-friendly build if you’re comfortable using a drill and a level, and it’s especially great for narrow hallways, mudrooms, or that awkward wall space by the door.
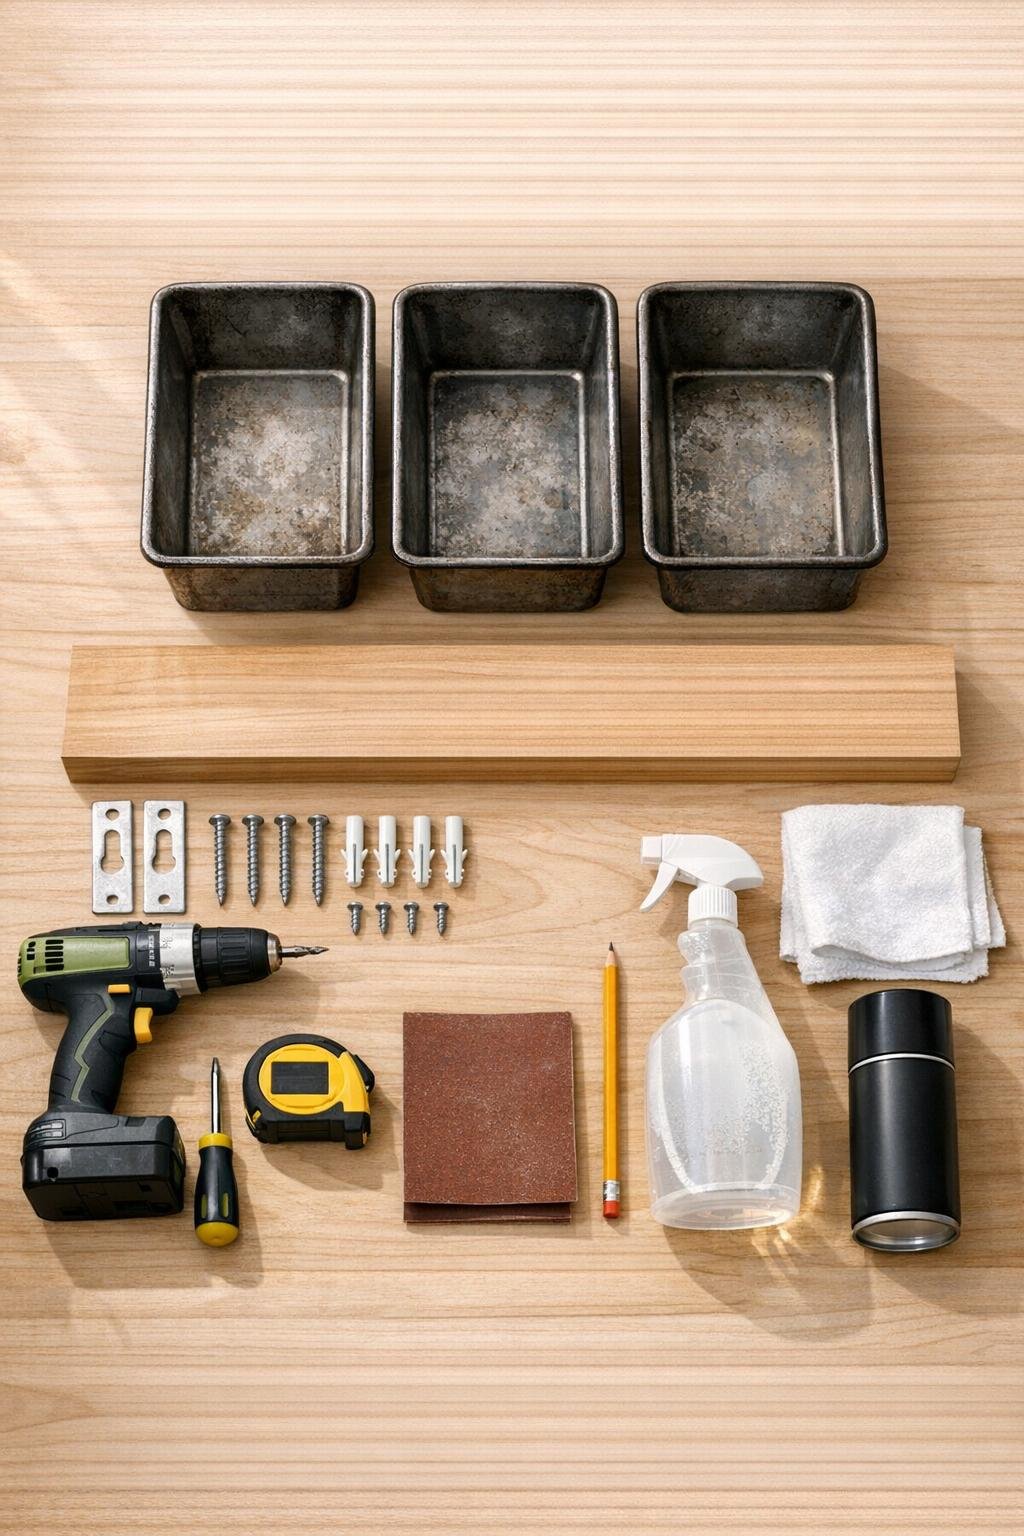
Materials
1 narrow floating shelf, 24 inches long x 6 inches deep x 1 1/2 inches thick
Instructions
1. Clean the loaf pans thoroughly with degreasing cleaner and dry them completely so old residue does not interfere with paint or mounting.
2. Lightly sand any rust spots or rough edges on the pans with 120-grit sandpaper, then smooth with 220-grit sandpaper.
3. Spray paint or seal the pans now if desired, and let them cure fully according to the product directions before assembly.
4. Decide how you want the pans stacked on the shelf, then mark their positions so they sit centered and evenly spaced from top to bottom.
5. Hold each pan in place and mark two screw locations through the back of each pan, keeping the holes about 1 inch in from the sides and centered vertically.
6. Drill pilot holes through the marked spots in the metal pans, then smooth any sharp burrs around the holes.
7. Attach the pans to the front face of the floating shelf one at a time using #8 x 1/2-inch screws and washers, checking that each pan stays level before tightening.
8. Measure the full assembled piece and mark the wall for the shelf location, placing it at a height that is easy to reach but clear of door swing and traffic.
9. Use a level to draw a straight guide line, then install the floating shelf bracket according to the manufacturer’s instructions, using studs or drywall anchors as needed.
10. Slide or secure the shelf onto the mounted bracket, then test the sorter gently with a few envelopes before loading it fully.
11. Sort mail into the pans by category, such as bills, outgoing mail, and school papers, and add small labels later if you want them outside the image-visible project.
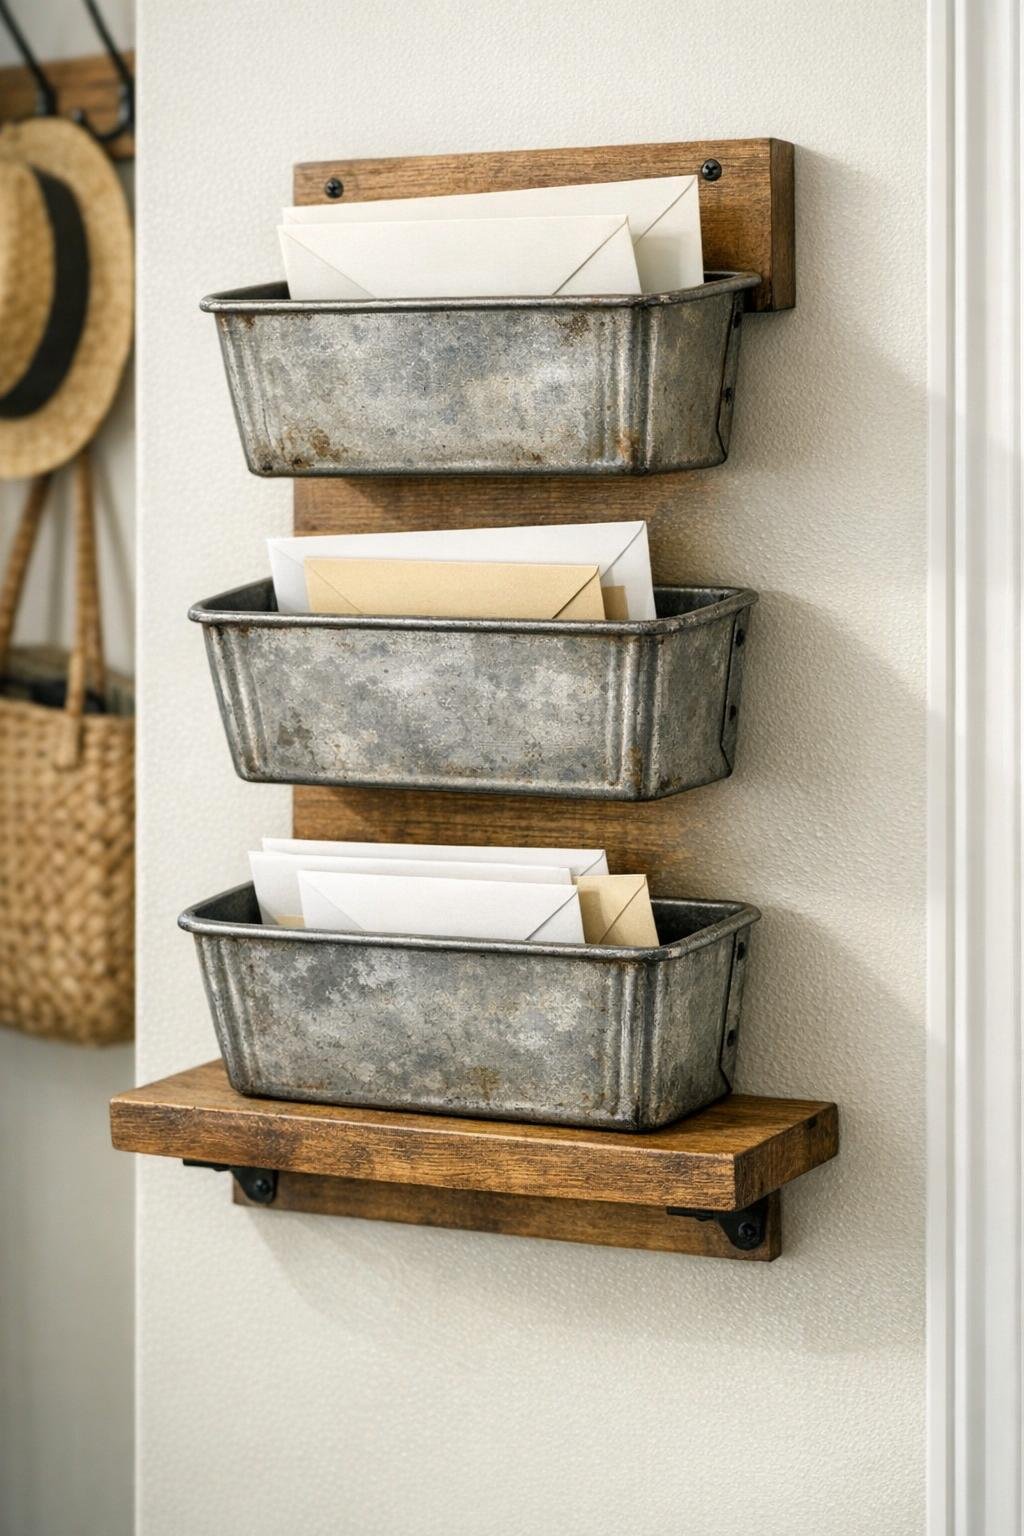
Variations & Tips
Use matching pans: If you want a cleaner, more polished look, choose loaf pans that are the same size and finish so the stack feels intentional.
Keep the patina: I personally love a little age on vintage metal, so I’d only remove loose rust and seal the surface rather than painting over all the character.
Add a key rail: A row of small hooks installed underneath the floating shelf makes this even more useful for keys, dog leashes, or my ever-missing spare car key.
Mount into studs when possible: Even though paper is light, a wall-mounted piece by the front door gets bumped more than you think, so extra support is worth it.
Try a family sorting system: If paper piles up fast in your house, assign one pan per person or one pan per category to make weekday cleanup easier.
Check pan depth: Before you commit, test that your loaf pans are deep enough to hold standard envelopes without them tipping forward.
Protect sharp edges: Older metal pans can have rough rims, so run your hand carefully around each one after sanding and file any spot that still feels sharp.