
This is one of those wonderfully simple projects that looks far fancier than it has any right to. With an aluminum flexible dryer vent hose, a little orange spray paint, and a couple of basic garage items, you can shape a charming fall decoration that has lots of texture and that classic pumpkin form without carving, sewing, or fussing with anything complicated.
I especially love projects like this when I want something seasonal on the porch or by the front door, but I do not want to spend an entire afternoon making it. If you enjoy easy home décor with a big payoff, this is a very beginner-friendly craft. I’ll show you exactly how I shape it so it looks squat and pumpkin-like instead of just a painted ring.
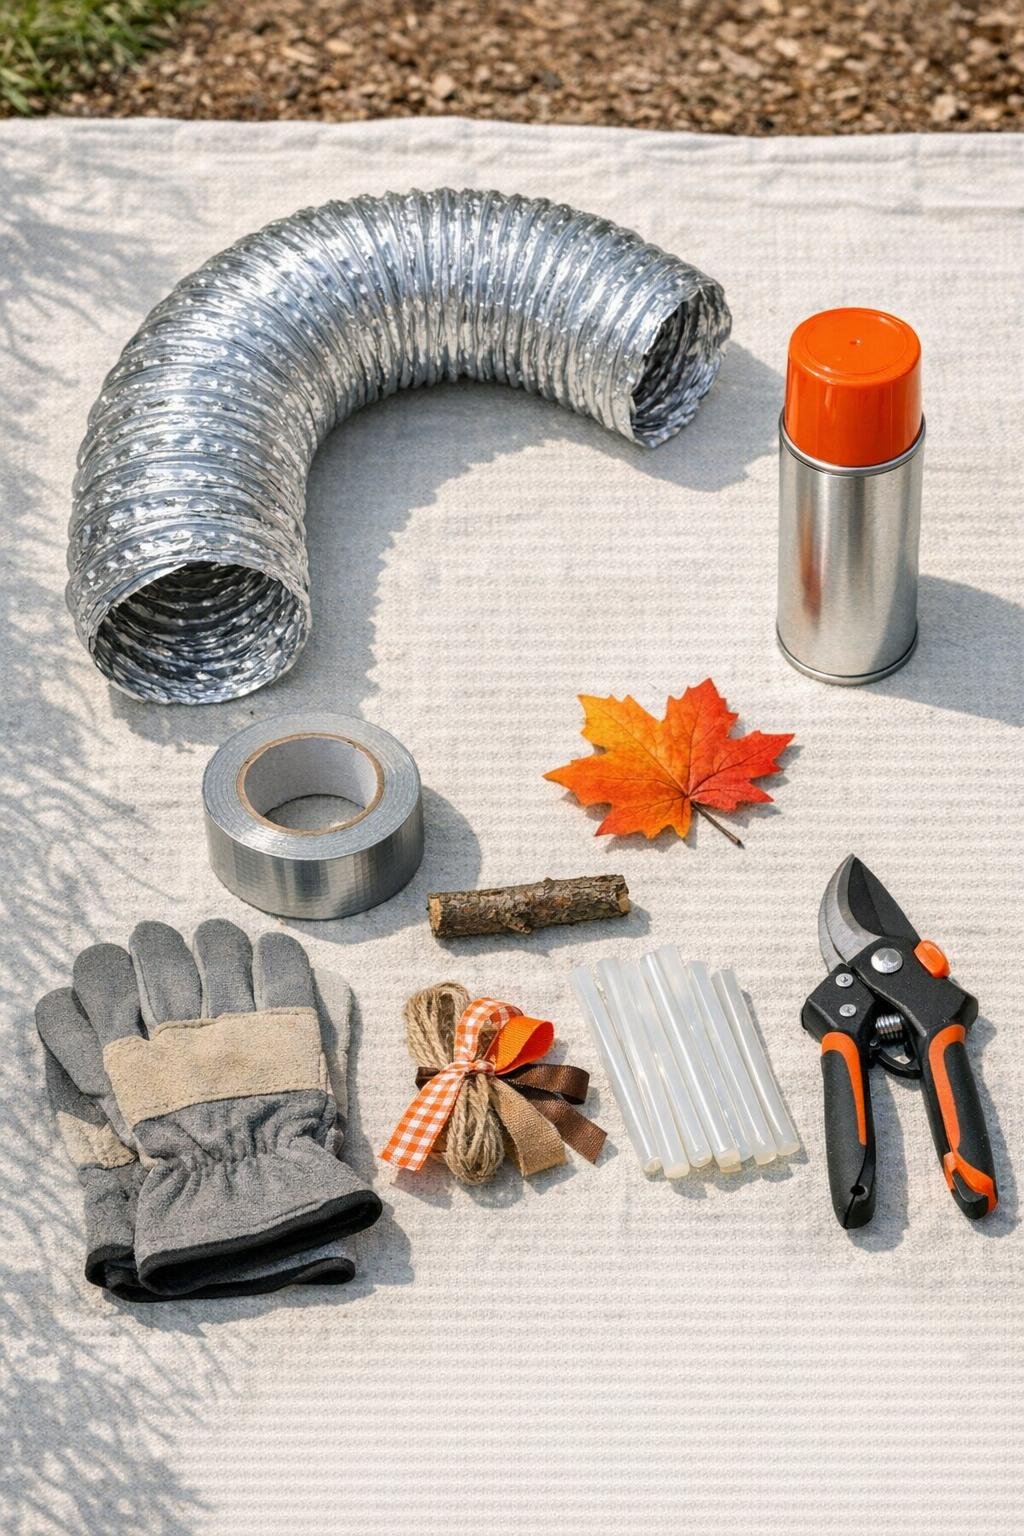
Materials
Instructions
1. Take the dryer vent hose outdoors and spread your drop cloth on a flat surface. Put on gloves before handling the hose, since the cut aluminum edges can be sharp.
2. Extend the hose enough to work with it comfortably, then lightly press and shape it so the ridges are even. This helps the paint go on more uniformly and makes the finished form easier to control.
3. Spray one light coat of bright orange paint over the outside of the hose, turning it as needed to reach the grooves. Let it dry according to the can directions, then apply a second light coat instead of one heavy coat for better coverage and less dripping.
4. Once the paint is fully dry, bend the hose into a circle about 10 to 12 inches wide. Adjust the size until it looks like a good pumpkin base and the ridges are still nicely compressed.
5. Join the two ends by pushing a strip of duct tape partly inside one opening, then fitting the other end over it and pressing the tape firmly so the connection holds from the inside. Add another short strip inside if needed to secure the seam.
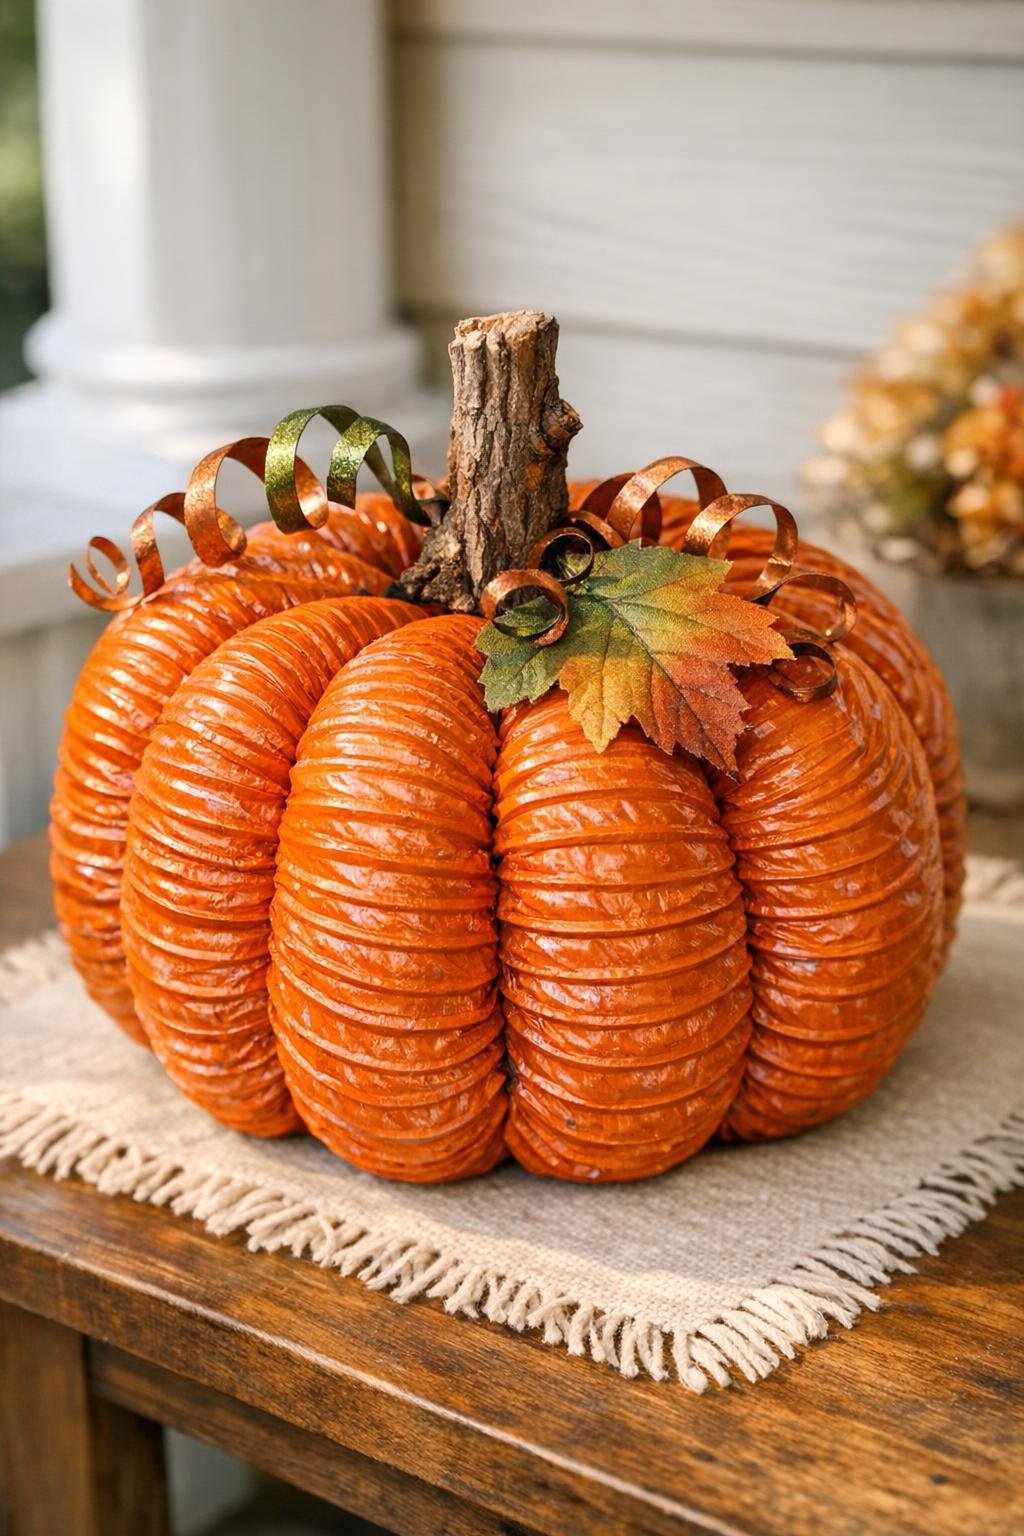
6. Scrunch and stack the ribs downward all around the circle to shorten the height and create a squat pumpkin shape. Keep adjusting with your hands until it looks full and evenly rounded.
7. Turn the taped joint to the top center so it will be hidden by the stem. Nestle the branch piece over that spot and hot glue it firmly in place.
8. Curl the ribbon pieces by pulling them gently across the edge of closed scissors, then glue the curls beside the stem. Add the faux leaf near the stem for a finished fall look.
9. Let the glue cool completely, then fluff the ribbon curls and make any final shaping adjustments to the ribs. Set the finished pumpkin on a covered porch, mantel, shelf, or entry table for display.
Variations & Tips
Size option: Use a longer section of hose for a larger pumpkin, or compress the ring tighter for a shorter, plumper shape. I like medium-sized ones best because they are easy to style in groups.
Color variation: If bright orange is not your style, try muted pumpkin orange, cream, sage green, or matte white for a softer farmhouse look. Just keep the coats light so the ribbed texture stays crisp.
Kid-friendly display idea: I would not hand the spray painting or sharp hose edges over to kids, but children can help choose the ribbon and leaf once the pumpkin is assembled. That is a fun way to let everyone put a little personality into your fall décor.
For picky decorators: In my house, even seasonal décor gets opinions, so I keep embellishments simple. If your family prefers a cleaner look, skip the ribbon curls and use just the stem and one leaf.
Weather tip: This pumpkin is best for a covered porch or indoor decorating since spray paint can wear down in direct rain and rough weather. If you want it outside longer, place it somewhere sheltered.
Safety tip: Always wear gloves when cutting or shaping aluminum vent hose because the edges can be sharp. I also recommend letting the painted hose dry completely before scrunching it, so you do not end up with fingerprints or smudges in the finish.