
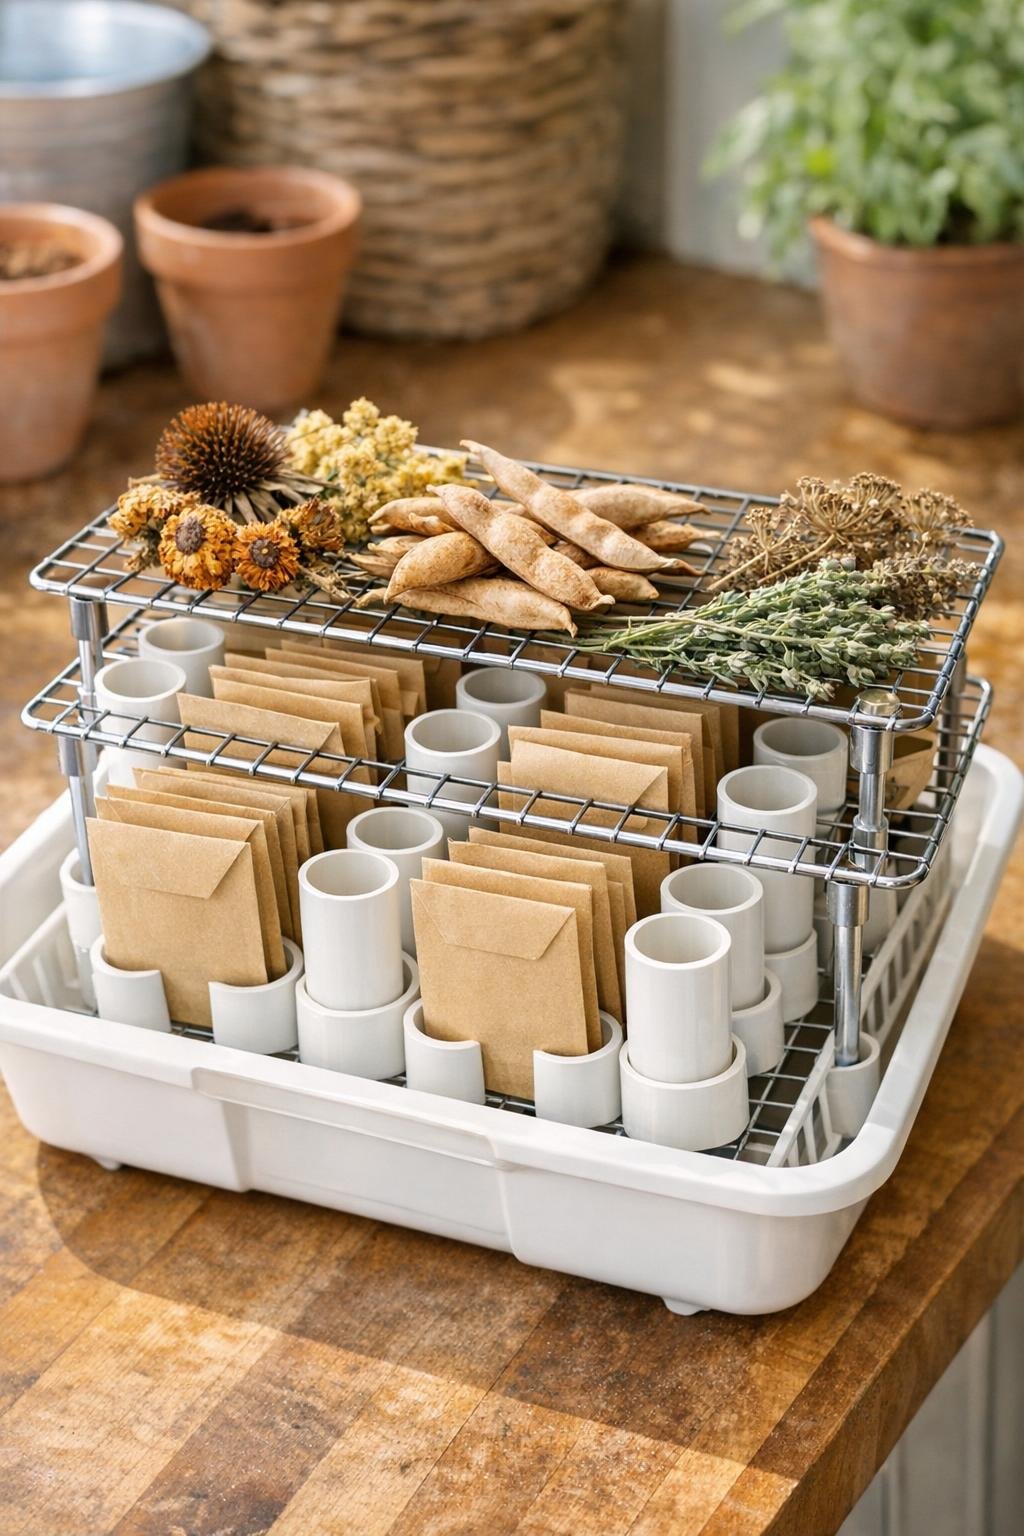
By late summer and early fall, my kitchen table always seems to fill up with seed heads, bean pods, and little paper envelopes of next year’s garden. After years of balancing everything on plates, towels, and baking sheets, I finally put together this simple seed-saving drying rack from short PVC pipe sections and two easy dollar store finds. It keeps seed packets upright, gives pods and flower heads a place to dry, and makes the whole business look tidy enough that folks really do ask where I bought it.
This is a good project for gardeners who like to save zinnia, marigold, bean, pea, herb, or wildflower seeds without spending much money. I like it because it’s sturdy, washable, and easy to size for a windowsill, mudroom shelf, or pantry corner, and it comes together in an afternoon with very little fuss.
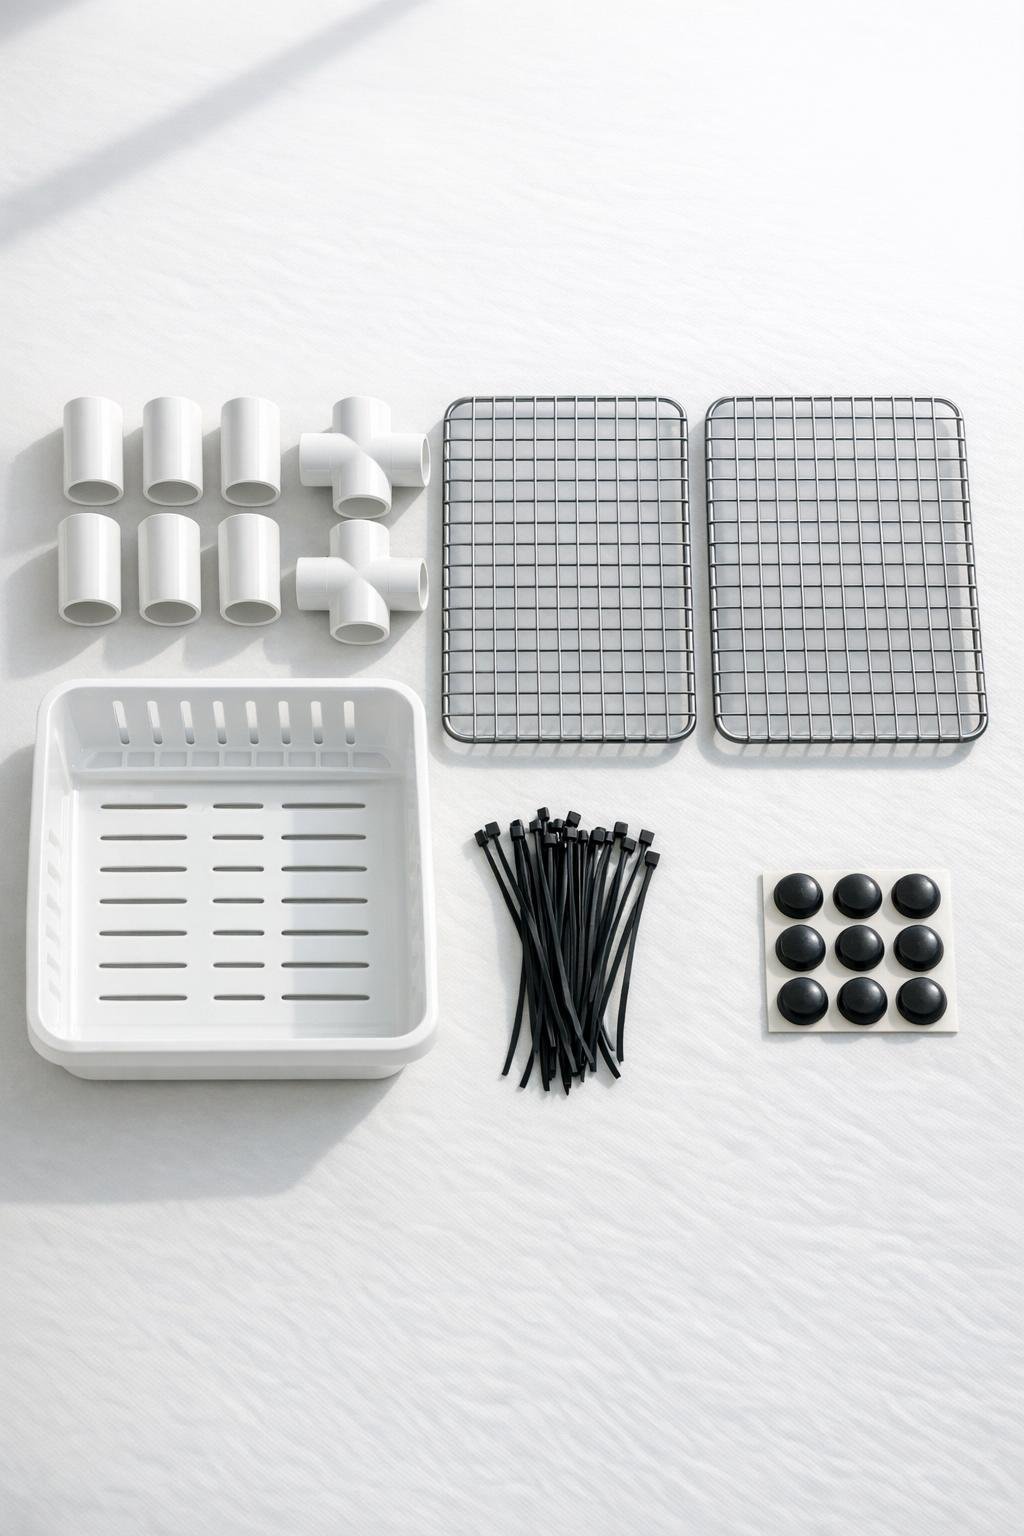
Materials
Instructions
1. Wash and dry the dish tray and cooling racks so your seed rack starts clean and dust-free. If you’re using thrifted or dollar store pieces, give them a good scrub and let them dry fully.
2. Cut the PVC pipe into twelve 2-inch-long sections if they are not already cut. Sand the cut edges until they feel smooth, because rough edges can snag paper seed envelopes and scratch your hands.
3. Set the dish tray on your work surface and place one cooling rack inside it to check the fit. The tray will catch chaff and loose seeds, while the rack lifts your drying materials up for better airflow.
4. Stand the PVC sections upright across the cooling rack in evenly spaced rows. I like to make three rows of four holders so there’s room for plenty of envelopes or small bundles without crowding.
5. Attach each PVC section to the cooling rack with two zip ties threaded through the rack wires and around the pipe. Pull them snug so the pipe pieces do not wobble, then trim the zip tie tails close.
6. Lay the second cooling rack on top as a light upper support, lining it up so it gently boxes in the PVC holders and adds stability. Secure the top rack to a few of the PVC sections and to the lower rack at the corners with more zip ties.
7. Turn the tray over and stick the rubber bumpers on the bottom corners. This keeps the rack from sliding around on a counter or shelf and gives it a little lift for airflow underneath.
8. Test the rack by slipping paper envelopes into some PVC holders and laying seed heads, herb sprigs, or bean pods across the top rack. Adjust any pipe sections that feel crowded so everything has breathing room.
9. Place the rack in a dry, well-ventilated spot out of direct rain and heavy humidity. As seeds finish drying, tap loose seeds into envelopes and let the tray catch the bits and pieces that always seem to scatter.
Variations & Tips
Make it narrower: If you only save a handful of seeds, use one smaller cooling rack and 6 to 8 PVC sections in a compact tray for a windowsill-sized version.
Use different pipe sizes: A 1 1/4-inch PVC works well for slimmer envelopes, while 2-inch PVC holds larger folded packets or small mesh bags of seed heads.
Label smartly: I write seed names and dates on kraft envelopes before I set them into the rack. That way, when the goldenrod fluff and zinnia petals start flying, I’m not guessing what belongs where.
Keep airflow gentle: A dry room with moving air is better than hot direct sun for most saved seeds. I’ve learned over the years that too much heat can make seeds brittle before they’re properly cured.
Try a harvest basket nearby: Set a small bowl or basket next to the rack for incoming pods and flower heads. It makes the whole seed-saving routine feel organized, which is half the battle come September.
Clean between seasons: At the end of seed-saving time, snip and replace any worn zip ties, wipe down the tray, and brush out the racks. A tidy rack stores easily and is ready when next year’s garden starts giving back.