
I have always had a soft spot for the kind of fall decorating that looks like it came together naturally, the way a basket of gourds on a porch or a wool blanket over a rocker can make a whole home feel ready for the season. This little project turns four old long wool socks into a set of soft pumpkin decorations, and it is one of those wonderfully thrifty ideas that looks far more expensive than it is. Around here, that is my favorite kind of craft.
If you enjoy simple, cozy projects and do not want to fuss with carving, painting, or buying store-bought décor every year, this is a fine one to make. I like it especially for folks who have a donation pile, a bag of rice in the pantry, and a fondness for giving old things a second life. These pumpkins come together quickly, and they look right at home on a mantel, entry table, or Thanksgiving centerpiece.
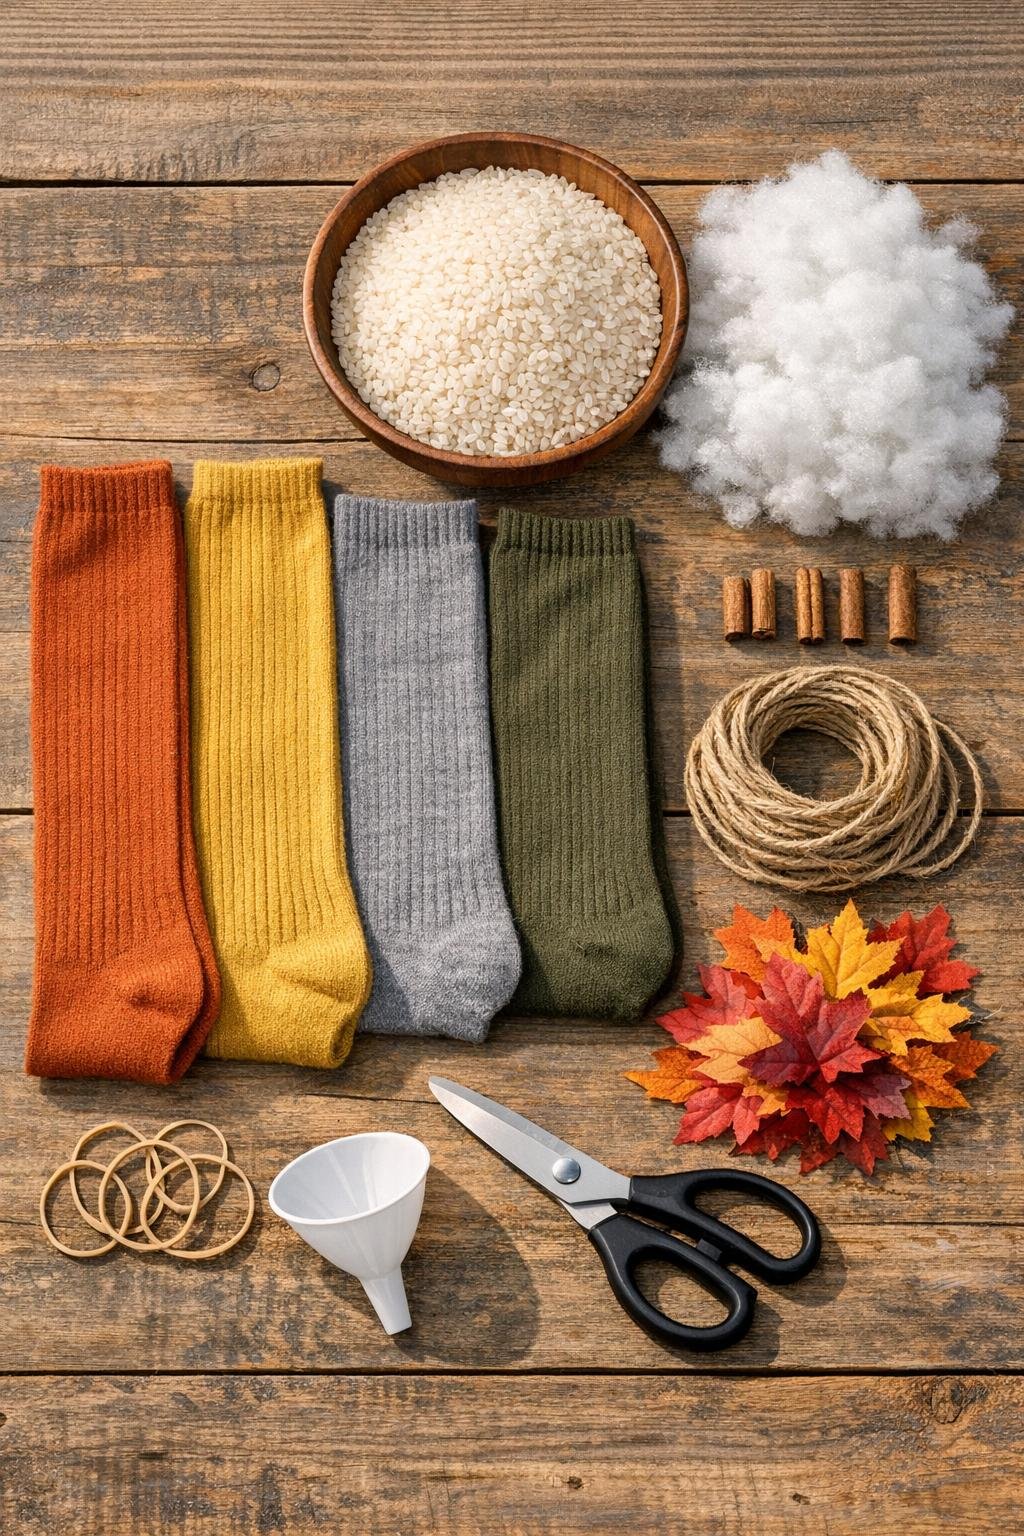
Materials
4 long wool socks, adult size knee-high or crew, in fall colors or neutral tones
Instructions
1. Lay out your four socks and trim away any badly worn heel threads or loose fuzz so each pumpkin starts with a tidy shape. If the socks are very long, decide whether you want tall pumpkins or squat ones before filling.
2. Set a funnel into the opening of the first sock and pour in about 2 to 2 1/2 cups of rice to form a weighted base. Add a small handful of fiberfill on top so the pumpkin stays soft and rounded instead of looking like a plain sack.
3. Continue alternating rice and small bits of fiberfill until the sock is filled to your desired size, leaving enough empty fabric at the top to tie it closed. I usually stop when the pumpkin looks plump but still has some give when pressed.
4. Gather the open end tightly and secure it with a rubber band, then tuck the extra fabric down into the center if the sock is long enough. If there is too much excess fabric, trim it to about 2 inches before tucking.
5. Shape the filled sock with your hands, pressing gently around the sides until it forms a rounded pumpkin. This is the part that reminds me of shaping bread dough, just a little nudge here and there until it looks right.
6. Wrap one 3-foot piece of jute twine around the pumpkin, crossing through the center and pulling snug to create sections. Turn the pumpkin as you go and make 6 to 8 evenly spaced indentations, then knot the twine securely at the top center.
7. Press a cinnamon stick or short twig into the top center where the twine is knotted to make the stem. Add a dot of hot glue if needed, though a snug fit often holds it well on its own.
8. Tuck 2 or 3 faux fall leaves around the stem and glue them lightly if you want a fuller arrangement. A small burlap bow tied just under the stem also gives the pumpkin a dressed-up look for a mantel or table setting.
9. Repeat the filling, tying, and decorating process for the remaining three socks, varying the amount of rice slightly so the pumpkins are not all exactly the same size. A little difference between them makes the whole set look more natural, like real pumpkins from the patch.
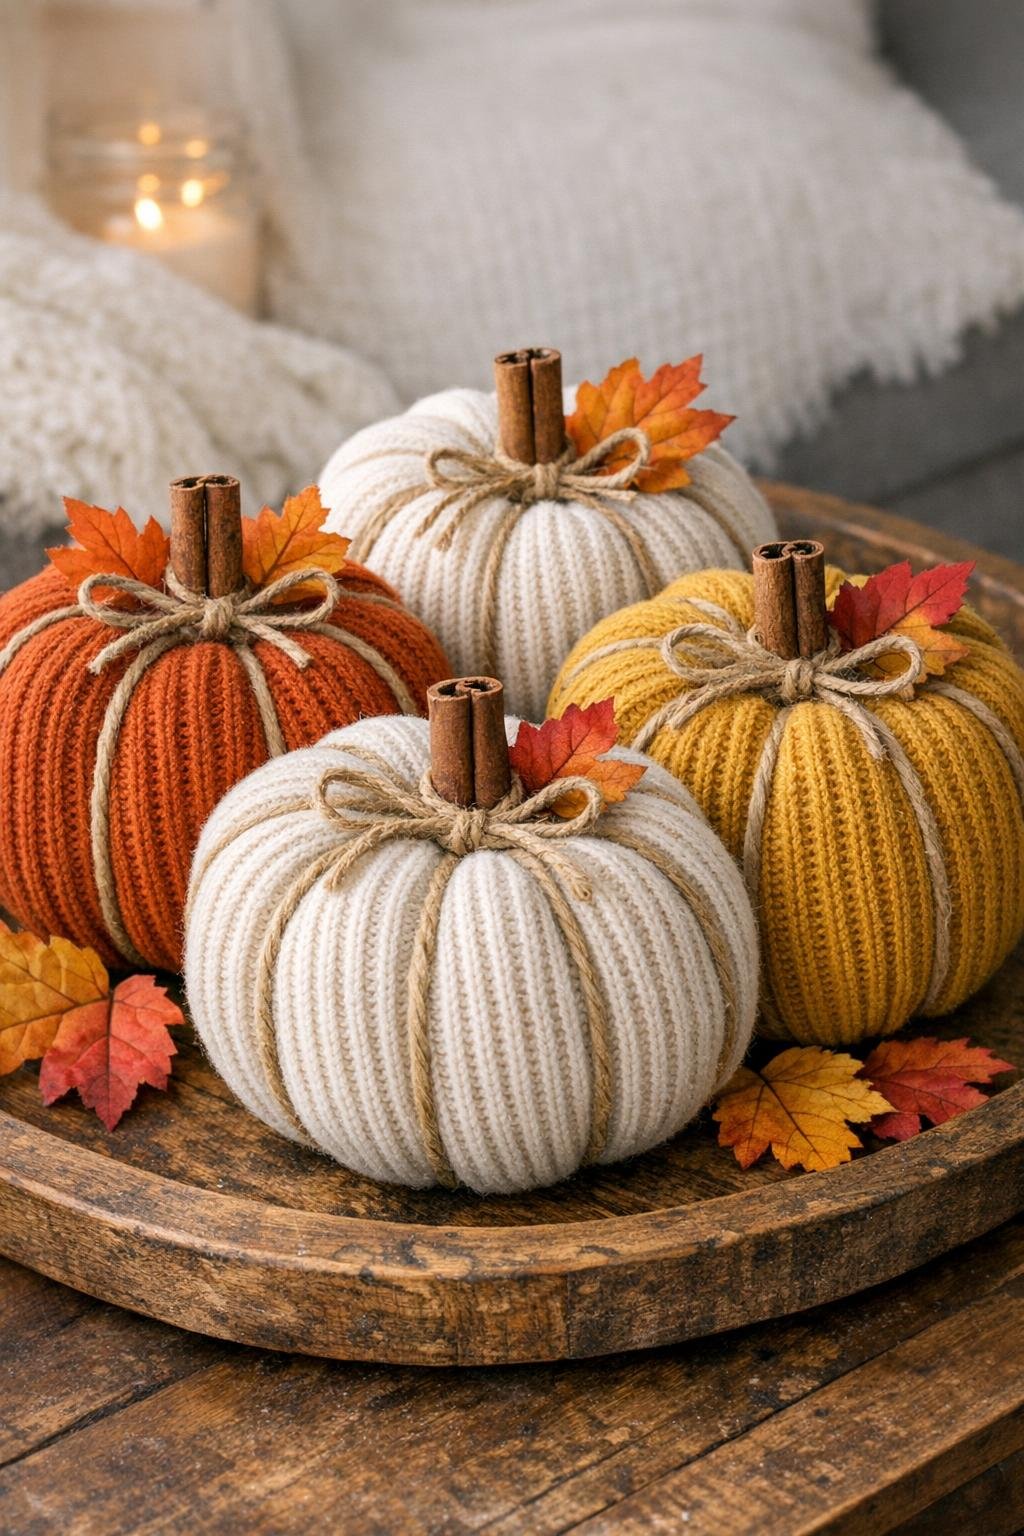
10. Arrange the four finished pumpkins together and adjust their shapes one last time by pressing the sides and flattening the bottoms so they sit nicely. Group them on a tray, in a basket, or along the center of the table for an easy fall display.
Variations & Tips
Use different sock textures: Ribbed wool socks give more visual interest, while smoother knit socks make a plumper, simpler pumpkin. I like mixing both in one group so the arrangement does not look too matched.
Try other fillers: Dried beans, lentils, or even clean kitty litter can stand in for rice if that is what you have on hand. Rice is my favorite because it shapes easily and gives the pumpkin a nice weight.
Make a farmhouse set: Choose cream, oatmeal, gray, or faded plaid socks and use plain twine with twig stems. Those quieter colors look lovely if your home leans more rustic than bright autumnal.
Add a faint seasonal scent: Tuck a little cinnamon or pumpkin pie spice into the fiberfill before tying the sock closed. Keep it light, just enough for a gentle cozy smell when you pick one up.
Size them for a better display: Fill one sock a little fuller, two medium, and one smaller so your arrangement has a natural rise and fall. That simple trick makes them look more like a thoughtful store display, though they cost next to nothing.
Store them carefully: At the end of the season, place the pumpkins in a dry bin with tissue paper so the fabric stays clean and the stems do not snap. I have kept soft fabric pumpkins for years this way, and every fall it feels like greeting old friends again.