
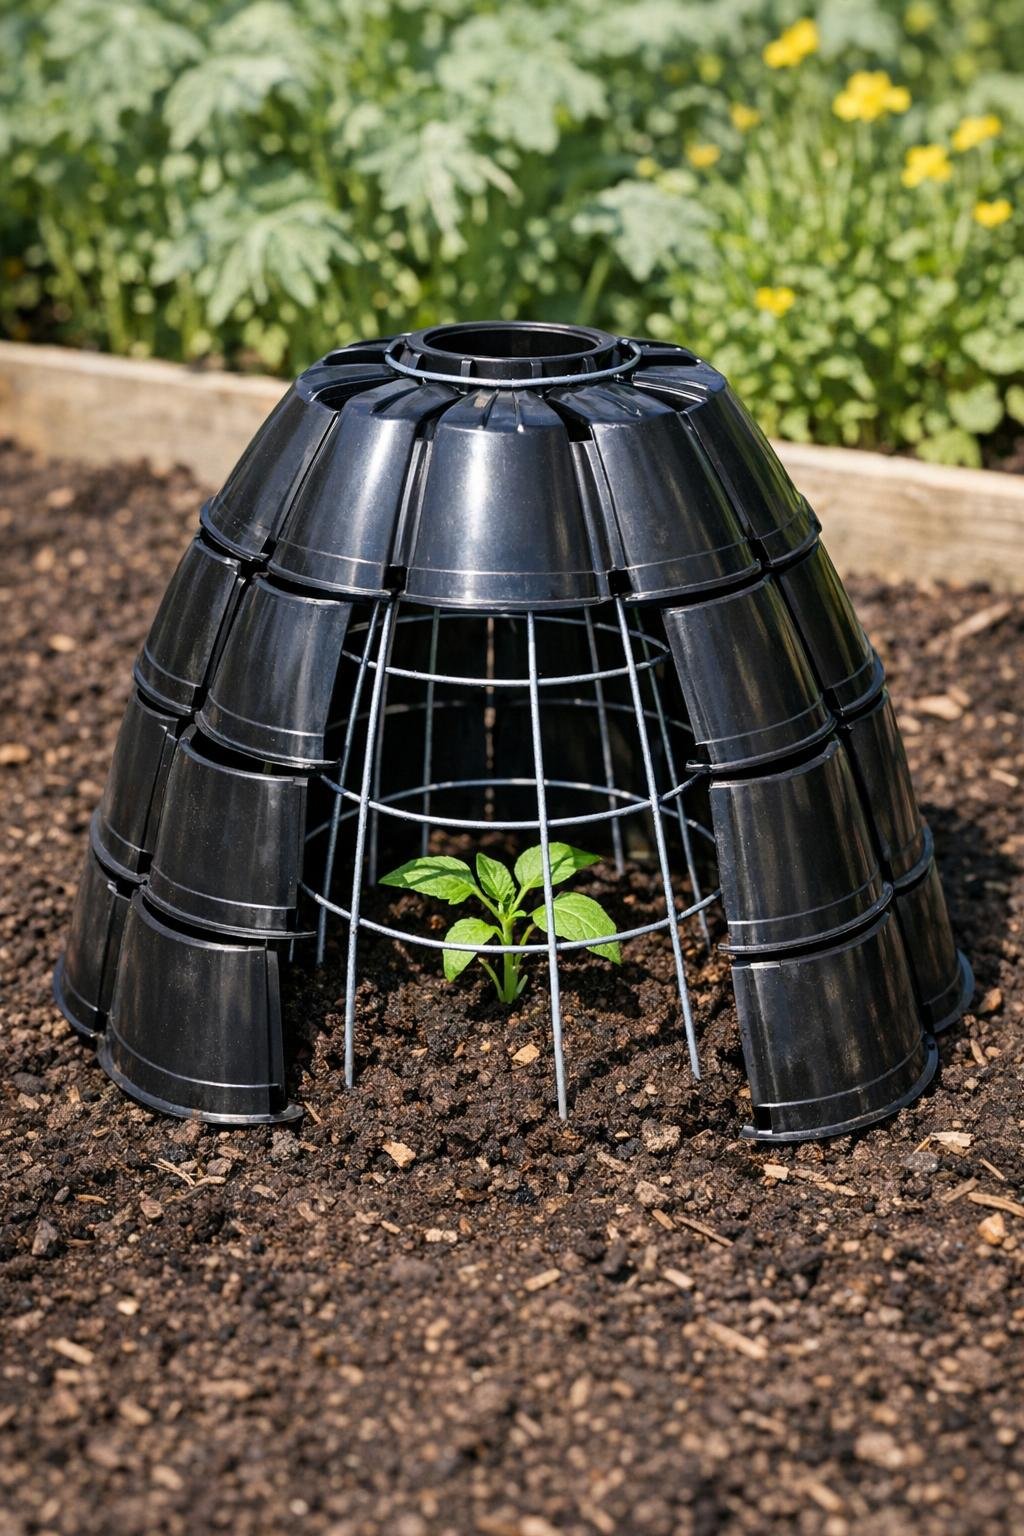
When I want to get a few tender seedlings into the garden a little earlier than the weather really ought to allow, I reach for the simplest fix I know: a little homemade protection dome. This one is made from cut plastic nursery pots and a common tomato cage, and it does a fine job shielding young plants from light frost, cold wind, and those sharp spring nights that sneak up on you here in the Midwest.
I’m fond of projects like this because they use up things that often collect behind the shed anyway. If you’ve got a stack of black nursery pots and an old wire cage, you can turn them into something sturdy, useful, and surprisingly tidy-looking. It’s a good beginner project, and if you’ve got seedlings, herbs, or small vegetable starts you’re hoping to baby along, this is one worth making.
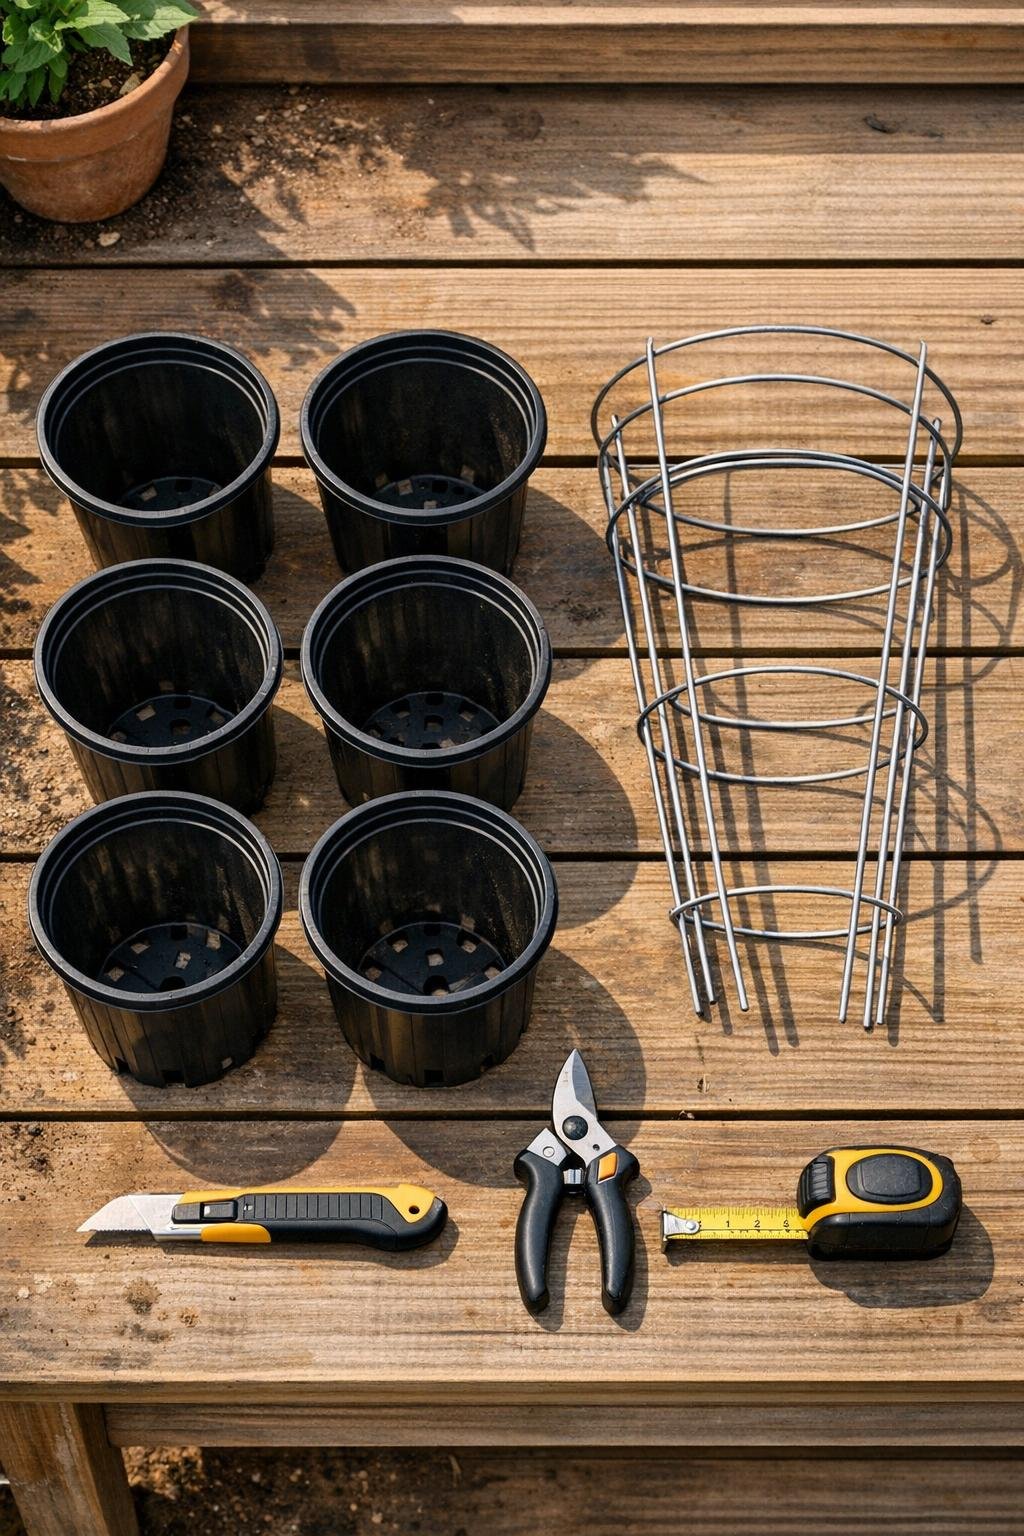
Materials
Instructions
1. Gather six matching plastic nursery pots and one standard wire tomato cage, and set everything on a steady work surface. Matching pots make the finished dome look neater and stack more evenly.
2. Use the utility knife to carefully cut the bottom out of each nursery pot, following the inner edge where the base meets the sidewall. Trim away any rough plastic so each pot becomes an open-ended cylinder.
3. Snip off the top circular ring of the tomato cage with heavy scissors or pruning snips so you’re left with the tapered wire frame and its vertical supports. Remove any sharp clipped ends or bend them inward with pliers if needed for safety.
4. Turn the tomato cage upside down so the wider end sits at the top and the narrower end points down toward the seedling. This inverted shape gives you a stable frame and a smaller opening near the ground.
5. Slide one cut nursery pot over the top of the upside-down cage and let it rest on the wire ring. Add a second pot below it, overlapping by about 1 inch, so you start forming a tall protective shell.
6. Continue stacking the remaining cut pots downward, overlapping each one slightly to create a shingled column around the cage. Adjust the overlap until the dome is tall enough to cover your seedling while still leaving a little air space above the plant.
7. Set the finished dome over a newly planted seedling, pressing the tomato cage legs a few inches into the soil to anchor it. Make sure the lowest pot sits close to the ground to help hold in warmth on chilly nights.
8. On mild sunny days, lift off the top pot or raise the whole dome briefly to vent excess heat and moisture. Put it fully back in place before evening if frost is expected.
Variations & Tips
For taller starts: Use 2-gallon nursery pots instead of 1-gallon pots if you’re protecting larger pepper, tomato, or dahlia transplants.
For windy spots: Push the tomato cage legs deeper into the soil or brace one side with a small garden stake so the dome stays put during spring gusts.
For easy venting: I like to leave the top pot loose rather than fixed in place, because it’s simple to pull off in the morning once the sun gets warm.
For extra frost insurance: On especially cold nights, drape an old towel or lightweight frost cloth over the dome after sunset and remove it in the morning.
Best use: This works especially well for individual tomato, pepper, basil, cucumber, or squash seedlings that need a little coddling their first week or two in the garden.
A practical reminder: Black plastic warms quickly in the sun, so check protected plants by late morning. Around here, spring weather can turn from frosty to hot in a hurry, and a little venting keeps your careful work from cooking the very seedling you meant to save.