
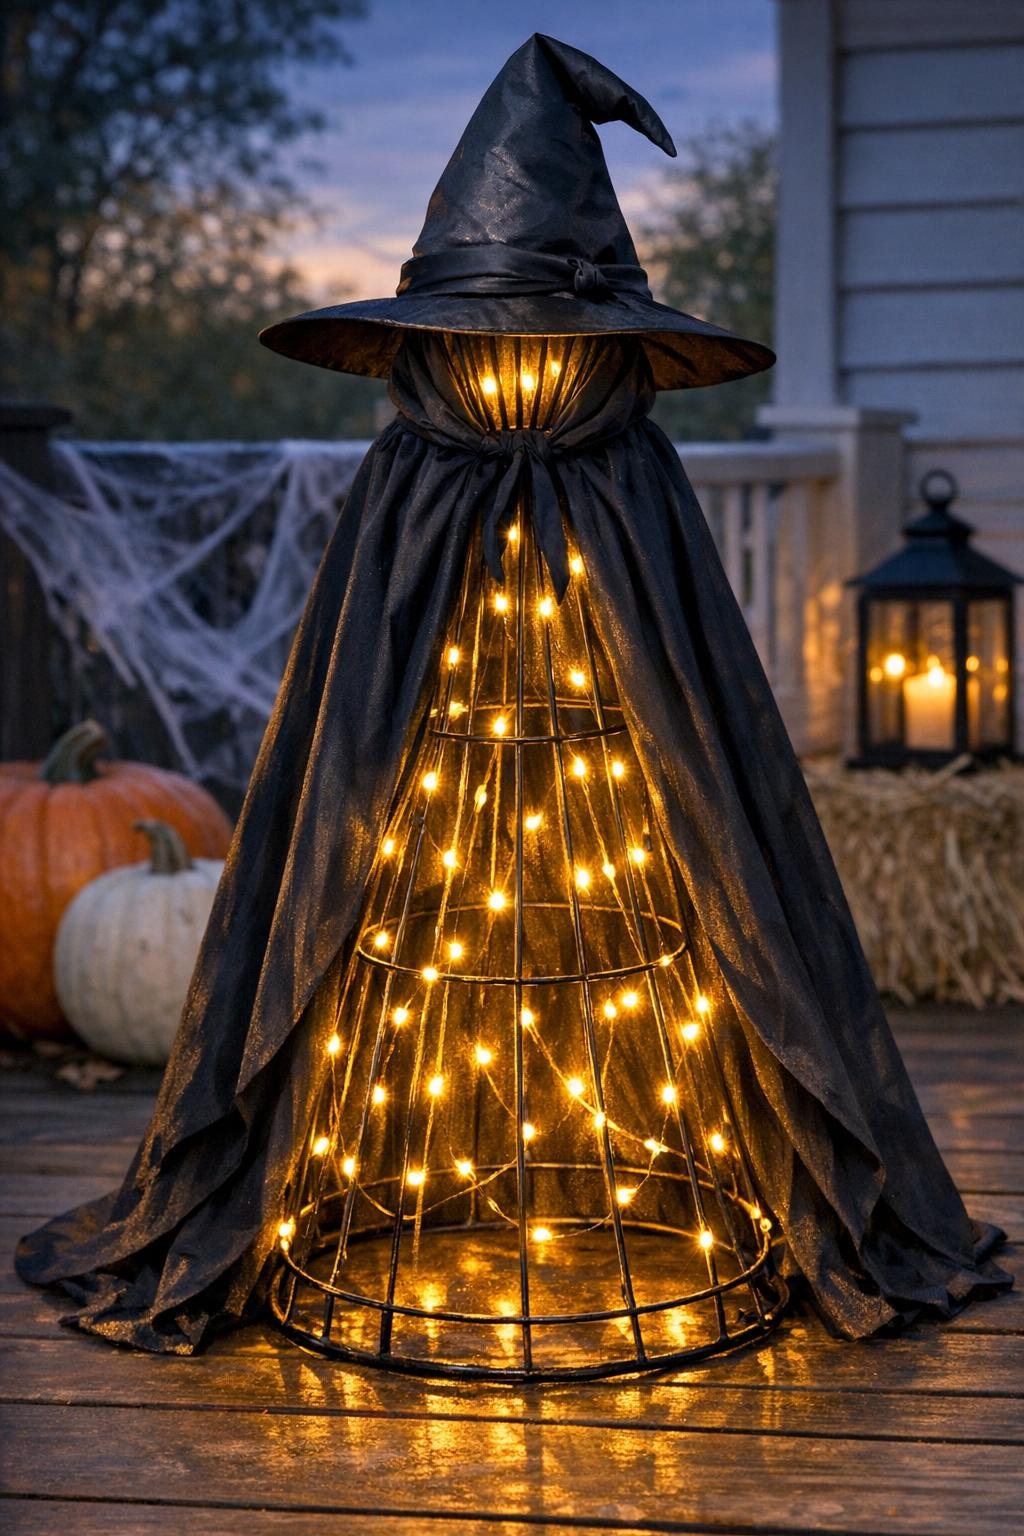
There are a lot of Halloween porch ideas that look wonderful in photos but turn into a whole afternoon of fussing once you actually start making them. This one is the opposite, and that is exactly why I love it. With an upside-down tomato cage, a simple dollar store witch hat, and a few basic supplies, you can make a glowing porch witch that looks delightfully eerie at dusk without needing power tools or a big crafting setup.
I especially like this project for busy families, beginner crafters, or anyone who wants a big seasonal impact on the front steps without spending much money. The shape does most of the work for you, and once you make one, it is very hard not to make two more so the first one has a proper little coven.
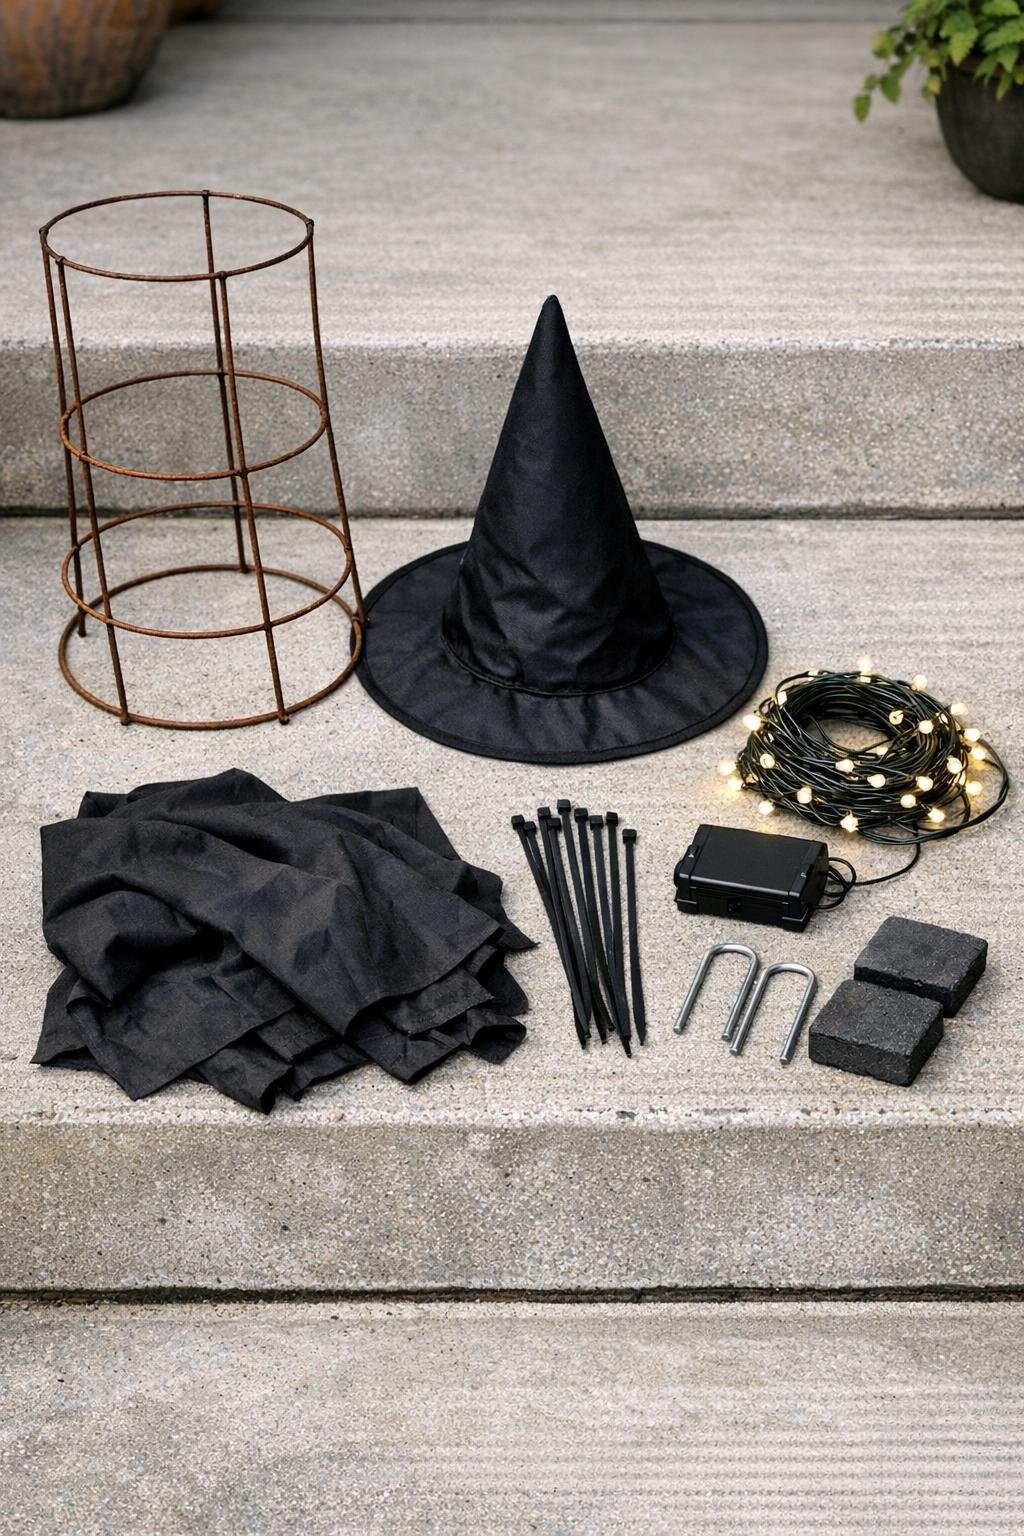
Materials
Instructions
1. Turn the tomato cage upside down so the wide circular ring sits flat on the porch and the wire prongs point straight up. This bottom ring is what gives the witch its stable base.
2. Pull the three top prongs together at the center to form a narrow neck shape. Secure them tightly with 2 or 3 zip ties a few inches below the tips so the cage holds its cone shape.
3. Add batteries to the light pack and test the string lights before attaching them. If your set has a timer, switch it on now so you can check the glow later at dusk.
4. Wrap the LED string lights around the inside of the cage from top to bottom, weaving them evenly around the vertical wires. Keep the battery pack low and toward the back so it is easy to reach but hidden once the cloak goes on.
5. Fasten the light string in 2 or 3 places with small zip ties if it sags or slides. Try to keep the lights tucked inside the frame, because that gives the finished witch a softer glowing silhouette.
6. Drape the black fabric over the cage so it falls like a cloak from the neck down to just above the ground. If you are using trash bags, split them open and overlap the pieces around the frame until the cone is covered.
7. Gather the top of the fabric around the neck and secure it to the cage with 2 or 3 zip ties. Let the lower edges hang loose so the cloak moves a little in the breeze.
8. Set the witch hat on top of the gathered prongs and fabric, then zip-tie it firmly in place through the hat brim and around the wire neck. Fluff the brim and point so the shape reads clearly from the walkway.
9. Adjust the fabric so the lights glow through evenly and the cage outline does not bulge awkwardly. Step back a few feet and check that the witch has a clean, tapered silhouette.
10. Weight the base with small pavers or bricks tucked behind the cloak, or push landscape staples over the bottom ring if you are setting it in soil or mulch. Turn the lights on at dusk for the best effect, especially if you are making a row of three.
Variations & Tips
Make a coven: This project really shines when you make three in slightly different heights. Use tomato cages of different sizes or trim fabric to different lengths so they look like a little group gathered on the porch.
For picky decorators: If anyone in your house prefers Halloween a little less spooky, use warm white lights for a softer glow instead of stark bright white. The shape still reads like a witch, but it feels more playful than eerie.
Fabric choice: Lightweight black fabric usually looks fuller and moves more naturally than trash bags, but both work. If you use fabric, a thin woven material or budget costume fabric lets more light through than thick felt.
Weather tip: Use only outdoor-rated battery LED lights, and skip plug-in strands if rain is in the forecast. I also recommend timer lights, because once these are set outside, it is nice not to fiddle with them every evening.
Wind control: On breezy porches, secure the base right away instead of waiting to see what happens. The bottom ring is stable, but a couple of hidden bricks or garden staples make a big difference.
Best display time: The silhouette is nicest at dusk and after dark when the inside glow is visible. In full daylight, the witch still looks fun, but the real reveal comes once the porch starts to dim.