
There is something about a pumpkin shape and a bit of old brass that makes a front porch feel instantly welcoming. This little two-piece autumn tiered tray project is made by stacking dollar store wooden pumpkin signs onto thrifted brass candlesticks, and it comes together with very simple supplies. The finished pieces have that sweet old-fashioned look I always love this time of year, like something you might have spotted on a neighbor’s stoop during harvest season.
I especially like this project for folks who want seasonal front door décor without building anything complicated. If you can paint, glue, and line things up carefully, you can make these. They are small enough to finish in an afternoon, but charming enough to look like you fussed over them all weekend.
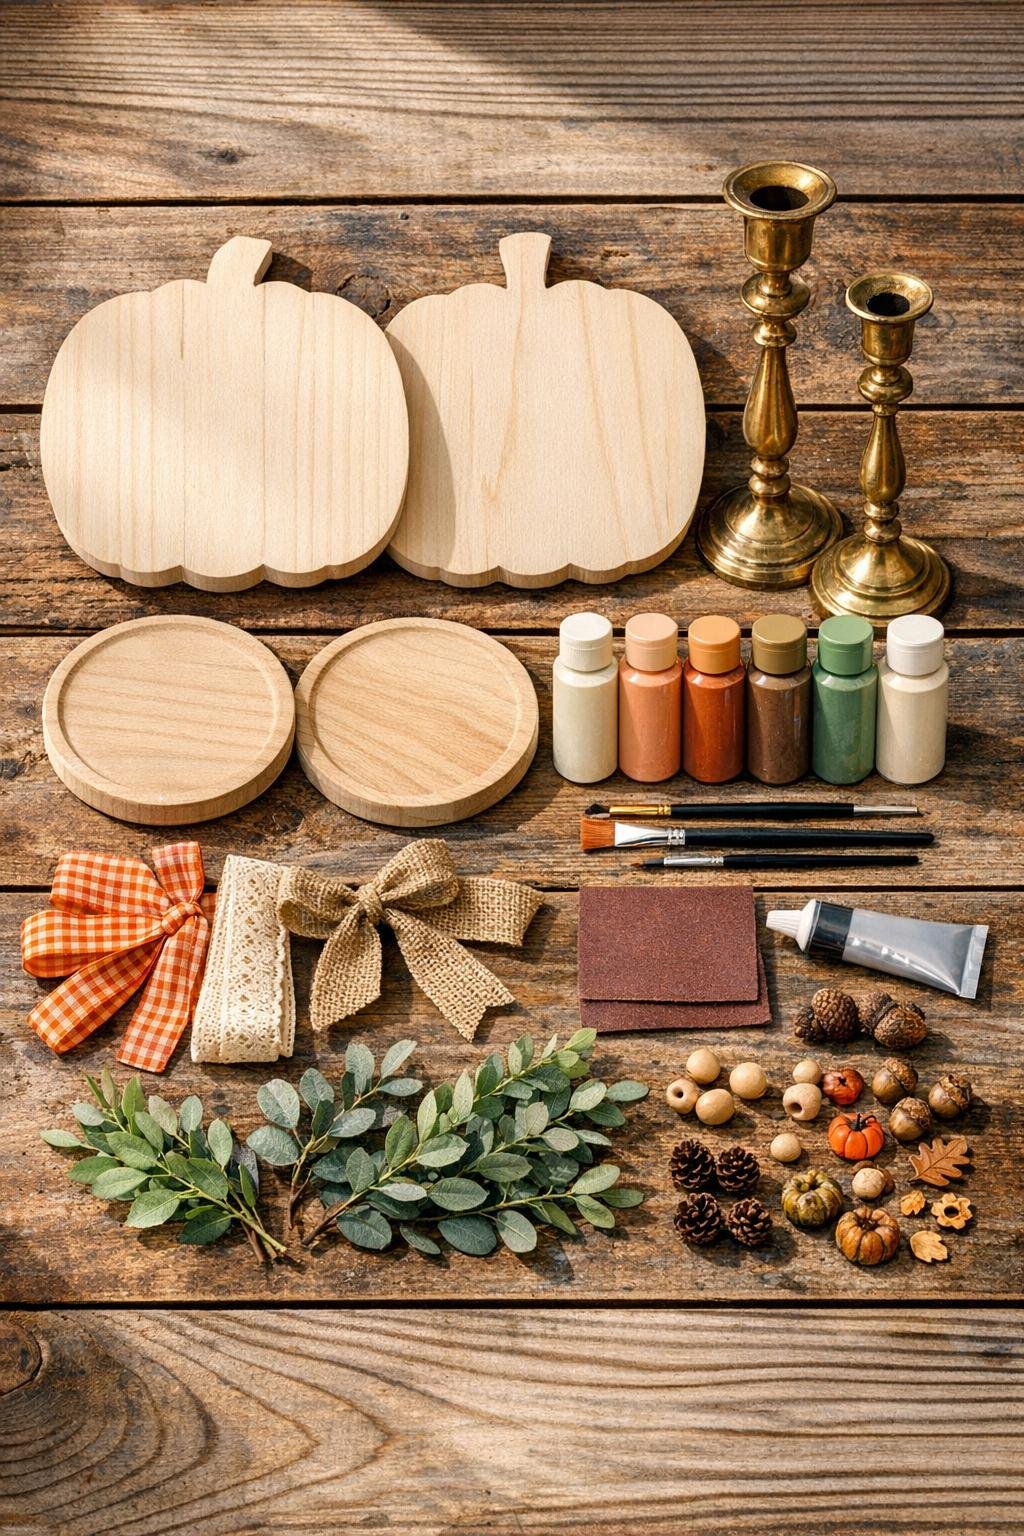
Materials
Instructions
1. Lay out your two wooden pumpkin signs, candlesticks, and round wood bases to decide which sizes look best together. I like to make one piece slightly taller than the other so they look like a matched pair instead of twins.
2. Remove any tags, hanging strings, staples, or loose hardware from the pumpkin signs. Lightly sand the front and edges so the paint goes on smoothly.
3. Paint the pumpkin faces in your chosen base color, using cream for a softer farmhouse look or muted orange for a traditional autumn finish. Let the first coat dry, then add a second coat if the wood still shows through.
4. Paint or touch up the stems in brown, then lightly dry-brush a little brown around the edges for a gently aged look. If you enjoy an old porch-market style like I do, sand the edges once the paint is dry to distress them just a bit.
5. If your brass candlesticks are tarnished, wipe them clean and buff them lightly with a soft cloth. Keep the aged brass finish if it has character; that warm worn look is half the charm of this project.
6. Center one candlestick on each round wood plaque or mini tray and glue it firmly in place. Hold each one steady for a minute, then let the adhesive set according to the package directions before moving on.
7. Once the bases are stable, glue one wooden pumpkin sign to the top of each candlestick. Check from the front and both sides to be sure the pumpkins are standing straight before the glue begins to grab.
8. Add a ribbon bow where the pumpkin meets the candlestick or near the stem, depending on the look you want. Tuck in a few faux leaves, berries, or greenery behind the bow and secure them with glue.
9. If you want extra durability for a sheltered front door area, brush on a thin coat of matte sealer over the painted pumpkin surfaces and let it dry fully. Add felt pads to the candlestick bottoms so the pieces sit nicely and do not scratch your door shelf or porch table.
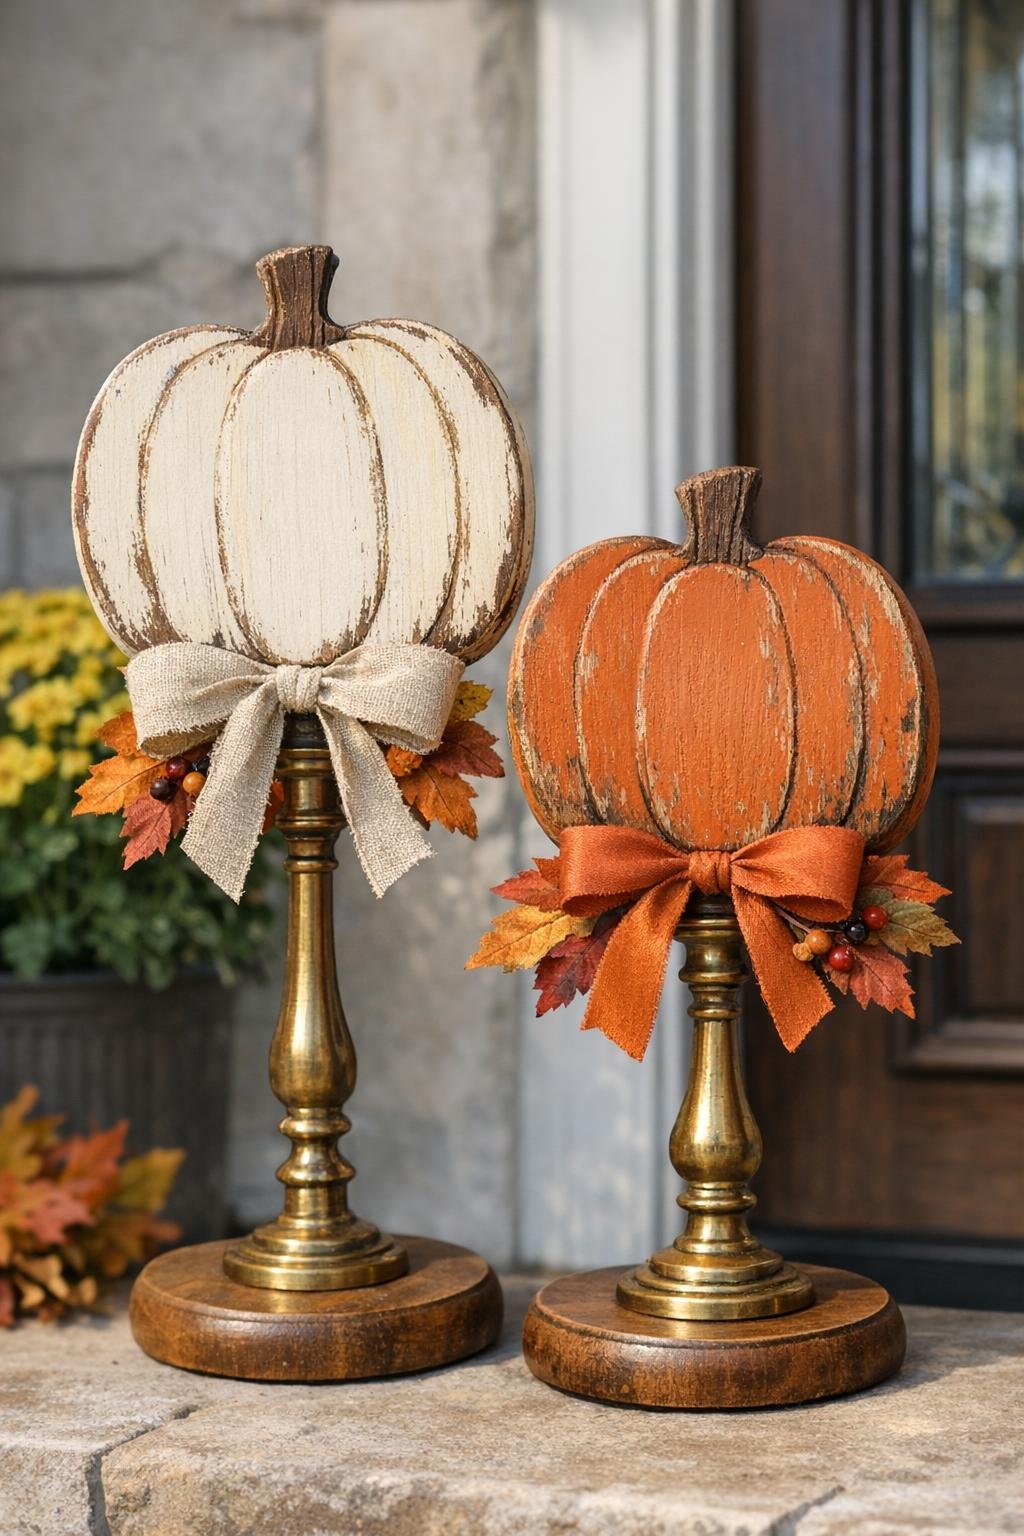
10. Set the two finished pieces together near the front door, spacing the taller one slightly behind or beside the shorter one. That little stagger gives them the feel of a tiny autumn tiered display, even though each piece is made from just a few humble parts.
Variations & Tips
Soft farmhouse version: Use cream paint on both pumpkins, natural burlap ribbon, and muted greenery for a gentle neutral look that works from September right through Thanksgiving.
Traditional harvest version: Paint both pumpkins in layered orange tones and add darker brown distressing, berry picks, and a plaid bow for a fuller country autumn style.
Better balance: If a candlestick feels top-heavy, choose a wider wood plaque for the bottom or glue a few large washers underneath the base before adding felt pads. A sturdy base matters, especially near a busy front entry.
Glue choice: For indoor or sheltered porch use, strong hot glue can be enough, but I prefer a heavy-duty craft adhesive for the main assembly because it gives a more dependable hold over time.
Weather note: These are best on a covered porch or just inside the front door area. Unfinished dollar store wood can warp in direct rain, and even the prettiest little porch project lasts longer with a bit of protection.
Make it your own: You can swap the pumpkin signs for other seasonal wooden shapes later in the year and reuse the candlestick bases. That is the sort of practical decorating I learned to appreciate long ago—pretty, affordable, and too sensible to use only once.