
If you’ve got a few beat-up tomato cages leaning in the shed, this is one of those satisfying little garden projects that turns clutter into something genuinely useful. I love a project like this in fall, when I’m cleaning up beds after work and suddenly have piles of stems, leaves, and spent annuals that feel too messy for the compost bin. By stacking old wire tomato cages into a simple debris mulching cage, you can corral all that loose garden material in one spot and let it break down into easy-to-use mulch.
This project is perfect for gardeners who want a fast, low-cost solution without hauling in new supplies. I’m always looking for ways to make my yard work feel more manageable during a busy week, and this is exactly the kind of five-minute build that saves time later.
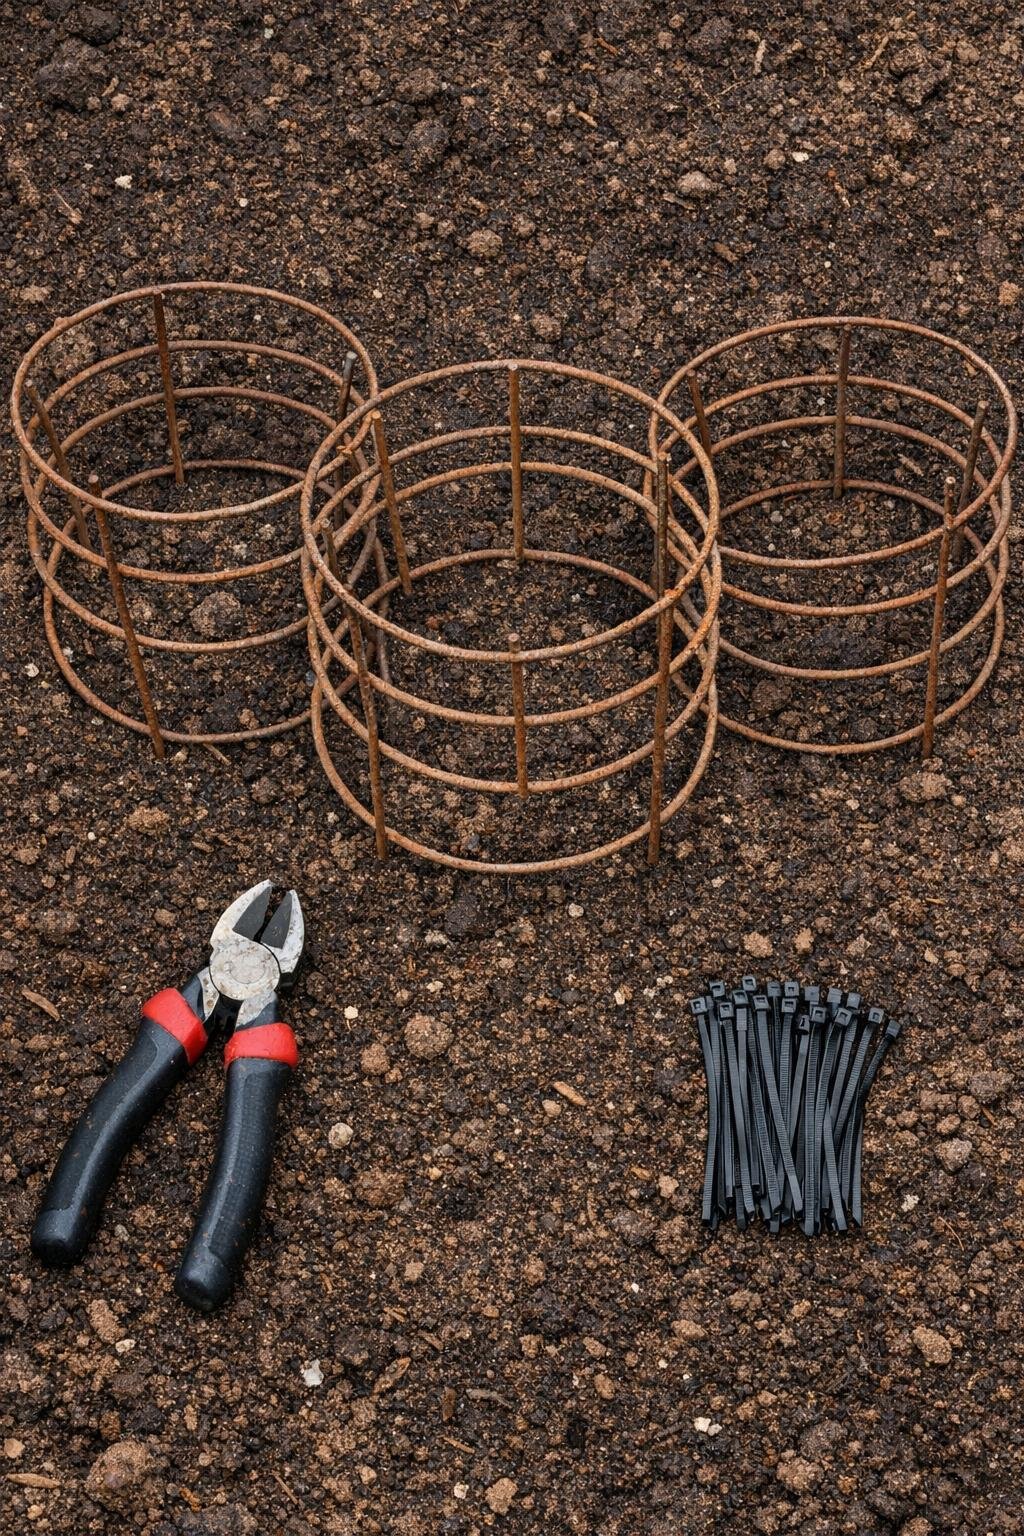
Materials
3 old wire tomato cages, standard size, about 14 to 16 inches wide and 36 to 42 inches tall
Instructions
1. Set the three tomato cages on the ground and check that the wire frames are mostly intact, trimming off any loose or dangerously bent ends with the wire cutters.
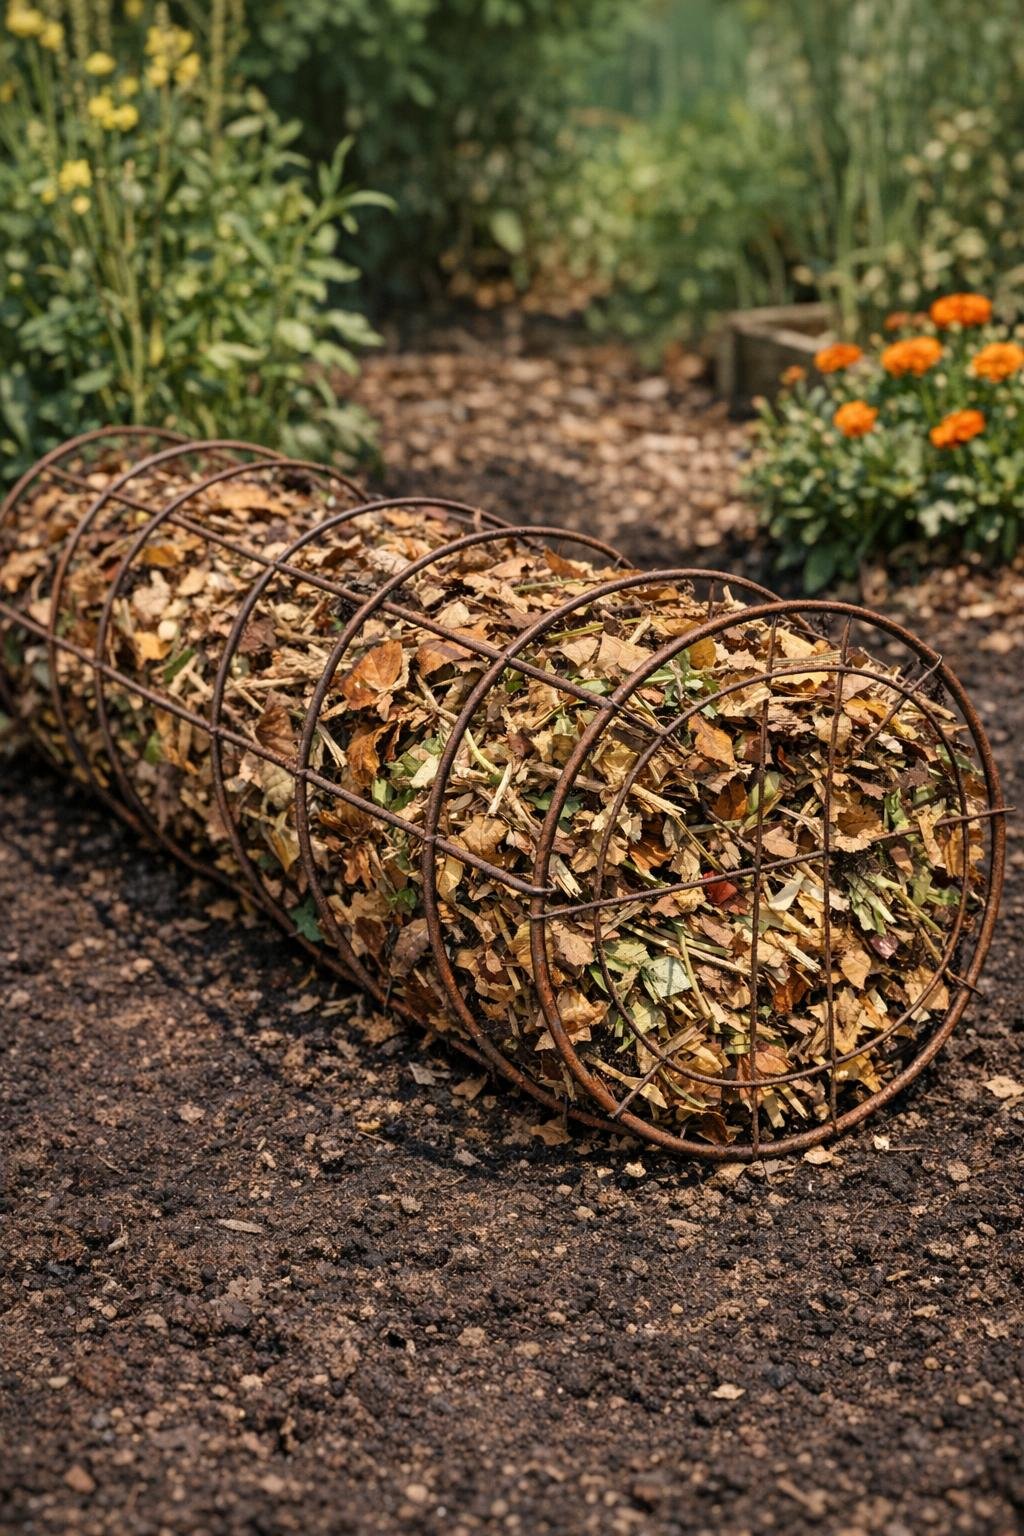
2. Turn each cage on its side so the circular rings run horizontally, then nest the narrow end of one cage into the wide end of the next to form one longer tube.
3. Overlap each connection point by one full wire ring if possible so the finished cage is sturdier and less likely to pull apart when filled with garden debris.
4. Fasten the first joint with 4 zip ties spaced evenly around the overlap, pulling each one tight so the cages hold their round shape.
5. Repeat on the second joint with 4 more zip ties, then add the remaining 4 ties anywhere the wire feels loose or springy.
6. Trim the tails off all the zip ties with the wire cutters so nothing snags your gloves or sleeves later.
7. Roll the finished cage to the spot where you want to collect fall debris, then set it on bare soil or mulch where moisture can reach the material inside.
8. Start filling the cage with chopped stems, dry leaves, pulled annuals, and other soft garden cleanup waste, mixing browns and greens as you go for faster breakdown.
9. Water the contents lightly if they are very dry, then keep adding debris over time until the pile settles and begins to break down into rough mulch.
10. When the material at the bottom looks crumbly and dark, lift the cage or pull out finished mulch from the ends and spread it around your beds.
Variations & Tips
For a shorter cage: Use just 2 tomato cages if you have a smaller yard or only a little cleanup material. I’ve done this in a side bed when I didn’t want one more big bin taking up space.
For faster breakdown: Chop larger stalks and stems into shorter pieces before adding them. Smaller bits settle better and turn into usable mulch much more quickly.
For better airflow: Don’t pack the cage too tightly. A looser fill lets air move through, which helps the pile decompose instead of turning slimy.
What to skip: Avoid adding thick woody branches, diseased plants, or weeds that have gone to seed. Those are better handled separately so you don’t create extra garden headaches next season.
Make it easier to move: Build the cage close to where you’ll use the mulch. Once it’s filled, it gets awkward fast, and I’ve learned the hard way that “I’ll move it later” is not always a solid plan after a long workday.