
If you garden through those unpredictable shoulder-season weeks like I do, this simple pre-frost watering reservoir is one of those little projects that pulls double duty. You’re repurposing plastic milk jugs into protective mini covers while also creating a tidy way to water right at the soil line, which helps on chilly mornings when I’m trying to keep plants happy without soaking leaves.
I like this project because it uses just two basic items, comes together fast after work, and looks surprisingly intentional once it’s set in the garden bed. If you’ve got a few milk jugs headed for the recycling bin and a pack of tomato cages or wire plant supports in the shed, you can make a practical setup that helps young plants through early cold snaps and dry spells.
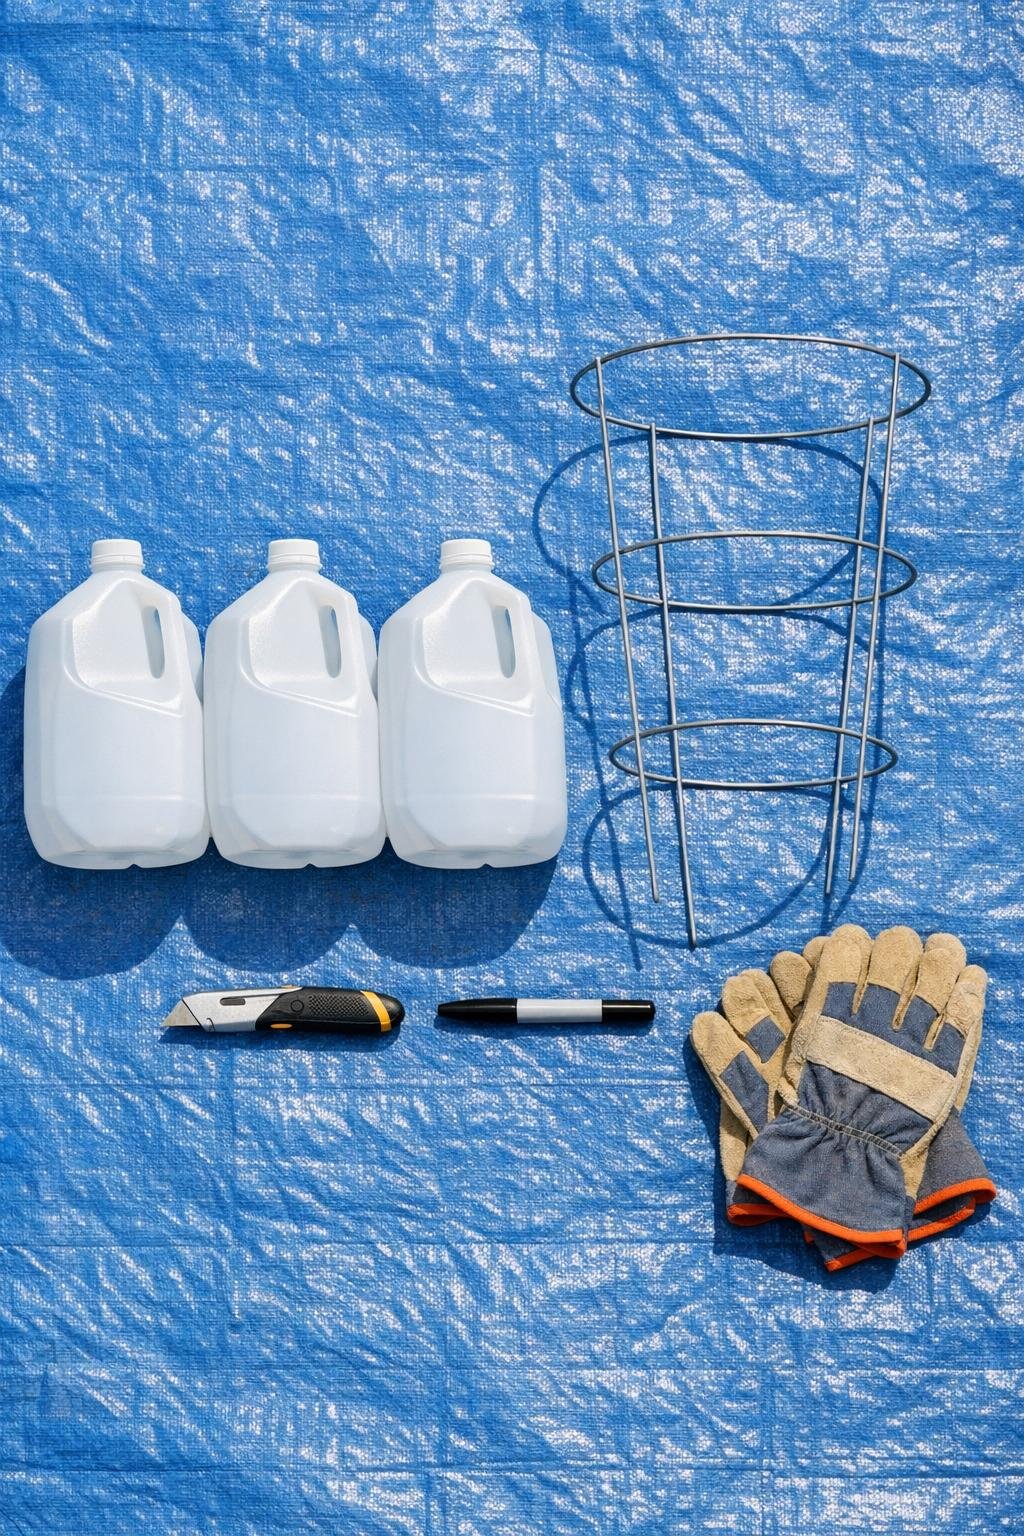
Materials
3 clean 1-gallon plastic milk jugs with caps, labels removed
Instructions
1. Rinse the milk jugs well, remove the labels, and let them dry completely so they’re easy to cut and won’t smell in the garden.
2. Put on work gloves and use the marker to draw a cutting line around the bottom of each jug, about 1 inch up from the base.
3. Carefully cut the bottom off each milk jug with a utility knife, keeping the cap end intact so each jug becomes an open-bottom watering cloche.
4. Set the tomato cage over the plant or small cluster of seedlings you want to protect, pressing the cage legs 4 to 6 inches into the soil so it stands firmly.
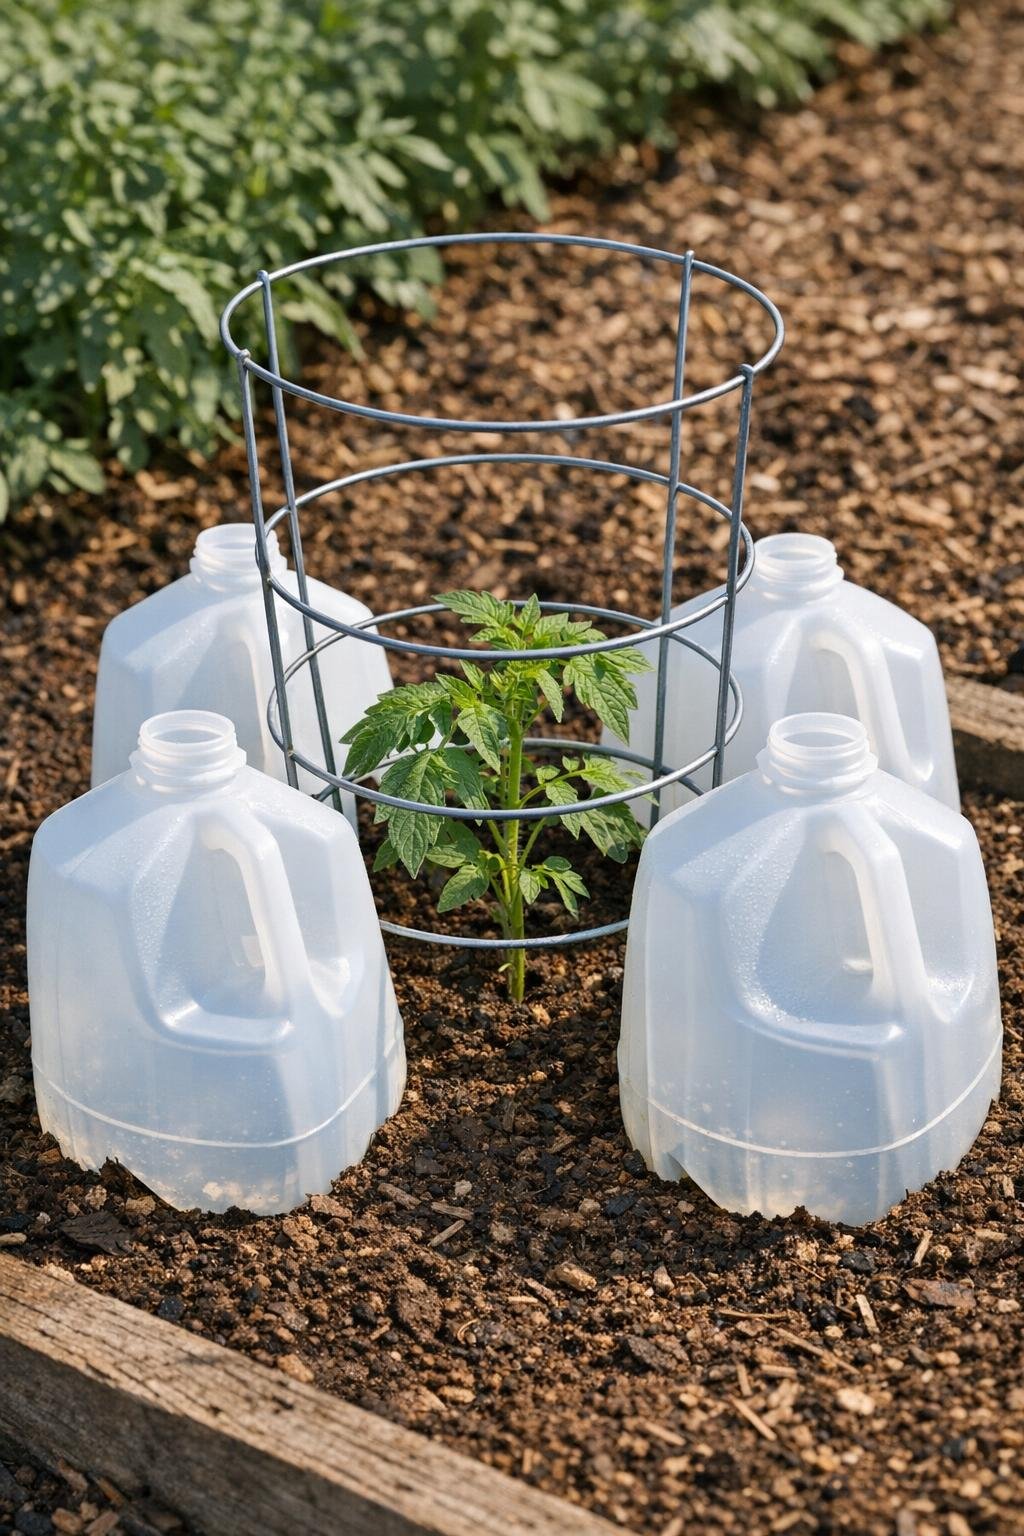
5. Slide the open-bottom milk jugs cap-end up onto the outer wires of the cage, spacing them around the lower half like protective watering sleeves.
6. Turn each cap slightly open to create a slow pour opening, then add water through the jug mouths so moisture drains gently into the soil near the roots instead of splashing across the bed.
7. On cold nights, keep the caps on to reduce airflow and give the plants a bit more shelter; on warmer days, loosen or remove the caps for ventilation.
8. Check the setup after wind or rain and reposition the jugs so they stay snug against the cage and keep the reservoir openings aimed toward the root zone.
Variations & Tips
For smaller plants: Use just one or two milk jugs on one side of the cage if you’re protecting a single pepper, lettuce start, or herb transplant.
For colder nights: Drape a light frost cloth over the tomato cage after setting the jugs in place; the cage keeps the cloth off tender leaves.
For steadier watering: Poke one very small hole in each cap if you want slower drainage, but test it first over bare soil so it doesn’t empty too fast.
For a cleaner look: Match the jug heights by trimming the cut edges evenly with scissors after the rough cut; I do this when I want the bed to look a little more polished from the sidewalk.
Safety tip: Cut the jugs on a flat surface and always work the knife away from your hand; this is one of those quick projects that still deserves a little caution.
Best use: This works especially well for fall plantings and spring starts when mornings are cold and afternoons warm up fast, which is basically classic Midwest garden weather.