
I’m a sucker for projects that turn the “why am I even keeping this?” pile into something I’ll actually use every day, and this little autumn picture ledge is exactly that kind of win. If you’ve got a few old wooden yardsticks tucked in a garage, junk drawer, or workshop corner, you can turn them into a simple three-piece display ledge that’s perfect for fall prints, family photos, or tiny seasonal décor.
What I love most is that this build looks charming and vintage without being complicated. It’s beginner-friendly, budget-friendly, and fast enough to knock out over a weekend nap-time window or after work, which is honestly my favorite category of DIY these days.
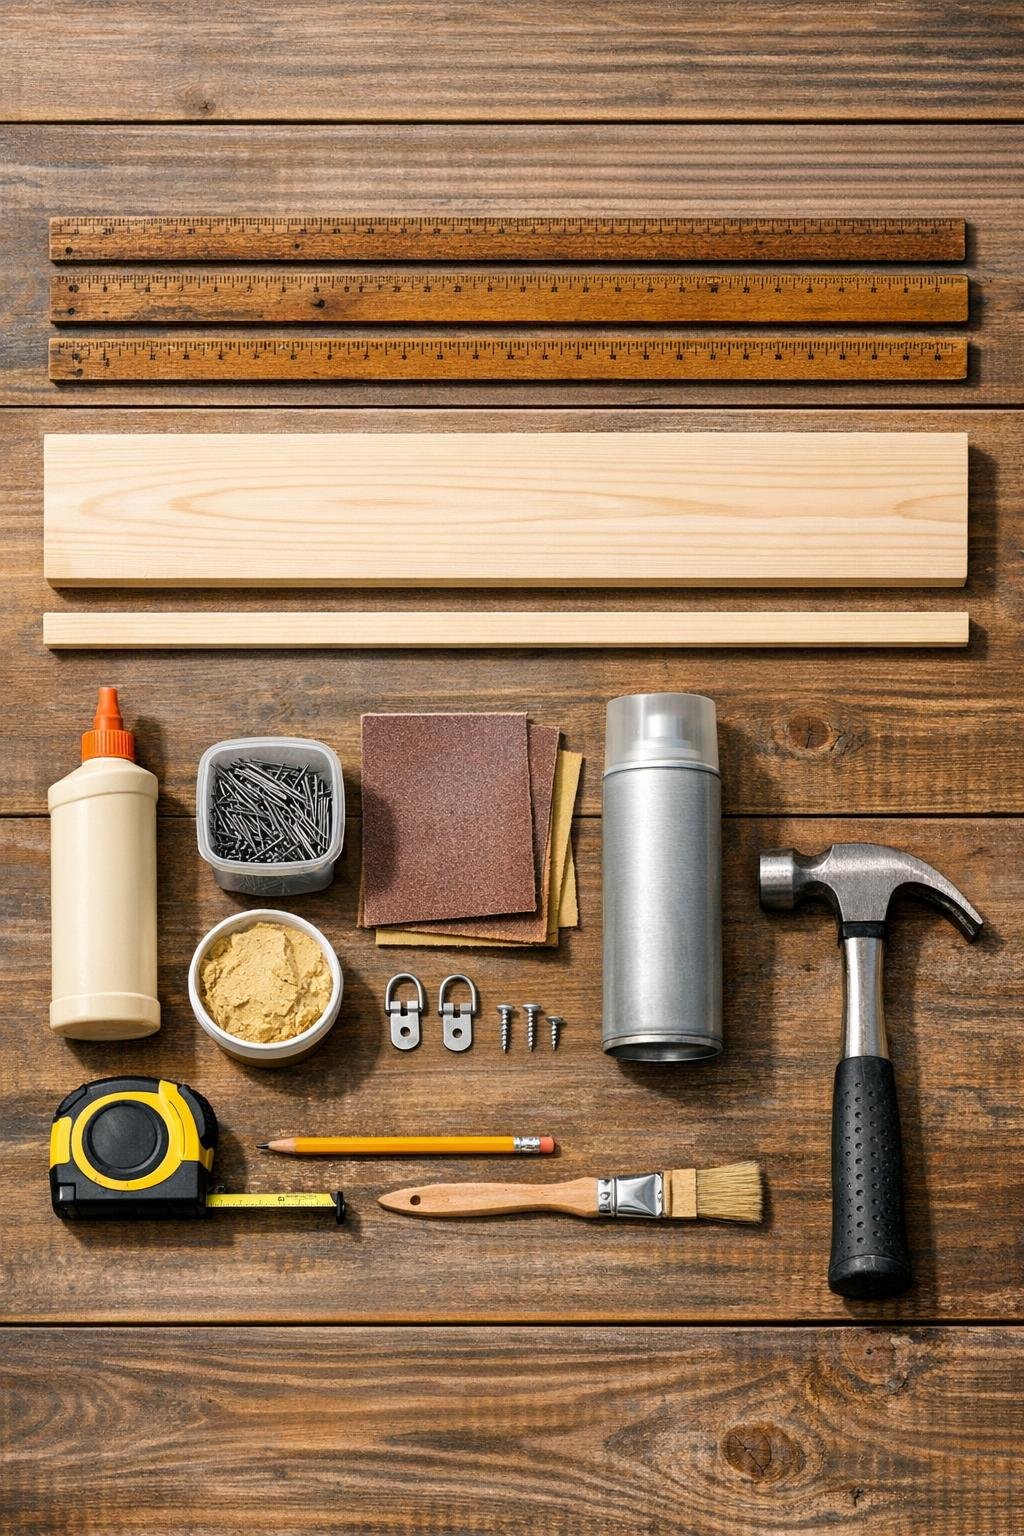
Materials
Instructions
1. Wipe down the yardsticks and wood boards with a dry cloth, then remove any loose dirt, flaking finish, or splinters. If the yardsticks are grimy like mine were, use a barely damp cloth and let them dry completely before building.
2. Lightly sand the 1 x 4 back board, the 1 x 2 shelf board, and the 1/2 x 3/4 front support strip with 120-grit sandpaper. Sand just enough to smooth the surface without making the boards look too fresh next to the aged yardsticks.
3. Fill any deep dents or nail holes in the boards with wood filler, let it dry, and sand smooth with 220-grit paper. Leave the ruler markings on the yardsticks untouched so they stay as the star of the project.
4. Lay the 1 x 4 board flat as the back piece, then center one yardstick horizontally across the top front edge. This top yardstick becomes the decorative face of the back panel.
5. Apply a thin line of wood glue to the back of that yardstick, press it in place, and secure it with a few evenly spaced brad nails. Keep the yardstick straight so the finished ledge looks clean when hung.
6. Place the 1 x 2 board along the bottom front of the back board to form the shelf, apply wood glue where the pieces meet, and nail it in place from the front or sides. This creates the shallow ledge that will hold lightweight frames and fall décor.
7. Glue and nail the 1/2 x 3/4 strip along the front edge of the shelf board. This small lip adds support and keeps pictures from sliding off, which is especially helpful if you like layering frames the way I do.
8. Center the second yardstick across the front face of the shelf board and attach it with glue and brad nails. Make sure the measurement markings face outward.
9. Center the third yardstick on the front face of the lip support strip and glue and nail it in place. Now all three yardsticks are visible from the front, giving the ledge that collected-over-time vintage look.
10. Fill any visible nail holes in the plain wood areas, then lightly sand those spots once dry. Avoid sanding over the yardsticks so you don’t blur the aged finish or markings.
11. Brush on a light coat of matte clear sealer over the entire ledge, including the yardsticks, and let it dry fully. I like a matte finish here because it protects the wood without making the old rulers look shiny and new.
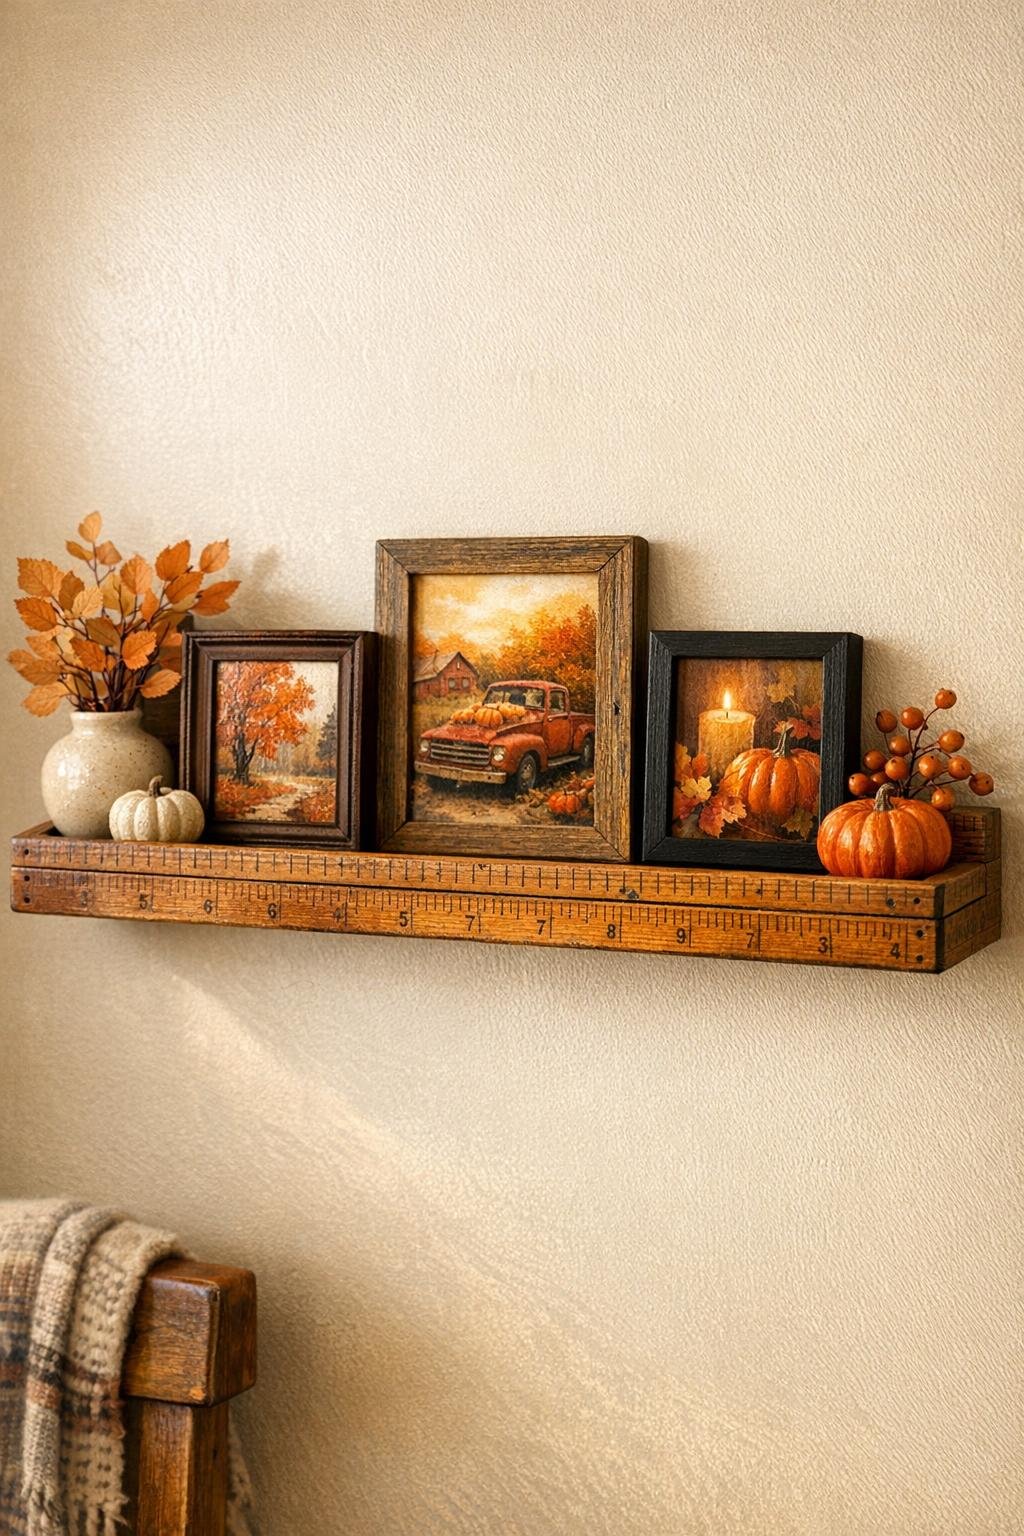
12. Attach two D-ring hangers to the back, one near each end, then hang the ledge level on wall screws or anchors. Style it with lightweight framed prints, a small autumn sign, or a mini wreath tucked in front for an easy seasonal update.
Variations & Tips
For a more rustic look: Use mismatched yardsticks with faded wood tones and small scuffs. That worn-in look makes the finished ledge feel even more collected and charming.
If your yardsticks are different lengths: Trim your back board, shelf board, and front strip to match the shortest yardstick. Keeping all the front pieces aligned makes the project look intentional.
For renters: Keep the styling lightweight and use appropriate wall anchors or picture-hanging hardware rated for your wall type. This ledge is decorative, so it doesn’t need to hold anything heavy.
Seasonal swap idea: Once the ledge is up, you can change it out all year long with recipe cards, holiday prints, school photos, or tiny greenery. I love projects that don’t get packed away after one season.
Finish tip: If the yardsticks are very dry, apply a very thin first coat of sealer and let it soak in before adding a second light coat. It helps protect the old wood without darkening it too much.
Safety note: If the yardsticks are very old, check for loose staples, rusty tacks, or cracked ends before handling. A quick inspection saves a lot of frustration once you start assembling.