
I love a project that solves a real little household problem with things I already have or can grab for a couple of dollars, and this garden twine dispenser is exactly that kind of make. If you’re always misplacing the end of the twine, fighting a tangled roll, or dragging a dusty spool in and out of the shed, this is such a simple fix.
What makes this one especially satisfying is that the aluminum soup cans stay clearly recognizable, so it has that clever “wait, what is that made from?” look neighbors always comment on. I’d recommend this for anyone who likes practical garden organization, especially if you want something quick enough to finish in one evening after work.
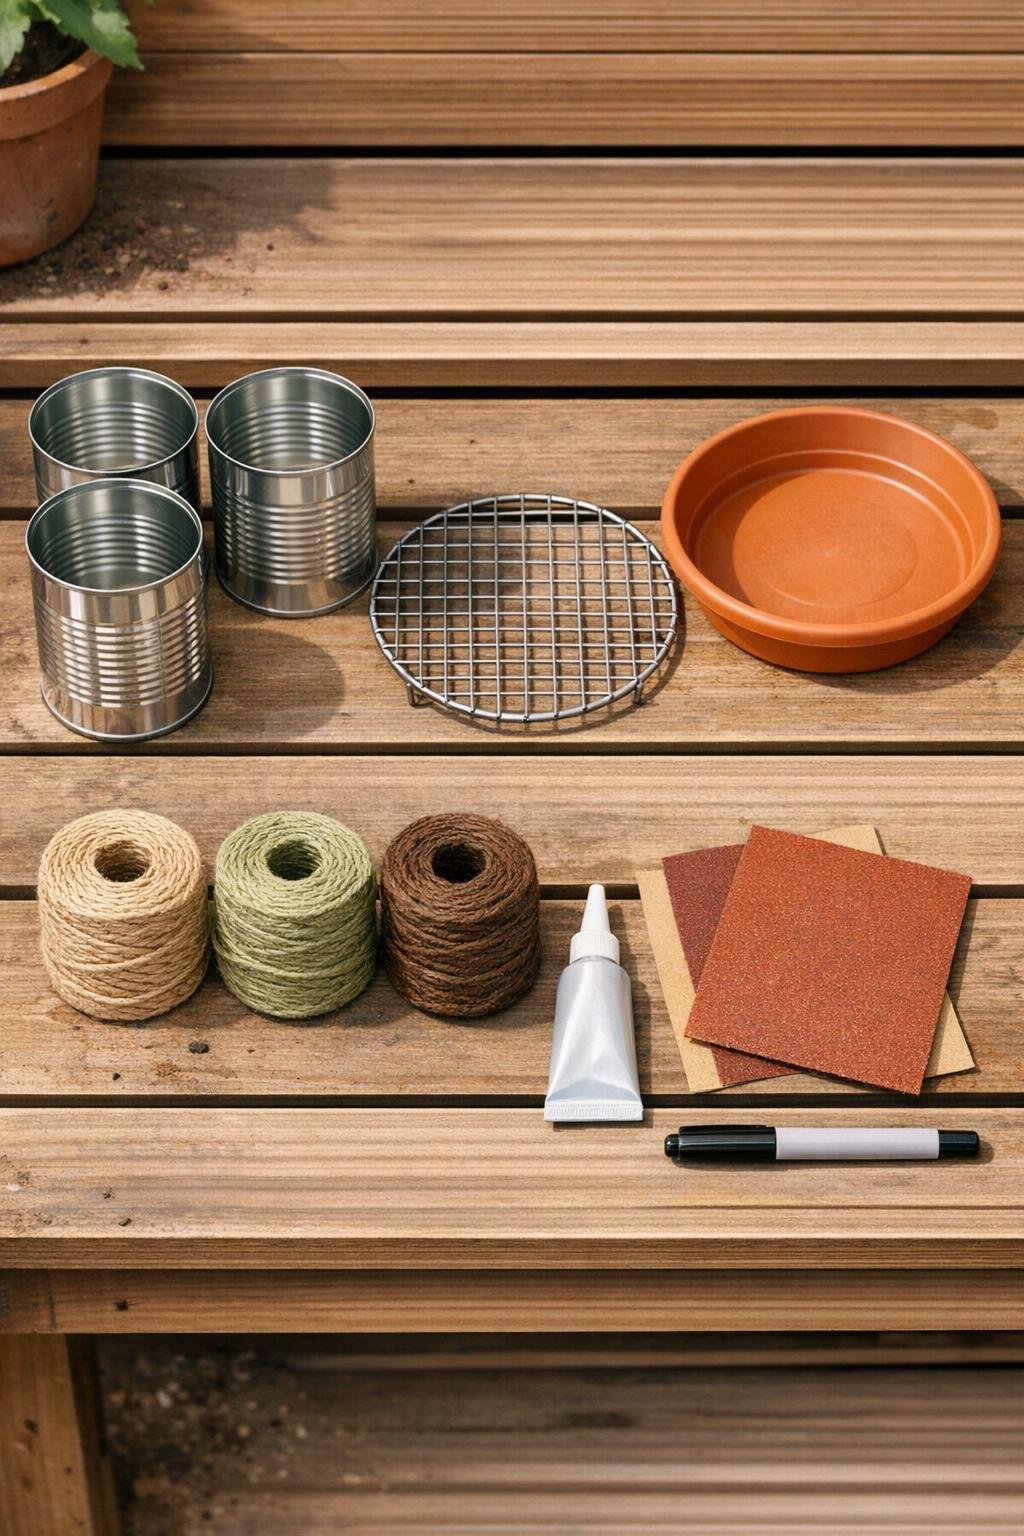
Materials
Instructions
1. Wash the soup cans thoroughly, remove the paper labels, and make sure the cut bottom edges are as smooth as possible. Sand the cut edges and the outer rim lightly so there are no sharp spots.
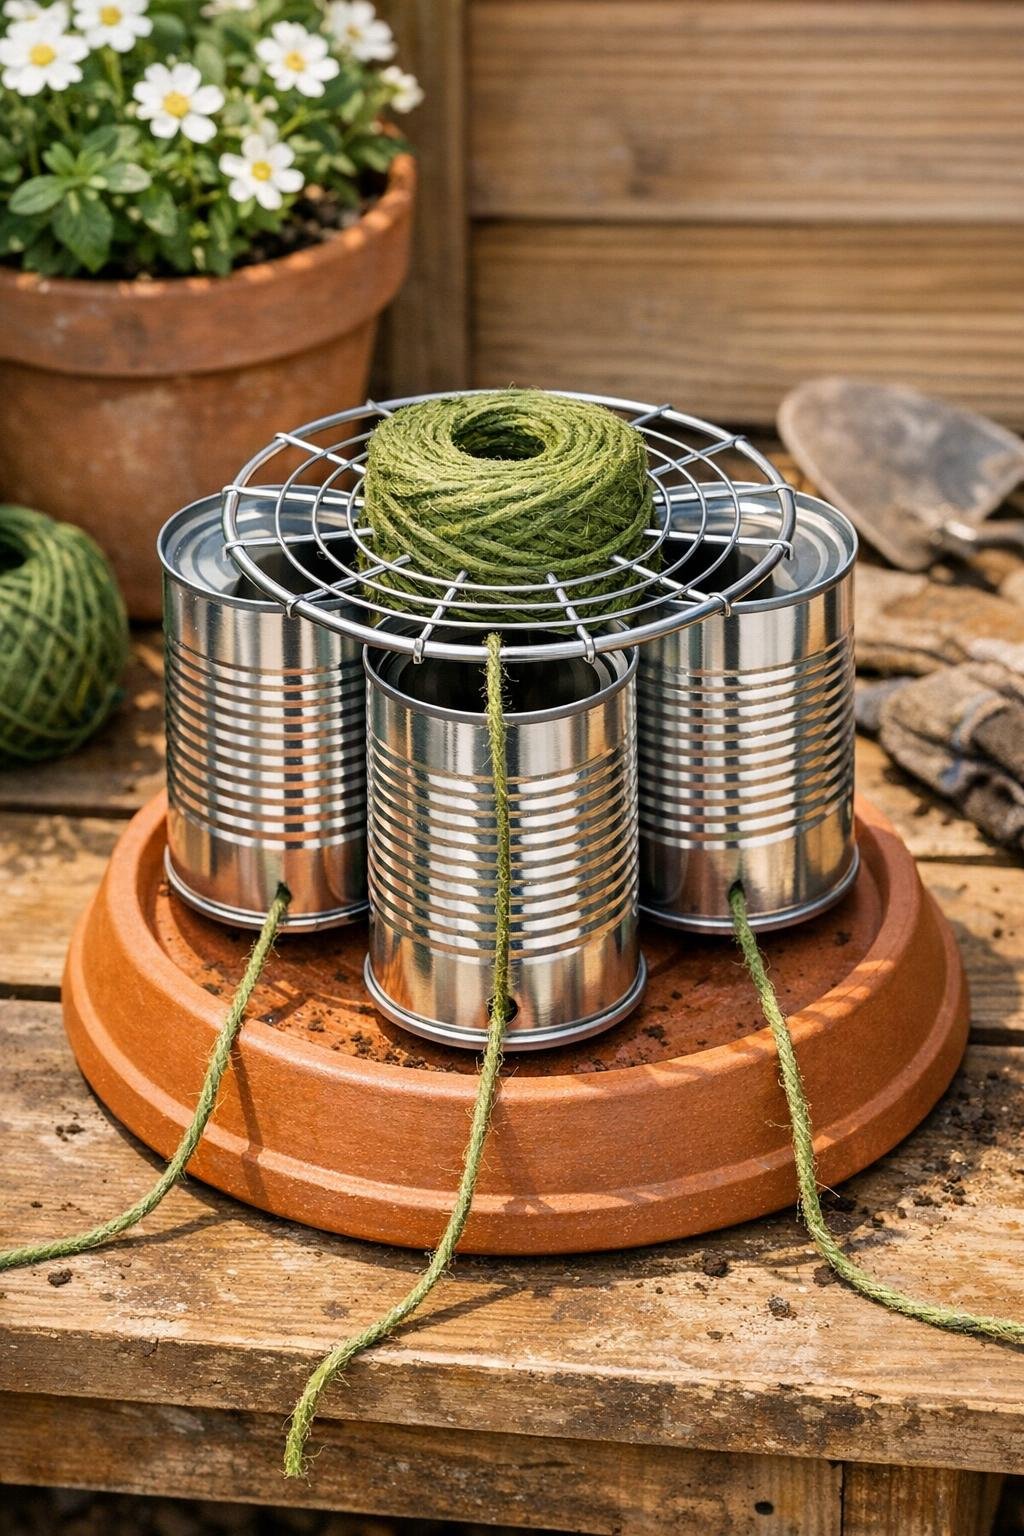
2. Set the plastic planter saucer upside down on your work surface and center the round wire cooling rack on top of it. This creates the base and top grid that will hold the cans in place.
3. Stand the three aluminum cans upright on the upside-down saucer in a triangle arrangement, leaving about 1 inch between each can. Trace around each can with the marker so you can place them back in the same spots.
4. Apply a bead of glue around the bottom rim of each can and press them onto the marked circles on the saucer. Hold each one for a few seconds so the cans stay upright and evenly spaced.
5. Add glue to the top rim of each can, then lower the round wire cooling rack over them so the rack rests across all three can openings. Press gently until the rack bonds to the cans and looks level from all sides.
6. Let the glue cure fully according to the package directions before loading anything into the dispenser. I usually leave it overnight so I’m not tempted to rush and shift the cans out of alignment.
7. Drop one roll of garden twine into each can from the top. Pull the loose end of each roll up through a nearby opening in the wire rack so the twine feeds out neatly.
8. Test each spool by pulling a few feet of twine, then trim and tuck the ends so they’re easy to grab later. If one roll catches, rotate it inside the can until it unwinds smoothly.
Variations & Tips
Painted finish: If you want a more polished look, spray-paint the cans and the wire rack the same color before assembly. Just make sure the color change is done before gluing, and let everything dry completely.
Twine choices: I like keeping one can filled with jute twine, one with cotton twine, and one with soft plant tie. It makes the dispenser more useful during that late-season cleanup stretch when every plant seems to need something different.
Safer edges: If your can edges still feel rough after sanding, wrap the rims with a narrow line of clear-drying glue and let it harden. That little step makes a big difference if you’re reaching in often.
Outdoor storage: This works best on a covered porch, potting bench, or inside a shed instead of out in the rain. Aluminum holds up well, but the twine stays much cleaner and easier to pull when it stays dry.
Keep it steady: If your dispenser slides on a smooth table, add 3 or 4 small rubber bumpers under the saucer. That’s one of those tiny upgrades I appreciate every time I’m trying to cut twine one-handed while holding tomato stems with the other.