
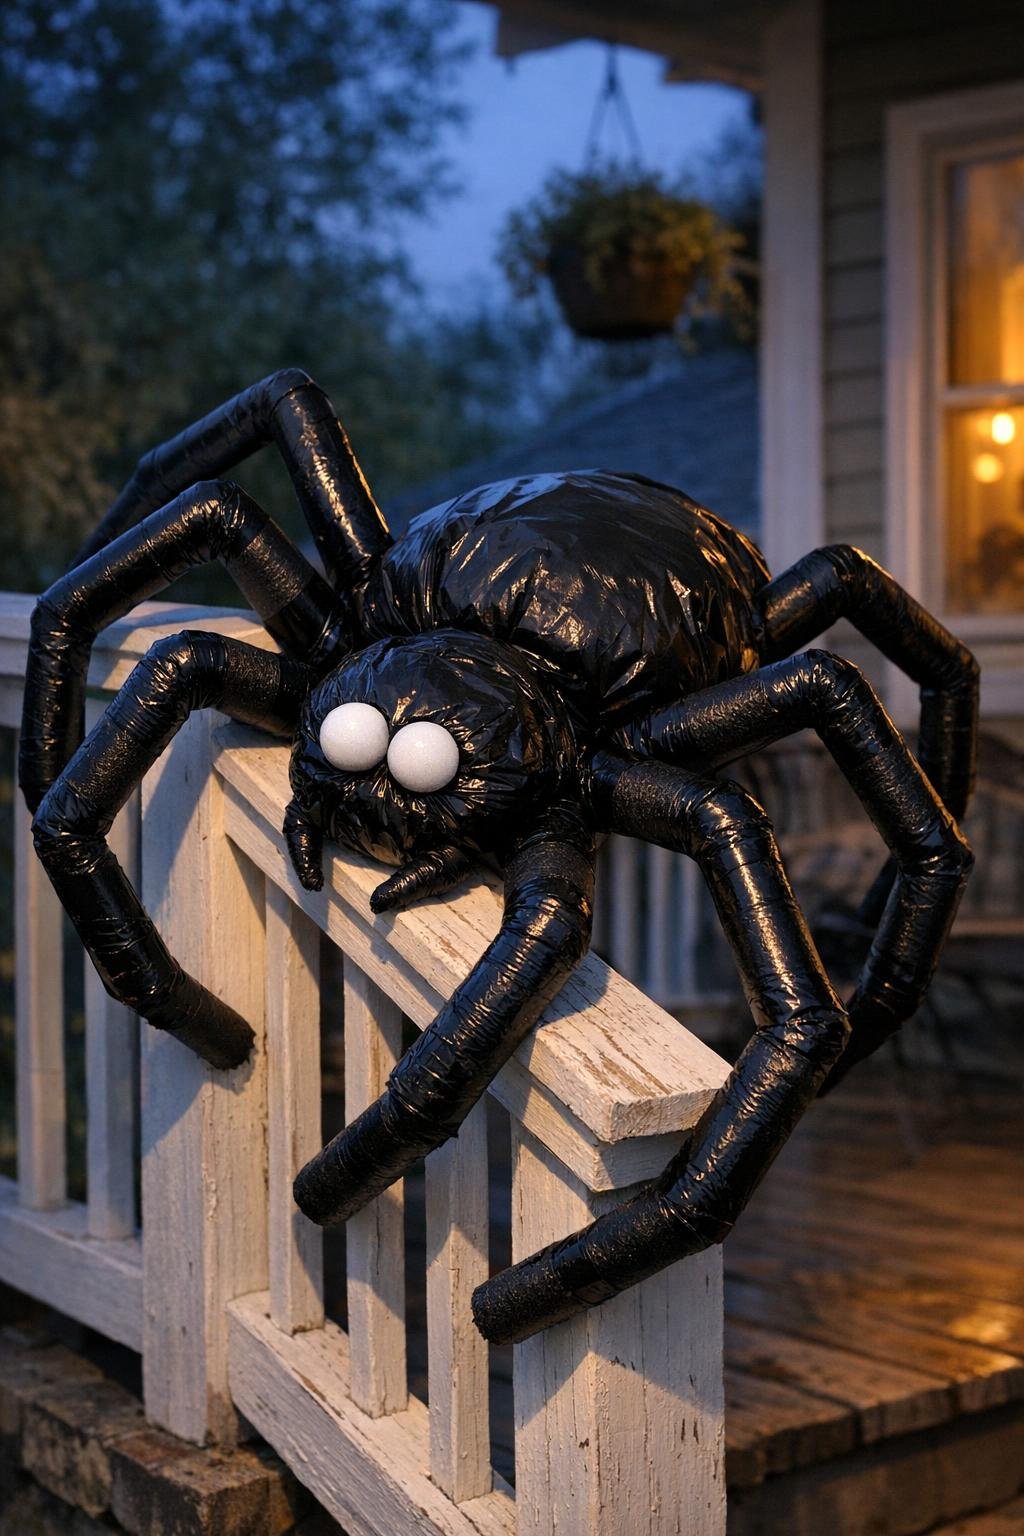
This is one of those Halloween yard projects that looks wildly dramatic from the street but is actually made from very ordinary materials and an hour or two of hands-on work. If you’ve got a front yard, porch railing, or the side of a house that needs something big and creepy, this lightweight spider absolutely delivers — especially at dusk, when it reads as a dark silhouette and people do a double take.
I also love that this build is more about shaping than precision. The biggest thing to know before you start is that the pool noodles need hidden support: I run a straightened coat hanger wire through each noodle before bending it, because a bare noodle will flop flat within a day outside. That wire is what keeps the crouched leg shape, and it makes the finished piece sturdy enough to pose without turning this into a heavy project.
Materials
Instructions
1. Straighten the coat hangers as much as possible and slide one wire through the center of each pool noodle. This hidden wire is what holds the bent leg shape outdoors, so don’t skip it.
2. Bend each wired noodle into a wide upside-down V with a long upper section and a slightly shorter lower section, like a crouched spider leg. Try to keep all 8 legs close in size so the body will sit evenly when you mount it.
3. Wrap each bent noodle completely in black duct tape, slightly overlapping the tape as you go so the color looks solid and the surface feels more finished. If your noodles are already black, you can use less tape and just reinforce the bends and ends.
4. Make the body by doubling up two trash bags for the abdomen and stuffing them with plastic bags or dry leaves until you get a large rounded shape about 24 inches across. Cinch the opening tightly with zip ties or garden wire, then smooth and tape the outside seams.
5. Make a slightly smaller head section with the other two doubled trash bags, stuffing them to about 16 to 18 inches across. Cinch it tightly, then tape the head to the abdomen so you get one connected two-part body with a defined front and back.
6. Attach 4 legs to one side of the body and 4 to the other using heavy-duty zip ties pushed through the taped trash-bag body and tightened around the top section of each leg. Space them evenly from front to back and angle them slightly forward and backward for a more natural stance.
7. Reinforce each leg connection with extra duct tape around the zip-tied area so the body skin doesn’t tear in wind. Lift the spider and adjust the bends until it looks low, wide, and crouched rather than flat.
8. Glue the eyes onto the front head section with two larger foam balls low in front and a cluster of smaller foam balls above them. That layered eye arrangement reads much more spider-like than just using two big eyes.
9. Move the spider to your porch railing, fence, or the side of the house and pose the legs so it looks like it’s climbing. Anchor every leg with zip ties or garden wire, because the whole spider is featherweight and one gusty night can send it straight to the neighbor’s lawn.
10. Step back to check the silhouette and tweak the leg bends until the shape looks balanced from the street. The effect is scariest at dusk and at a distance, so aim for a bold outline more than tiny details.
Variations & Tips
Use leaves for free bulk: If you’re making this in fall, dry leaves are great body stuffing and save a lot of plastic bags. Just keep them dry so the body stays light and doesn’t get soggy.
Choose the right mounting spot: I think this looks best crawling upward on a porch railing or across a corner of the house instead of sitting flat on the lawn. The raised pose makes the legs easier to read from the street.
Make the legs more dramatic: If you want a more aggressive look, bend the front two pairs of legs slightly higher and angle the back legs farther out. That gives the spider a more animated stalking posture.
Add subtle eye detail: A tiny dot of black tape or craft foam on the foam balls can help the eyes show up in daylight. I keep it minimal, though, because the overall silhouette is really the star here.
Plan for wind: This project is intentionally lightweight, which makes it easy to build and hang, but it also means anchoring matters. Tie down every leg you can, and check the zip ties after the first windy evening.
Store it in parts: If you want to reuse it next year, cut only the anchoring ties and keep the spider body and legs together as much as possible. I’d tuck it onto garage shelving or hang it from hooks so the leg bends don’t get flattened.