
There is something awfully satisfying about turning a plain old soup can from the recycling bin into something pretty enough to set out with pride. These punched-tin luminaries are one of those humble projects I love most: inexpensive, a little noisy, and simple enough for an afternoon at the kitchen table or out on the porch with a folded towel and a hammer.
The trick that makes all the difference is freezing water inside each can overnight before you ever pick up the nail. I learned long ago that thin metal likes to buckle and crumple when rushed, but a can filled with solid ice holds its shape beautifully while you punch your design. If you enjoy projects that feel old-fashioned, useful, and just a touch magical by the end, this one is for you.
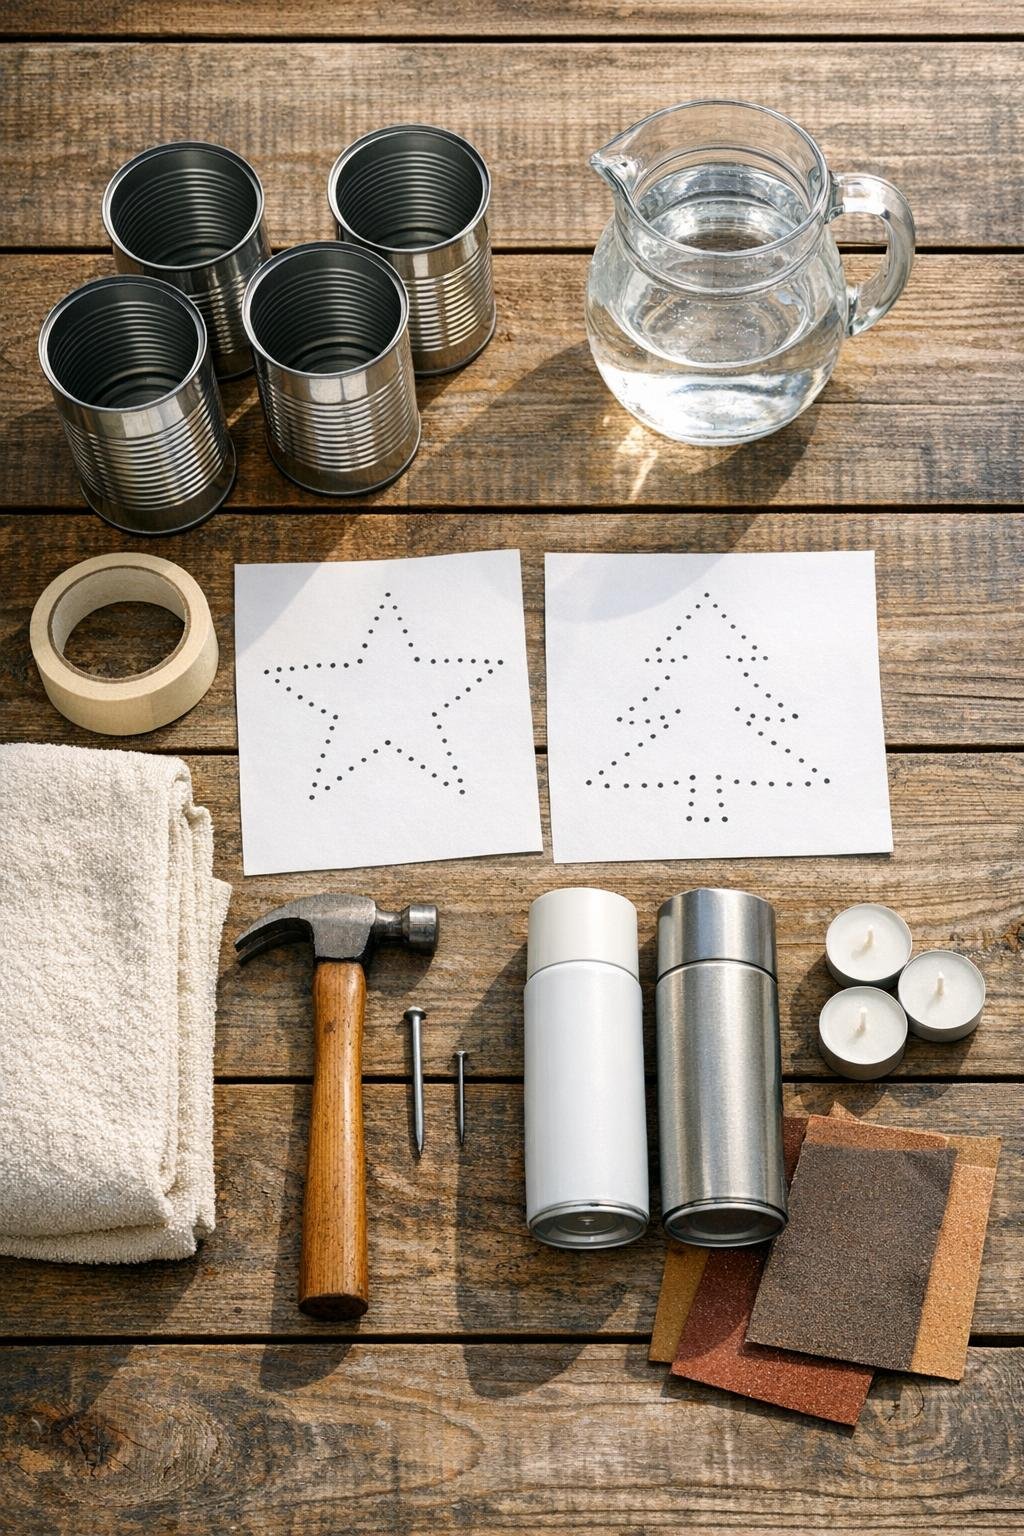
Materials
Instructions
1. Fill each cleaned soup can with water to just below the rim and freeze them overnight until solid. This is the whole secret to getting crisp punched holes instead of a sad, flattened can.
2. Draw or print a simple dot pattern such as stars, a snowflake, or a little pine tree, then tape one pattern snugly around a frozen can. Keep the paper flat so your holes stay evenly spaced.
3. Set the can upside down on a folded towel to cushion the blows and keep it from skittering around. Work on a sturdy surface where a bit of hammering noise will not bother anybody too much.
4. Use the large nail first for the bigger dots in your design, tapping straight down with the hammer until the nail pierces the metal. Lift the nail out cleanly after each hole.
5. Switch to the small nail for finer details and continue punching every marked dot in the pattern. Turn the can as you go rather than twisting your wrist, and let the ice support the metal.
6. Remove the paper pattern and check for any missed dots, then touch up the design while the can is still frozen. Aim for roughly 100 holes total if you want a full, balanced pattern that will show nicely later.
7. Let the ice melt completely, pour out the water, and dry the can very well inside and out. Smooth the rim and any rough outer burrs lightly with fine sandpaper.
8. Spray the can with thin, even coats of white or metallic paint and let it dry according to the can directions. Two light coats usually look better than one heavy one.
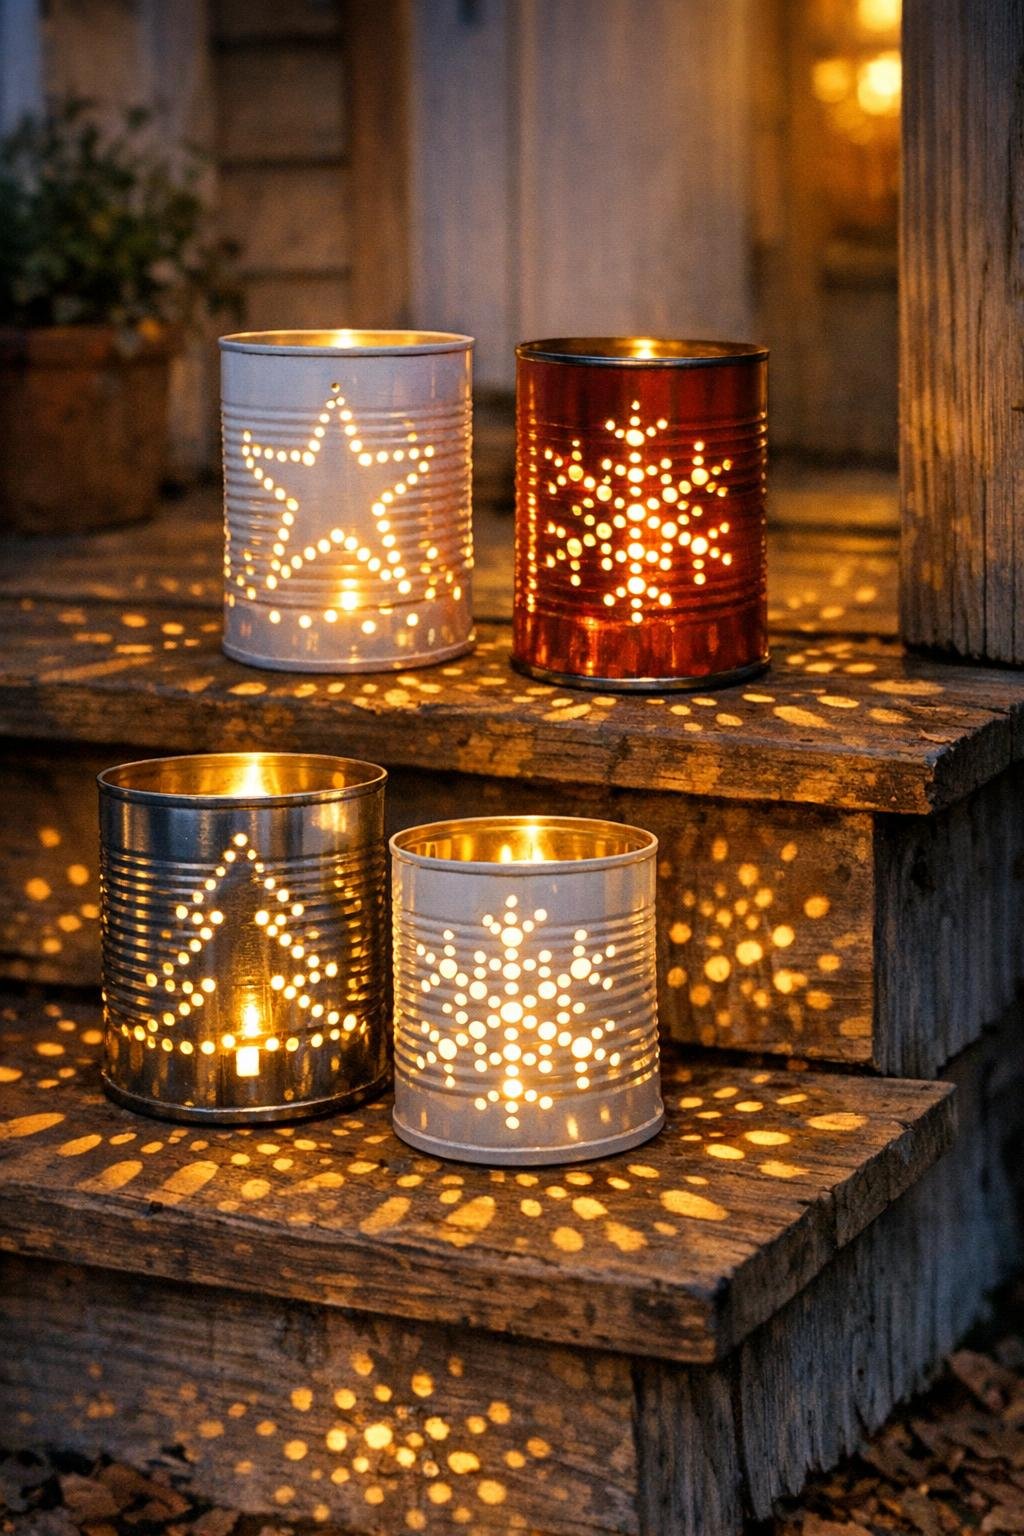
9. Place a tealight down inside each can by dropping it in gently rather than reaching your fingers deep inside, since the punched metal edges on the interior can be sharp. A real tealight is fine in these metal cans, though LED works beautifully too.
10. Line the finished luminaries along porch steps, a walkway, or a windowsill and light them at dusk. A whole set together always looks best, and the hammering that made them is half the fun of the finished piece.
Variations & Tips
Pattern ideas: Simple shapes are the easiest to punch cleanly. I like stars, snowflakes, little pine trees, or bands of evenly spaced dots around the top and bottom.
Paint finish: White looks crisp and wintry, while silver, pewter, or soft gold gives a more old-fashioned holiday feel. If you prefer a rustic look, you can even leave the can unpainted after drying it well.
Hole sizing: Mix large and small holes for a design with more character. Bigger holes make bold points of light, and small holes fill in the details beautifully.
Can choice: Standard soup cans are easiest to handle, but vegetable cans and coffee cans work too if they are plain metal and clean. Just keep your paper pattern scaled to the size of the can.
Noise warning: This is not a silent craft, and I mean that in the nicest way. The steady tapping is deeply satisfying, but it is best done at a reasonable hour and on a sturdy surface.
Safety tip: The inside edges can be sharp after punching, so always drop the tealight in from above instead of reaching inside. If children are helping with the decorating, save the hammering and candle placement for an adult.
Make a set: One luminary is sweet, but a whole row is where the project really shines. I like making several at once assembly-line style: freeze all the cans, punch all the patterns, then paint them together.