
If you’re anything like me, fall cleanup always starts out simple and somehow turns into me crouched in the garden trying to remember which perennial is “tough enough” to handle winter and which one appreciates a little extra help. This easy crown protector is one of my favorite end-of-season garden tricks because it uses broken terracotta pot pieces instead of tossing them out, and it gives tender perennial crowns a breathable little shield right where they need it most.
The best part is that this version only uses three main items: the terracotta shards, a roll of dollar store chicken wire or garden mesh, and landscape pins. It’s quick, practical, and honestly looks a lot neater than a loose pile of mulch. If you have a perennial that hates winter wet, freeze-thaw heaving, or heavy mulch pressed directly on the crown, this is a really handy project to keep in your back pocket.
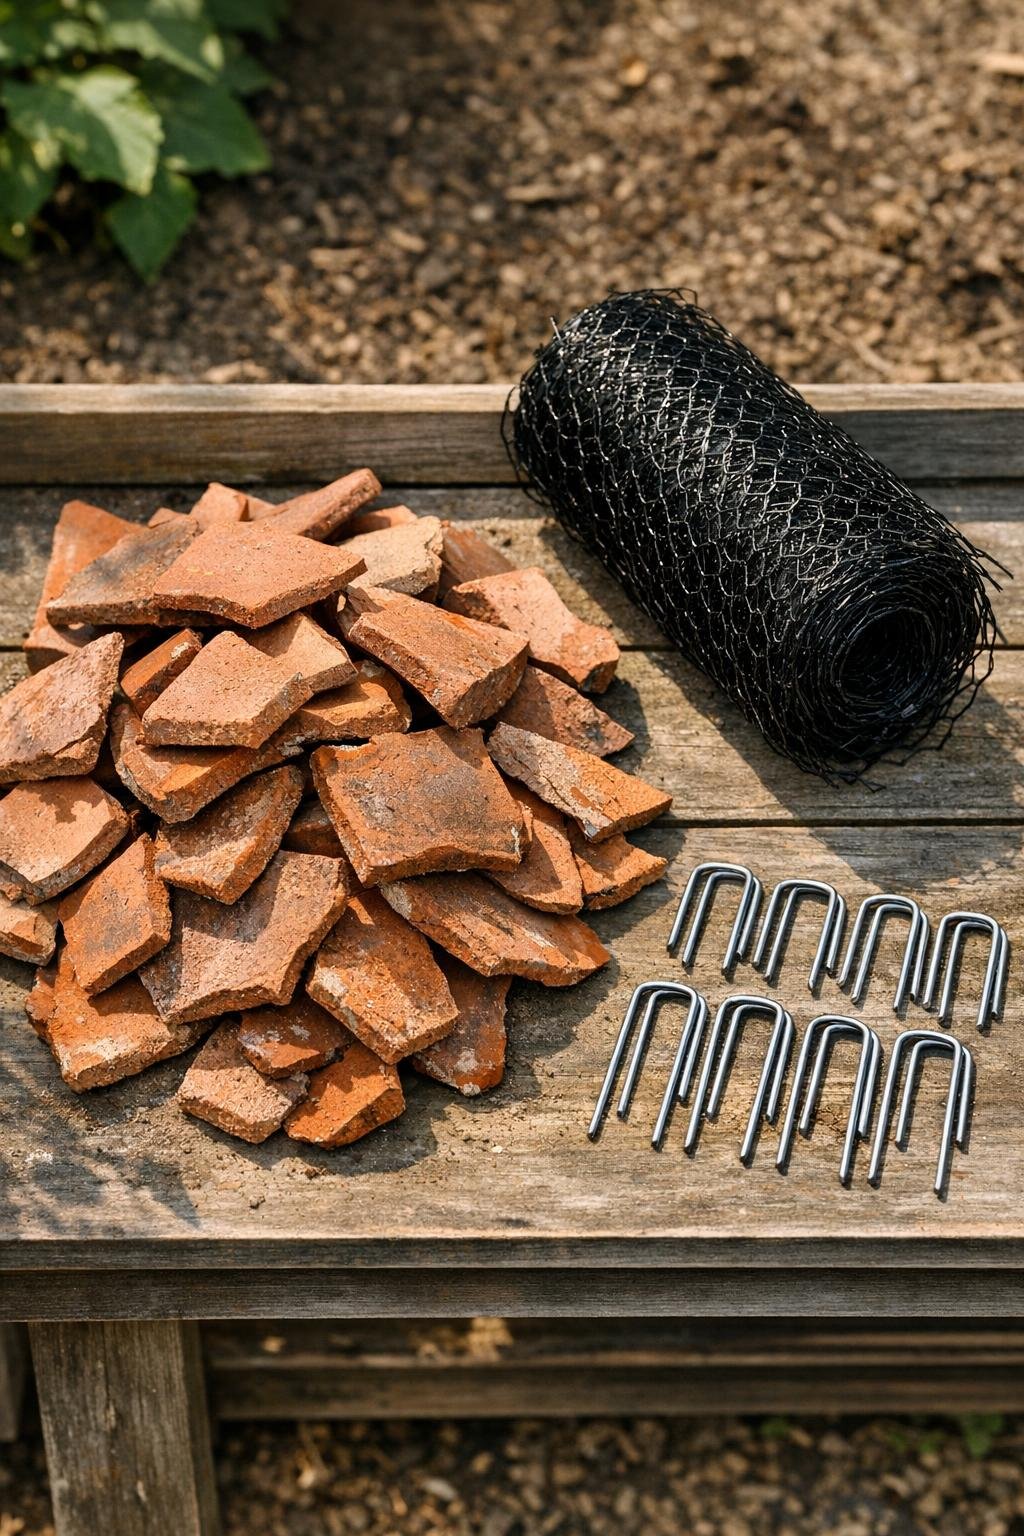
Materials
12 to 18 large broken terracotta pot pieces, roughly 3 to 6 inches wide each
Instructions
1. Cut back the perennial after a few hard frosts, leaving 2 to 4 inches of stem so you can still see where the crown sits. Brush away soggy leaves or collapsed mulch so the soil surface around the plant is clean and level.
2. If the soil around the crown is loose, mound 1 to 2 cups of soil or compost gently around the outside edge without burying the center. I do this a lot with newer plants because it helps everything feel anchored before I add the cover.
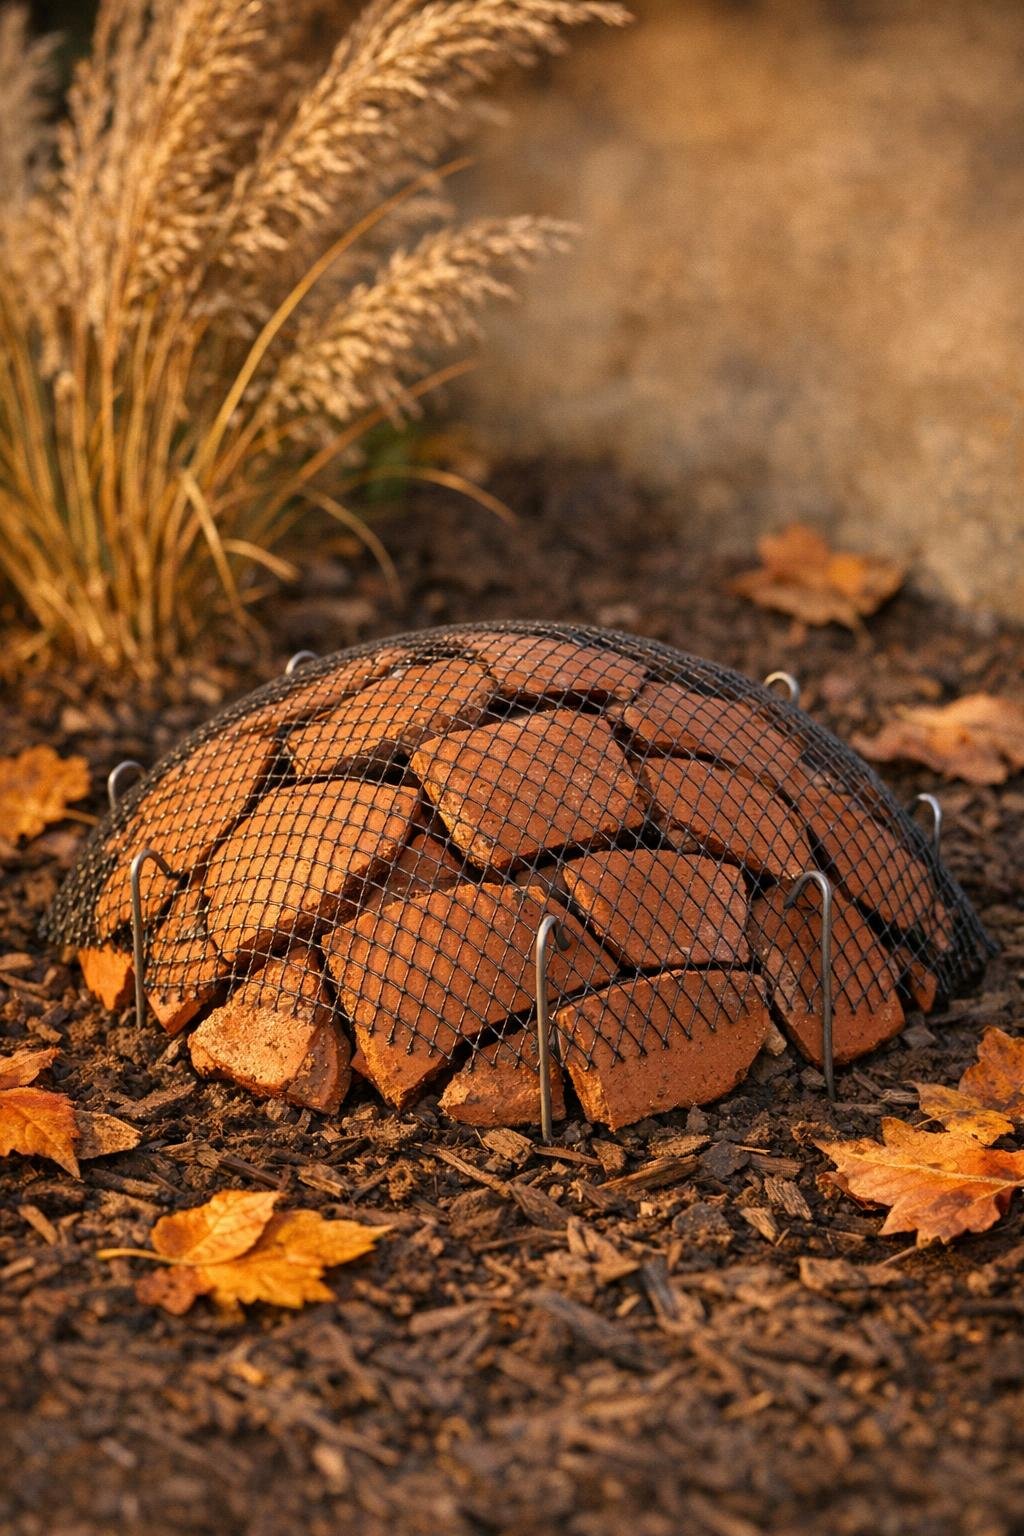
3. Stand the broken terracotta pieces on their sides around the perennial crown, overlapping them slightly to form a loose ring 8 to 12 inches across. Keep a small air gap over the center so the crown is protected but not smothered.
4. Add a light handful or two of dry shredded leaves, pine needles, or straw inside the terracotta ring if your winters are especially windy or your plant is borderline hardy. Keep this layer airy and loose, not packed down.
5. Cut a piece of garden mesh large enough to cover the terracotta ring with 2 to 3 inches extending all the way around. Lay it over the top and gently press it down so it follows the low dome shape made by the shards.
6. Anchor the mesh with 8 to 12 landscape pins, spacing them evenly around the edge and pushing them firmly into the soil. The mesh should hold the shards in place so winter wind and curious squirrels can’t easily knock them over.
7. Tuck in any sharp or sticking-out mesh edges and check that the center still has air space under the cover. You want this protector to shed debris and buffer temperature swings while still breathing.
8. Leave the protector in place through the worst of winter, then remove the pins, lift off the mesh, and take away the terracotta shards in early spring once repeated deep freezes are done. Store the pieces in a crate or bucket so they’re ready for the next season.
Variations & Tips
For extra-cold climates: Use a second layer of mesh and add a slightly wider ring of terracotta pieces so the cover traps a bit more insulating air without pressing directly on the plant.
Best plants for this trick: I like this method for marginally hardy perennials, newly planted crowns, alpine-type plants that dislike winter wet, and anything prone to freeze-thaw heaving.
Skip wet filler: Only use dry leaves, straw, or pine needles inside the ring. Damp packed mulch can hold too much moisture against the crown, which defeats the whole point.
Use the biggest shards first: The large curved side pieces from broken pots make the strongest outer wall, and smaller pieces are perfect for filling little gaps near the base.
Make spring cleanup easy: If you protect several plants, store each plant’s terracotta set together in a small bin. That sounds overly organized, but on a busy workweek evening in March, future you will be so grateful.
Watch drainage: This protector works best on well-drained soil. If water tends to sit in that bed, improve drainage first or raise the planting area slightly before winter.