
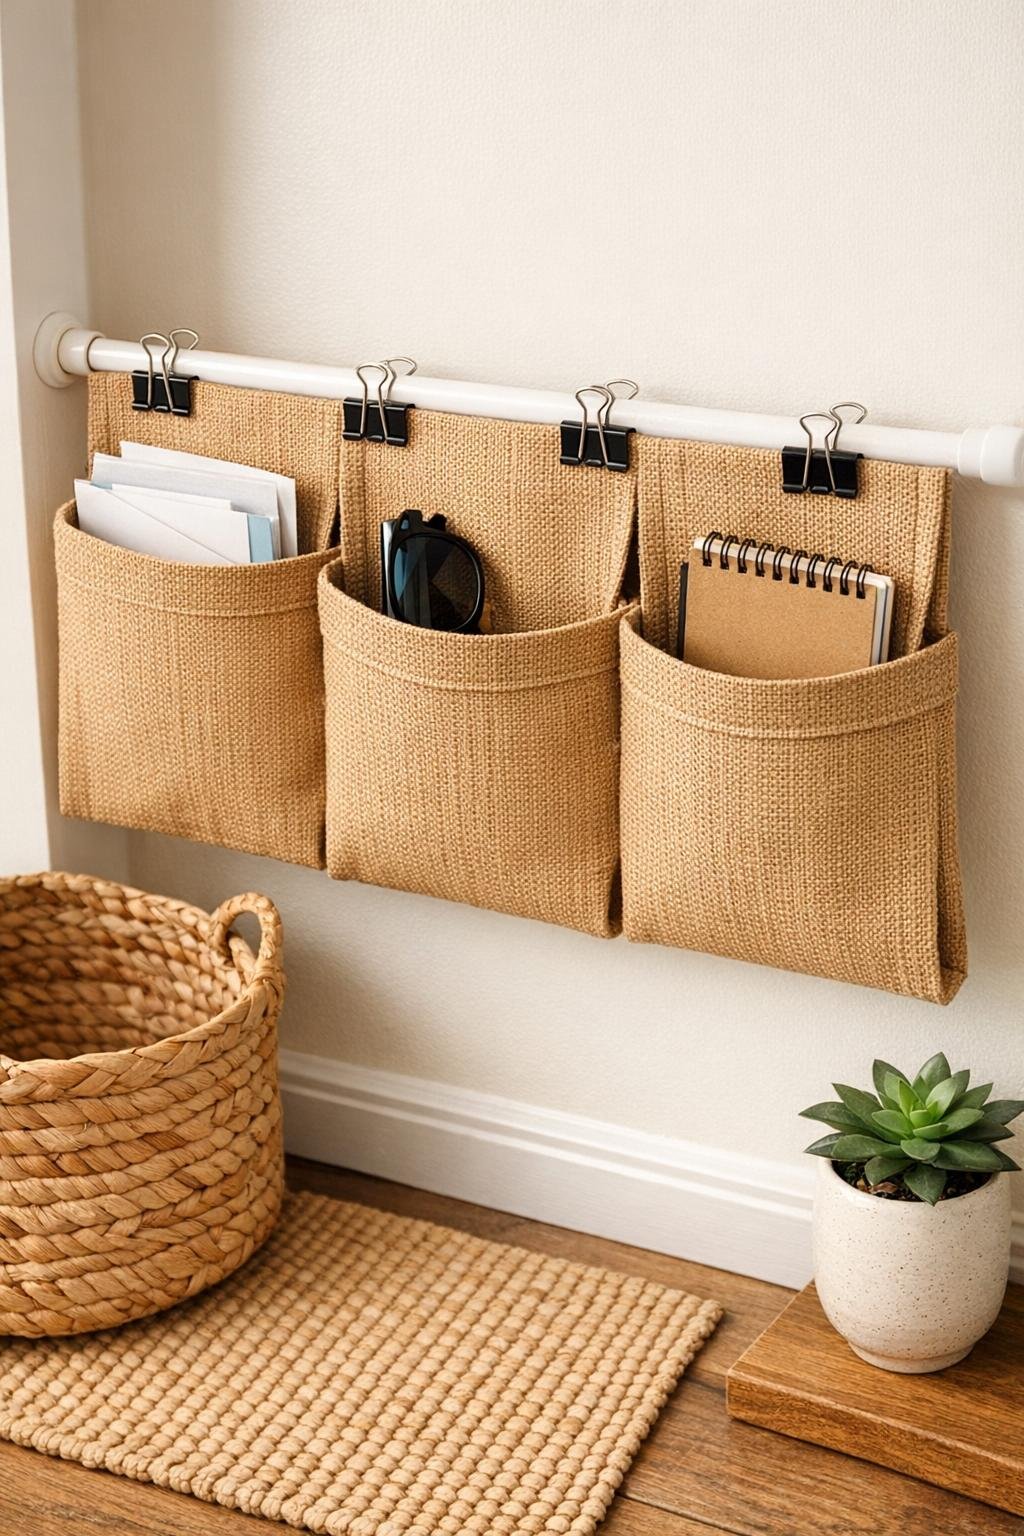
This entryway pocket organizer is one of those satisfying little projects that looks clever, costs very little, and solves a real everyday problem. By folding sturdy canvas placemats over a white tension rod and securing them with small black binder clips, you get a row of deep hanging pockets that are perfect for mail, sunglasses, dog-walking essentials, notepads, and all the bits that tend to collect by the door.
I love projects like this because they rely on simple household materials used in a smart way. The canvas gives the organizer enough body to hold its shape, the rod installs without hardware, and the clips add a crisp, utilitarian finish. If you want an easy renter-friendly entryway upgrade that goes together in under an hour, this is a very good one.
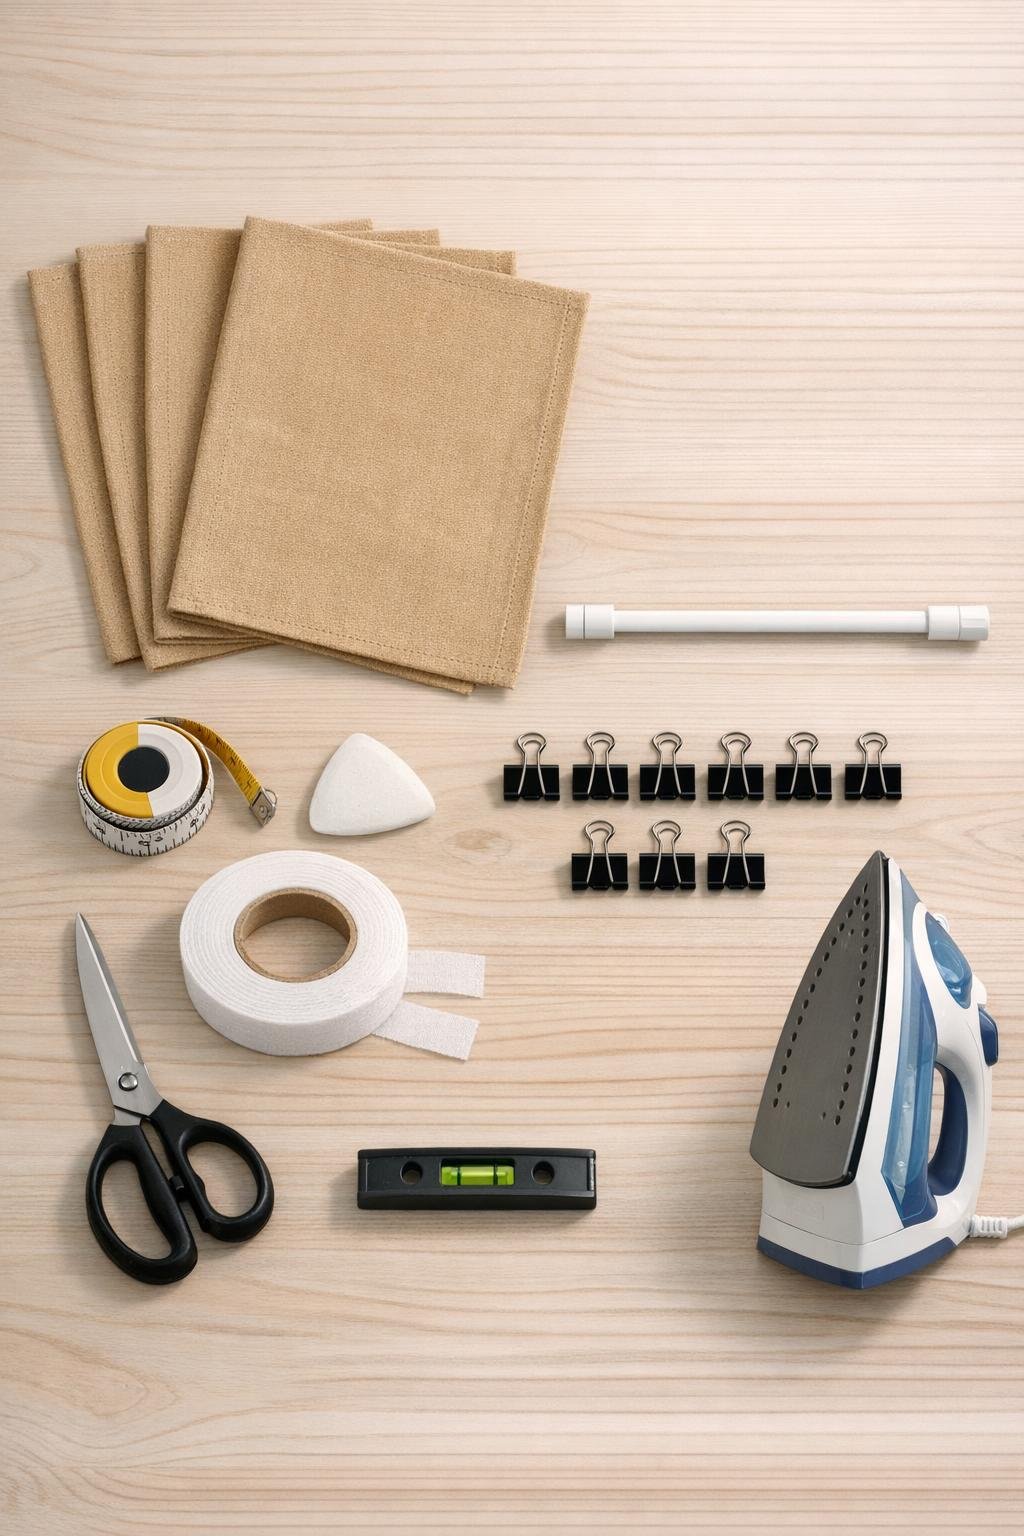
Materials
4 tan canvas placemats, approximately 13 x 19 inches each
Instructions
1. Measure the entryway space where you want the organizer to hang, then adjust your white tension rod so it will fit snugly across that opening or nook. Use a small level so the rod sits straight, because even a slight tilt makes the pockets hang unevenly.
2. Press all 4 placemats flat so the finished organizer looks crisp and hangs neatly. If any placemat edges curl, use a little steam and let them cool flat before moving on.
3. Fold the first tan canvas placemat evenly over the rod so the front panel is about 1 inch shorter than the back panel; this creates a natural pocket opening. Clip both side edges near the top fold with 2 small black binder clips to hold that shape.
4. Repeat with the remaining 3 placemats, spacing them evenly across the rod with about 1 to 1 1/2 inches between each pocket. Step back and adjust the spacing before tightening the rod fully.
5. If you want cleaner pocket edges, run a short strip of iron-on hem tape inside each side edge where the front and back layers meet, leaving the top open. Press carefully so each placemat keeps a deep pouch shape without sealing the pocket shut.
6. For taller items, leave the placemats at full depth; for mail and keys, trim no more than 2 inches from the front panel only and hem the raw edge with iron-on tape. I usually vary the heights slightly so one pocket works for envelopes, another for glasses, and another for pet gear.
7. Add optional twill tape tabs inside a pocket seam area if you want spots for keys or a small flashlight. Cut 4 pieces at 6 inches each, fold them into loops, and secure them under the top binder clips so they hang inside or just beside the pocket.
8. Load the organizer thoughtfully: put mail and papers in the center pockets, sunglasses and gloves in one side pocket, and dog leash accessories or reusable shopping lists in the other. Keep heavier items distributed so the rod stays balanced and the pockets hang cleanly.
9. Make the final adjustments by straightening the clips, evening the pocket openings, and pressing the fronts once more if needed. The goal is a full, useful organizer that still looks orderly and intentional rather than droopy.
Variations & Tips
Add labels without committing: Slide a small card behind each binder clip to mark pockets for mail, errands, or grab-and-go items, then swap them out as your routine changes.
Use matching placemats for a polished look: Identical tan canvas placemats make the organizer look intentional, but coordinating stripes or subtle ticking can work beautifully if your entryway is more casual.
Choose the right rod width: A rod that extends almost wall to wall gives the organizer a built-in look and keeps the placemats from bunching together in the center.
Keep weight realistic: This style is best for lightweight daily essentials, not bulky tools or water bottles. Think paper goods, keys, glasses, gloves, and pet-walking items.
Make it family-friendly: Give each person one pocket, or dedicate one to outgoing mail and one to things that need to leave the house tomorrow. In my kitchen, that kind of visual assignment is half the organizing battle.
Try a softer finish: If you prefer a less industrial look, replace the binder clips with small wooden clothespins, though the black clips do hold more firmly and give a nice graphic contrast against the tan canvas.
Press before photographing: This is a simple trick, but a quick final press is what makes it look blog-worthy instead of makeshift. Canvas always rewards that extra two minutes.