
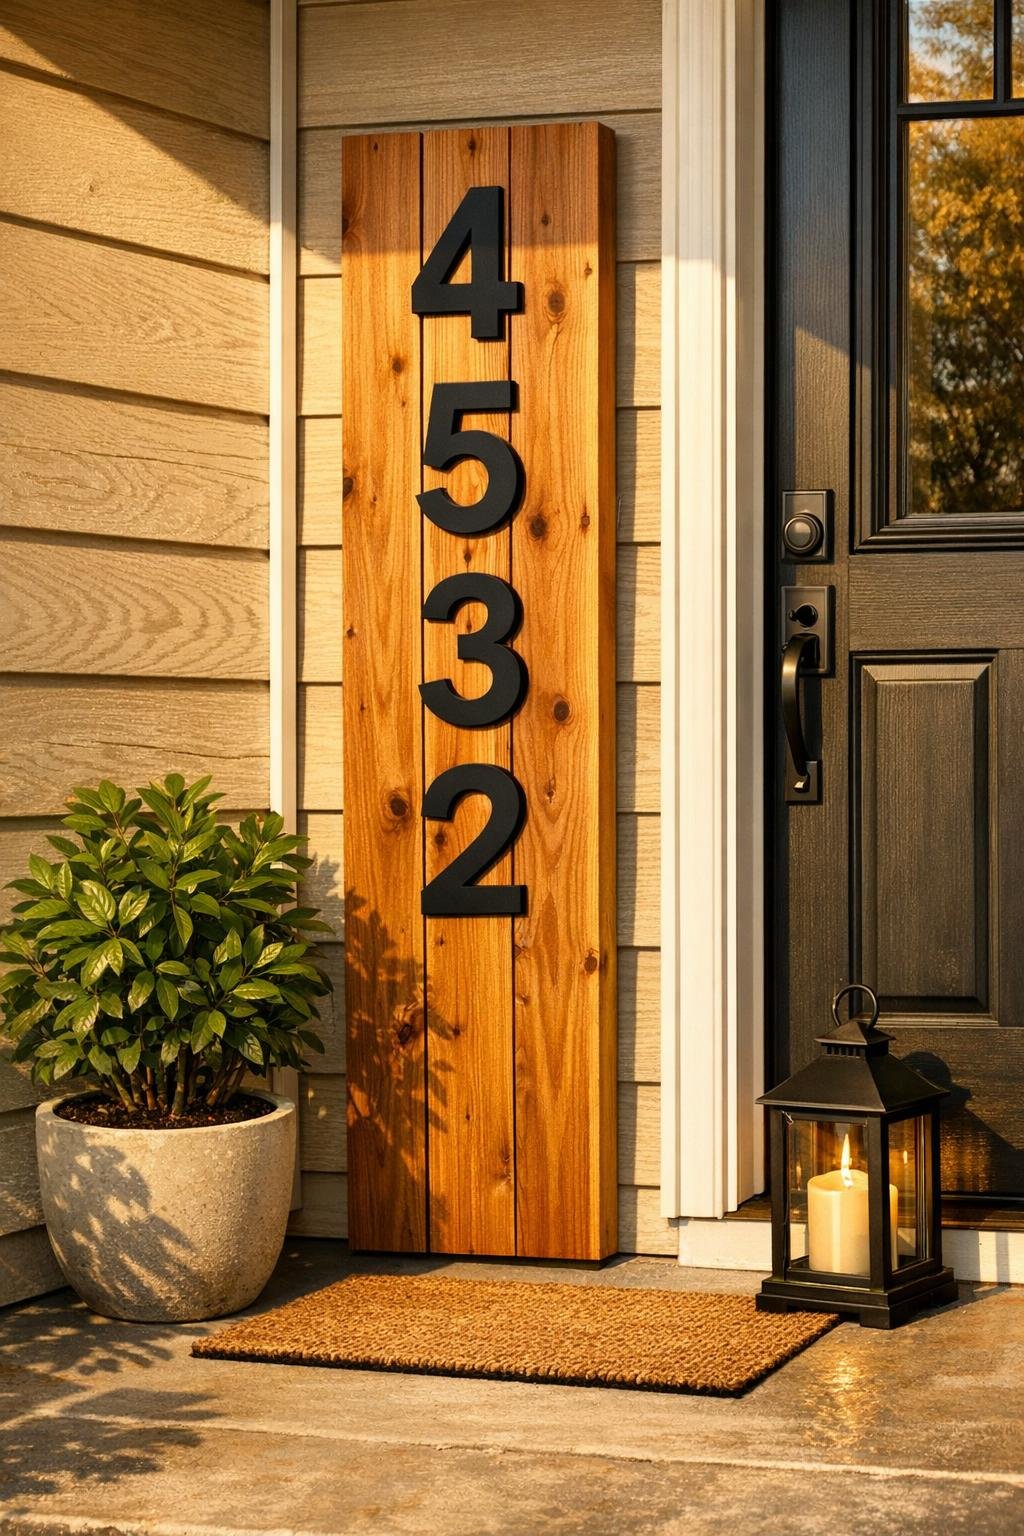
I love a project that makes the front porch look more pulled together in an afternoon, and this cedar address sign is exactly that kind of win. You’re taking simple warm cedar fence pickets, lining them up into a clean vertical plaque, and gluing on bold black house numbers for a crisp, easy-to-read finish that feels custom without needing fancy tools.
This is especially great if you want curb appeal on a realistic schedule. I’m always drawn to projects that look polished but don’t turn into a whole weekend, and this one checks that box beautifully. The natural cedar keeps it warm and welcoming, while the black numbers add that sharp contrast that makes the whole thing look neat and intentional on a porch column, beside the door, or near the steps.
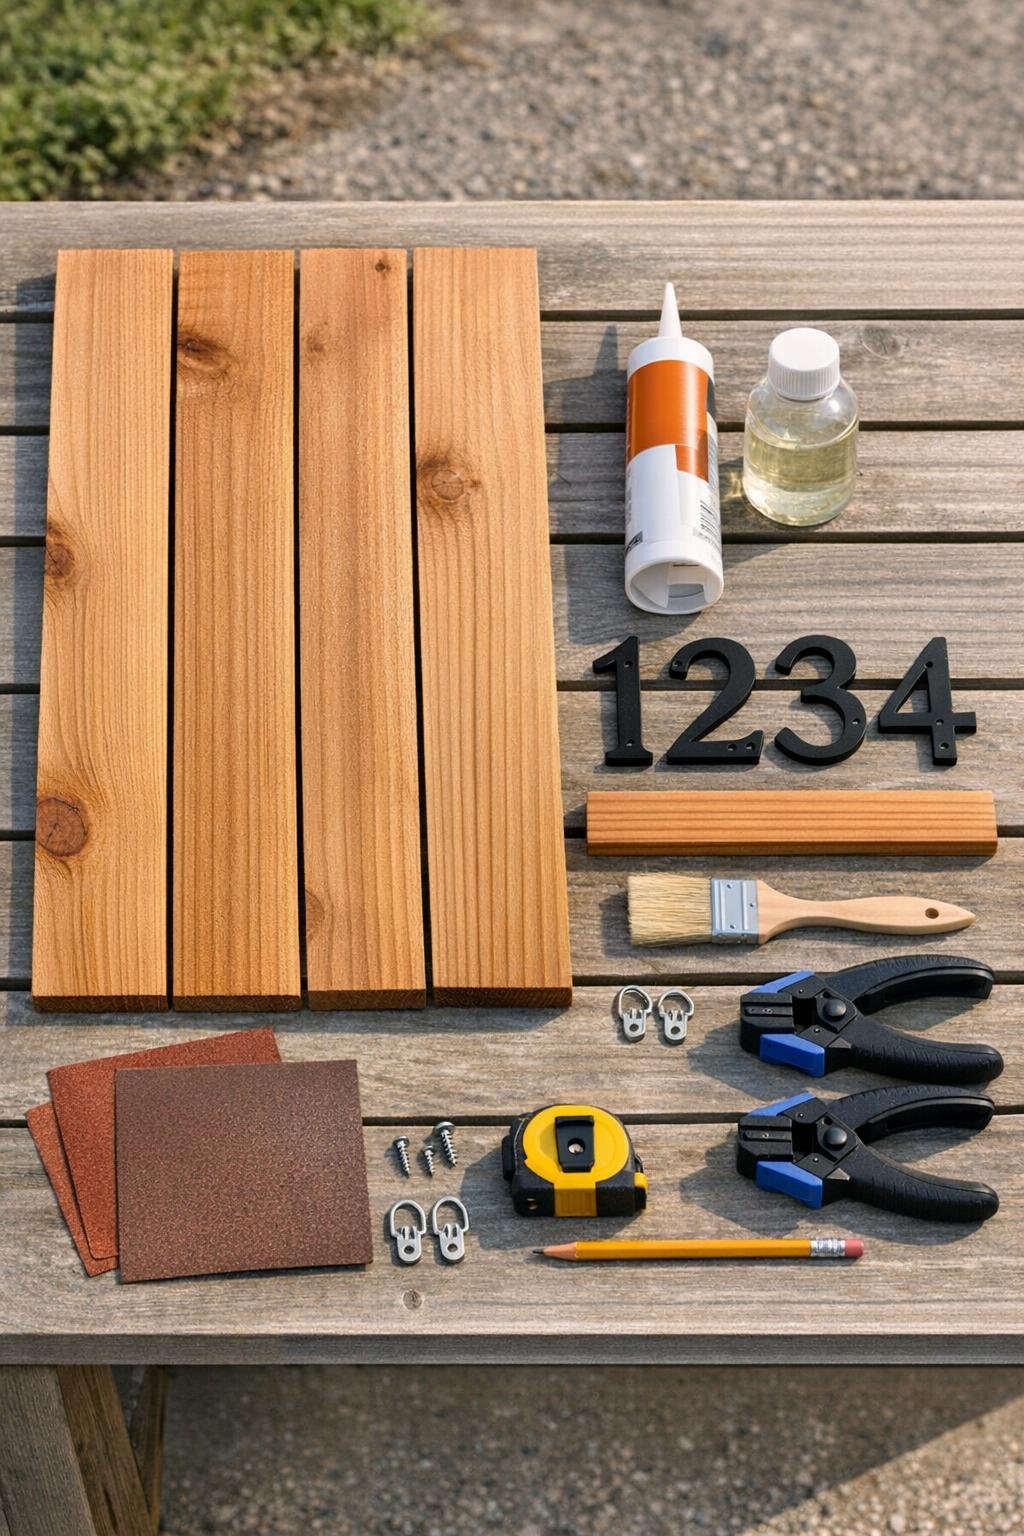
Materials
Instructions
1. Lay the four cedar pickets side by side with the best faces up, and arrange them so the color and grain look balanced across the front of the sign.
2. Trim the pickets to the same length if needed, then lightly sand the front, back, and edges with 120-grit sandpaper followed by 220-grit for a smooth, splinter-free finish.
3. Flip the pickets over, place one cedar support strip across the back 5 inches from the top and the other 5 inches from the bottom, then predrill and secure each strip with two screws per picket.
4. Turn the panel back over and wipe away dust, then brush on a thin, even coat of exterior clear satin sealer over the front, sides, and back; let it dry fully.
5. Measure the centerline of the sign and mark light placement guides for the house numbers, spacing them evenly from top to bottom so the full address fills the panel generously.
6. Use short strips of painter’s tape as temporary alignment guides, then set the black house numbers in place without glue to check spacing, margins, and overall balance.
7. Apply exterior construction adhesive to the back of the first number in a thin bead, press it firmly onto the cedar, and repeat with the remaining numbers, checking alignment as you go.
8. Press each number for 20 to 30 seconds, wipe away any glue squeeze-out right away, and let the sign lie flat until the adhesive cures according to the package directions.
9. Attach the two D-ring hangers to the upper back support strip, keeping them evenly spaced so the sign will hang straight.
10. Hang the finished sign on a porch post, siding hook, or wall screw, then step back and make any small leveling adjustment so the numbers read cleanly from the curb.
Variations & Tips
For taller house numbers: If your numbers are 6 inches tall, increase the sign length to 42 inches so the address still has nice breathing room at the top and bottom.
For extra contrast: I like the natural cedar best, but you can stain the pickets a medium walnut or weathered oak tone before sealing if you want a deeper, moodier porch look.
If your numbers have screw holes: You can still glue them on for the same clean look, or use short black screws for a more traditional mounted style; I’d keep the spacing exactly the same either way.
For apartment-style visibility: Choose the largest numbers your panel can handle and keep them centered in one straight vertical line so they’re easy to read from the street.
To help the glue bond well: Wipe the backs of the numbers and the cedar surface with a dry cloth before attaching them, because sawdust is usually the little thing that causes trouble.
For a more finished edge: Lightly soften the long front edges of the pickets with sandpaper before sealing; it’s a tiny detail, but it makes the sign feel more custom.
Mounting tip: If your porch gets strong wind, hang the sign from two anchored points or add a small rubber bumper at the lower back corners to keep it from tapping the wall.