
I love a kitchen project that feels a little like a magic trick, and this one absolutely does. You start with a pile of ordinary peppermint candies and a parchment-lined baking sheet, and a few minutes later you have something glossy, dramatic, and party-ready that looks far fancier than its tiny price tag suggests. For a holiday table, cookie swap, or dessert station, it’s one of those low-effort, high-payoff projects I come back to again and again.
What makes this especially satisfying is that it’s easy in the way good candy work should be easy: simple setup, quick baking, and a very clear visual cue for when it’s done. If you can line a pan and keep an eye on the oven window, you can make this. I’ll show you exactly how I do it so the platter releases cleanly, keeps those pretty peppermint swirls, and is ready for dry cookies or other lightweight treats.
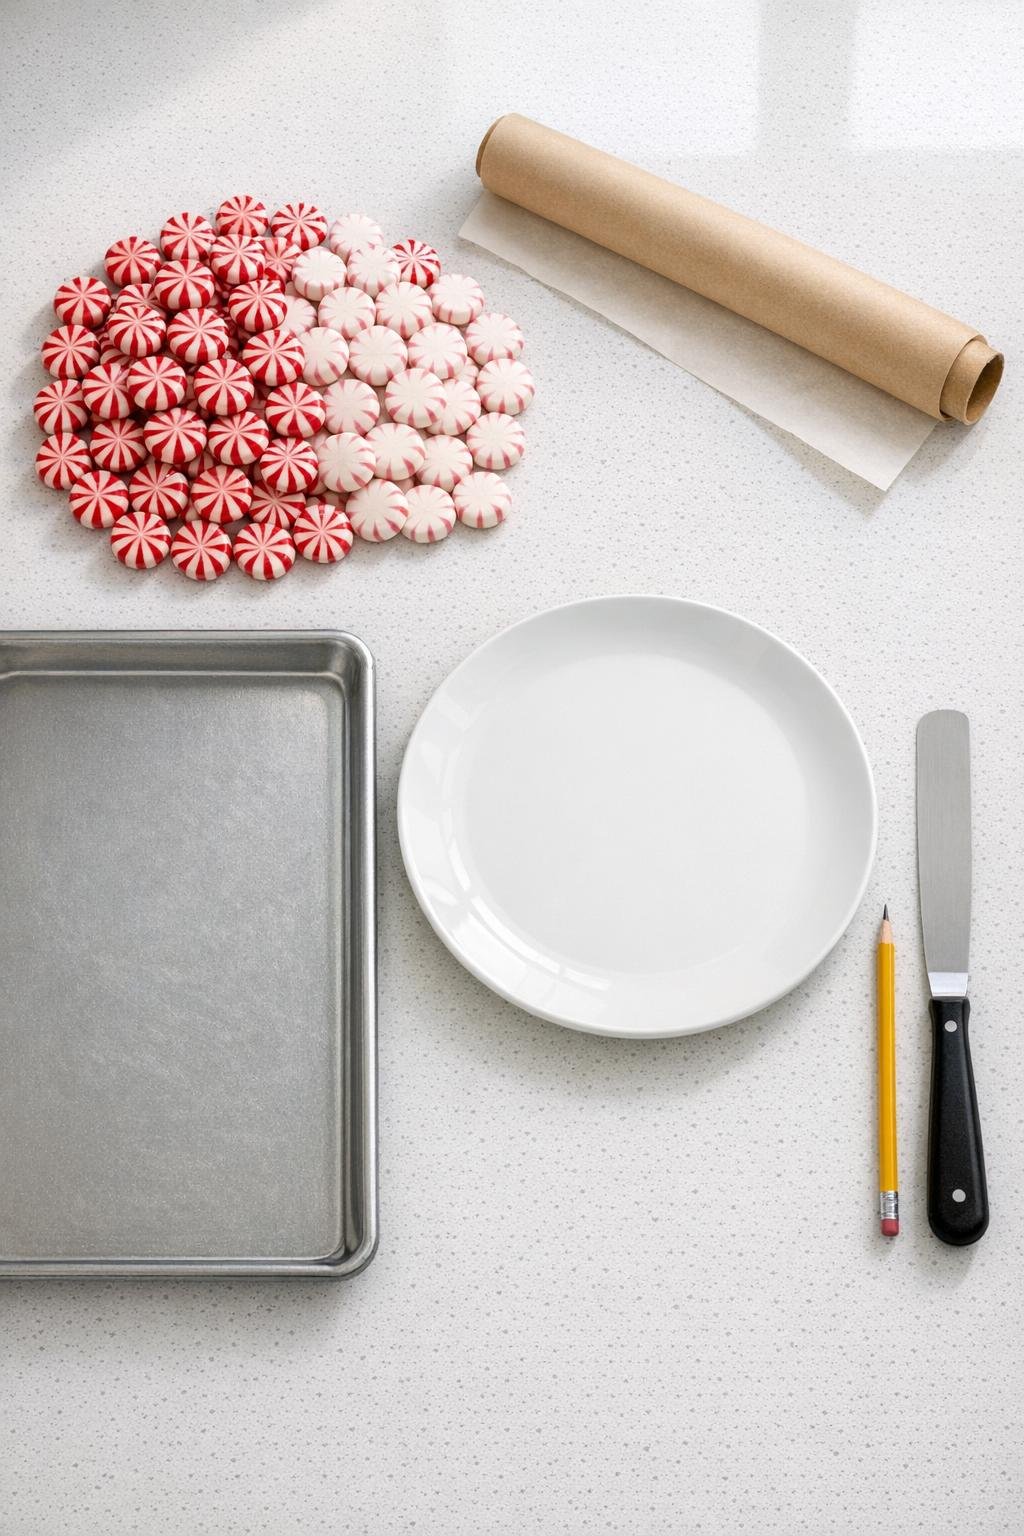
Materials
100 unwrapped round peppermint candies, about 12 ounces total
Instructions
1. Line the baking sheet with parchment paper before anything else; this is non-negotiable because melted peppermint will weld itself to bare metal and ruin the platter on the pan.
2. For a round platter, place the dinner plate on the parchment and lightly trace around it, then turn the parchment pencil-side down so the marking sits underneath and won’t touch the candy.
3. Unwrap all 100 peppermint candies and set them near the pan so you can work quickly; I like to do this first because once you start arranging, the pattern goes much faster.
4. Place the candies flat side down in tight, touching rows inside the traced circle, packing them closely so every candy touches its neighbors; if you prefer a rectangular tray, skip the tracing and fill a section of the sheet in a tight slab.
5. Preheat the oven to 350 F and place the pan on the center rack once it is fully heated.
6. Bake for 6 to 9 minutes, and park yourself at the oven window the last few minutes; the candies will hold their shape for a while, then soften and fuse within about sixty seconds.
7. Pull the pan out the moment the gaps close and the surface looks fused into one piece; even one minute more can smear the swirls into pink and start browning the edges.
8. Leave the platter to cool completely on the pan for 10 to 15 minutes without touching it, because hot candy shifts easily and can crack if moved too soon.
9. Slide a thin spatula under one edge, peel away the parchment, and lift the cooled candy off in one glossy piece.
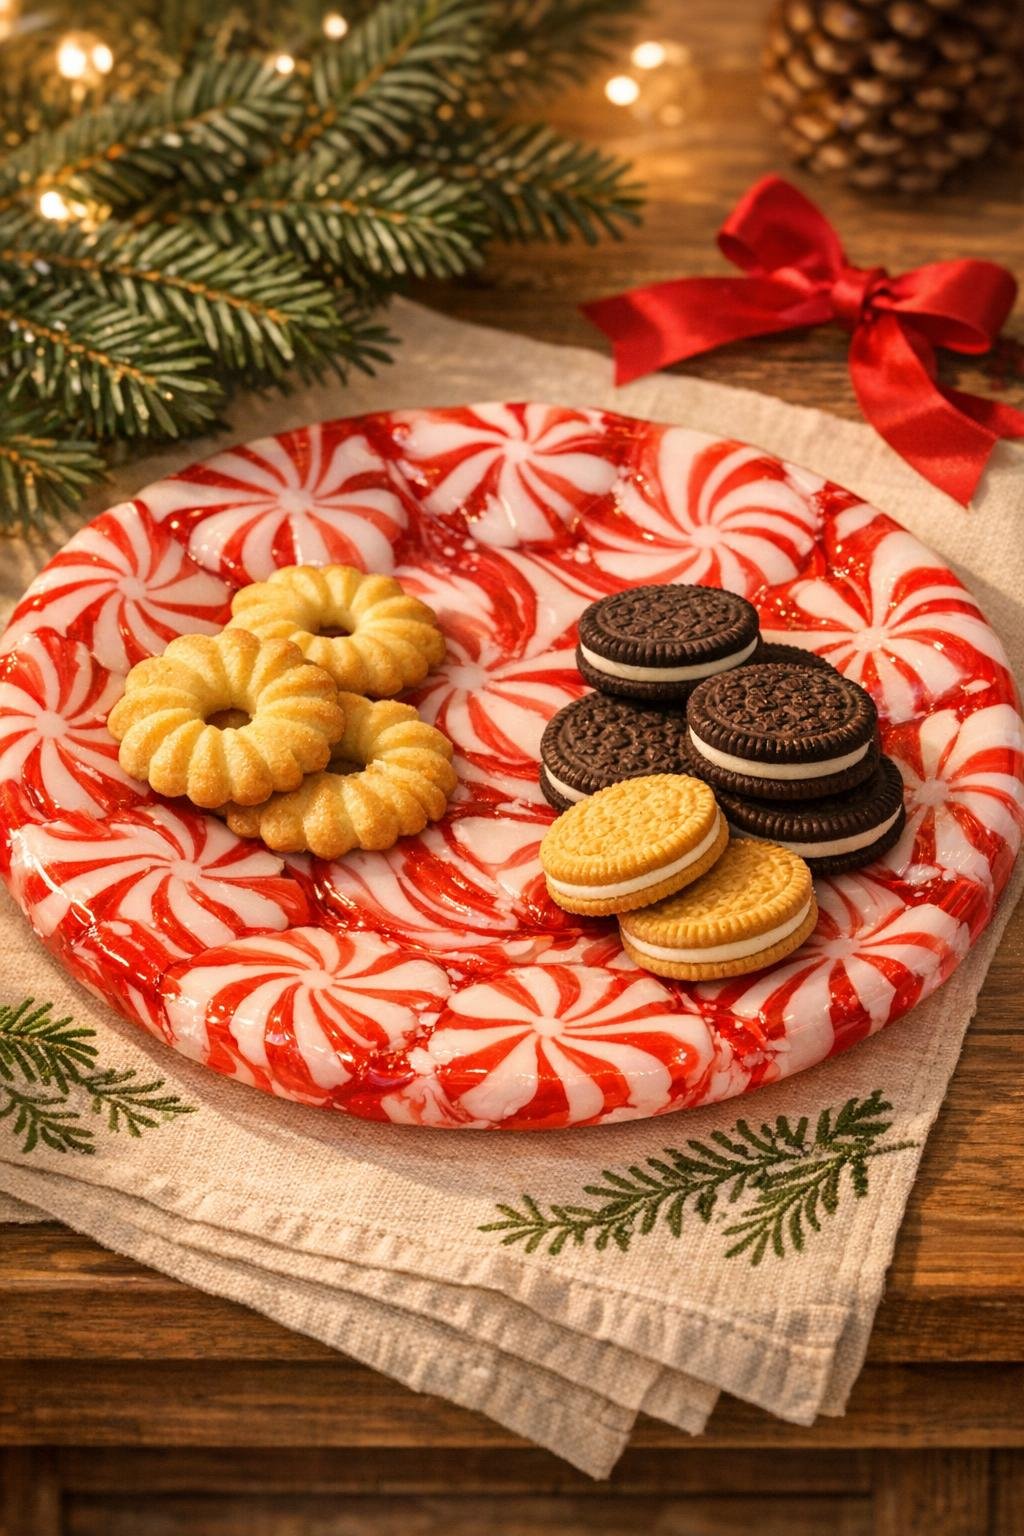
10. Set the platter on a dry serving surface and use it for dry cookies or other lightweight, non-sticky treats during the party.
Variations & Tips
Round or slab: A traced dinner plate gives you a classic round platter, but a rectangular slab tray is even easier if you want to use the full sheet and skip shaping.
Watch the swirls: This is the whole trick of the project. The best moment is when the gaps have just closed but each candy still keeps its striped identity; if you wait too long, the pretty pinwheel look melts into a flatter pink sheet.
Use only parchment: I’m repeating myself because it matters that much. Wax paper is wrong here, and an unlined pan is heartbreak.
Best foods to serve: Stick to dry cookies, biscotti, or other firm treats. Anything moist, warm, or sticky can soften the surface faster than you’d think.
Humidity matters: Because this is candy, it can get tacky on damp days and soft if it sits too close to a warm oven, so think of it as short-shift serving ware and seasonal decor, not permanent dishware.
For cleaner edges: Pack the outer ring carefully and keep the candies snug. A tight arrangement gives you a smoother outline and fewer weak spots around the rim.
Make-ahead note: I usually make this the same day I plan to use it, especially if the house is busy and warm from holiday cooking.
The best send-off: When the season ends, you are absolutely allowed to smash the platter and eat it. Honestly, that final crack is half the fun.
Budget bonus: This project usually comes in at about $3, which is one reason it never stops charming me.