
This is one of those little kitchen-table projects that feels almost too simple for how pretty the results are. You start with plain glass marbles, use a quick oven-and-ice-water trick, and end up with a whole stash of sparkling pieces that catch the light in the loveliest way.
I especially love this project if you want something inexpensive but still special-looking for a holiday tree, a window bowl, or homemade gifts. A single dollar-store bag can go a surprisingly long way, and because a few marbles usually break all the way through, I always plan for a little attrition and still come out with plenty.
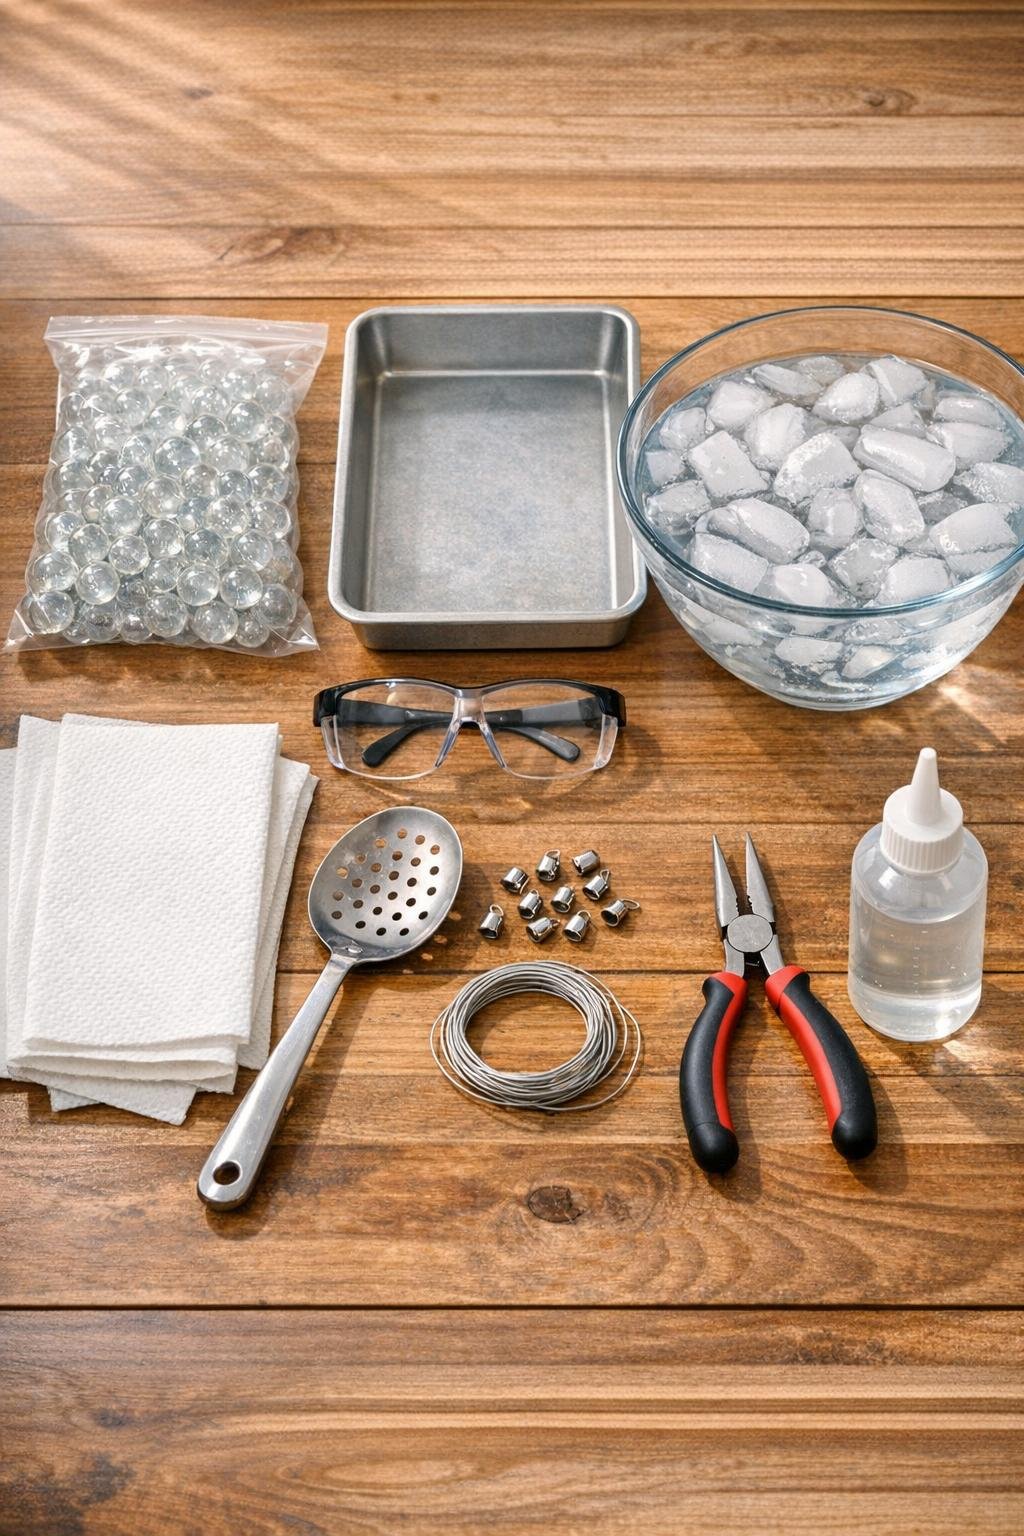
Materials
1 bag clear glass marbles, 14 to 16 oz, about 45 to 60 marbles
Instructions
1. Preheat your oven to 425 F and set the empty metal pan inside for a few minutes while you prepare the ice bath. Put the heatproof bowl on a folded towel and fill it with the ice and cold water.
2. Pour the marbles into the hot metal pan in a single layer and bake them for 20 minutes. This heat-soak is what sets up the magic, because the outside and inside of the glass won’t cool at the same speed.
3. Put on safety glasses before you open the oven, because the next step pops and crackles. The oven part is adult-only, and the marbles stay hot longer than you think.
4. Carefully pour the hot marbles straight from the metal pan into the bowl of ice water. The thermal shock shatters the inside of each marble into glittering fractures while the smooth outer shell stays intact.
5. Let the marbles sit in the ice water for 2 to 3 minutes until the popping stops. About one marble in ten may crack clean through, so expect a few casualties.
6. Use a slotted spoon to fish out the intact marbles and transfer them to paper towels. Discard any fully split marbles and let the survivors dry completely for at least 1 hour.
7. For simple pendant-style ornaments, glue one metal bail to the flattest spot on each dry marble and let the glue cure according to the package directions. I usually leave them undisturbed overnight so they are truly secure.
8. For fuller ornament clusters, cut three 8-inch lengths of jewelry wire and thread 3 to 5 marbles onto each length using wrapped bails or wire loops. Twist the wires together at the top with pliers and add a hook or ribbon loop for hanging.
9. If you want the easiest display, skip the hardware and pile the dry marbles into a clear glass bowl or hurricane vase. Set them near a window or where a lamp will shine through them, because low light through the fractures is the real showstopper.
10. Hang the finished ornaments on the tree, tie them onto gift tops, or group a dozen in a bowl for a bright centerpiece. A cheap bag of marbles really can make a whole tree’s worth of crystal sparkle.

Variations & Tips
For a fuller tree: Make a mix of single pendants and 3-marble clusters so the branches look layered and generous instead of flat.
For picky decorators: If your family likes things simple, leave the marbles clear and silver. If they love sparkle, pair them with velvet ribbon loops or tiny metallic hooks.
For colored ornaments: Use tinted glass marbles instead of clear ones, but still expect some losses during the ice-water step. The internal cracks show up especially nicely in pale blue, green, and amber glass.
For safer handling: Check every cooled marble with your fingers before using it. If you feel a sharp edge or hairline split on the outside, set that one aside instead of hanging it.
For stronger glue bonds: Wipe each marble with a dry paper towel before gluing on bails so there is no moisture left on the surface. Even a little dampness can weaken the hold.
For a non-holiday display: Fill a clear bowl, vase, or lidded jar with the finished cracked marbles and place it on a sunny shelf or windowsill. They look lovely year-round and don’t need any extra embellishment.
Budget tip: Since about one in ten marbles may break clean through, buy one extra bag if you need a specific number for gifts or a full large tree.
Best lighting: These really come alive with side light rather than overhead light. A nearby window, twinkle lights, or a soft lamp will make the internal fractures glitter much more than bright ceiling light.