
There’s a certain satisfaction in making something handsome out of a thing that’s just about lived out its first life, and this wreath is one of those projects that feels clever the minute it comes together. An old garden hose already knows how to live outdoors, so instead of fighting rain, wind, and sun the way many wreaths do, this one takes it all in stride and still looks cheerful on a porch or garden gate.
I like this project especially because it has a little humor to it. The hose stays unmistakably a hose, right down to the dangling nozzle, and that wink is what makes people smile. If you’ve got a retired hose and about half an hour, you can turn it into a full, sturdy welcome wreath with a big bow and seasonal picks that you can swap out all year long.
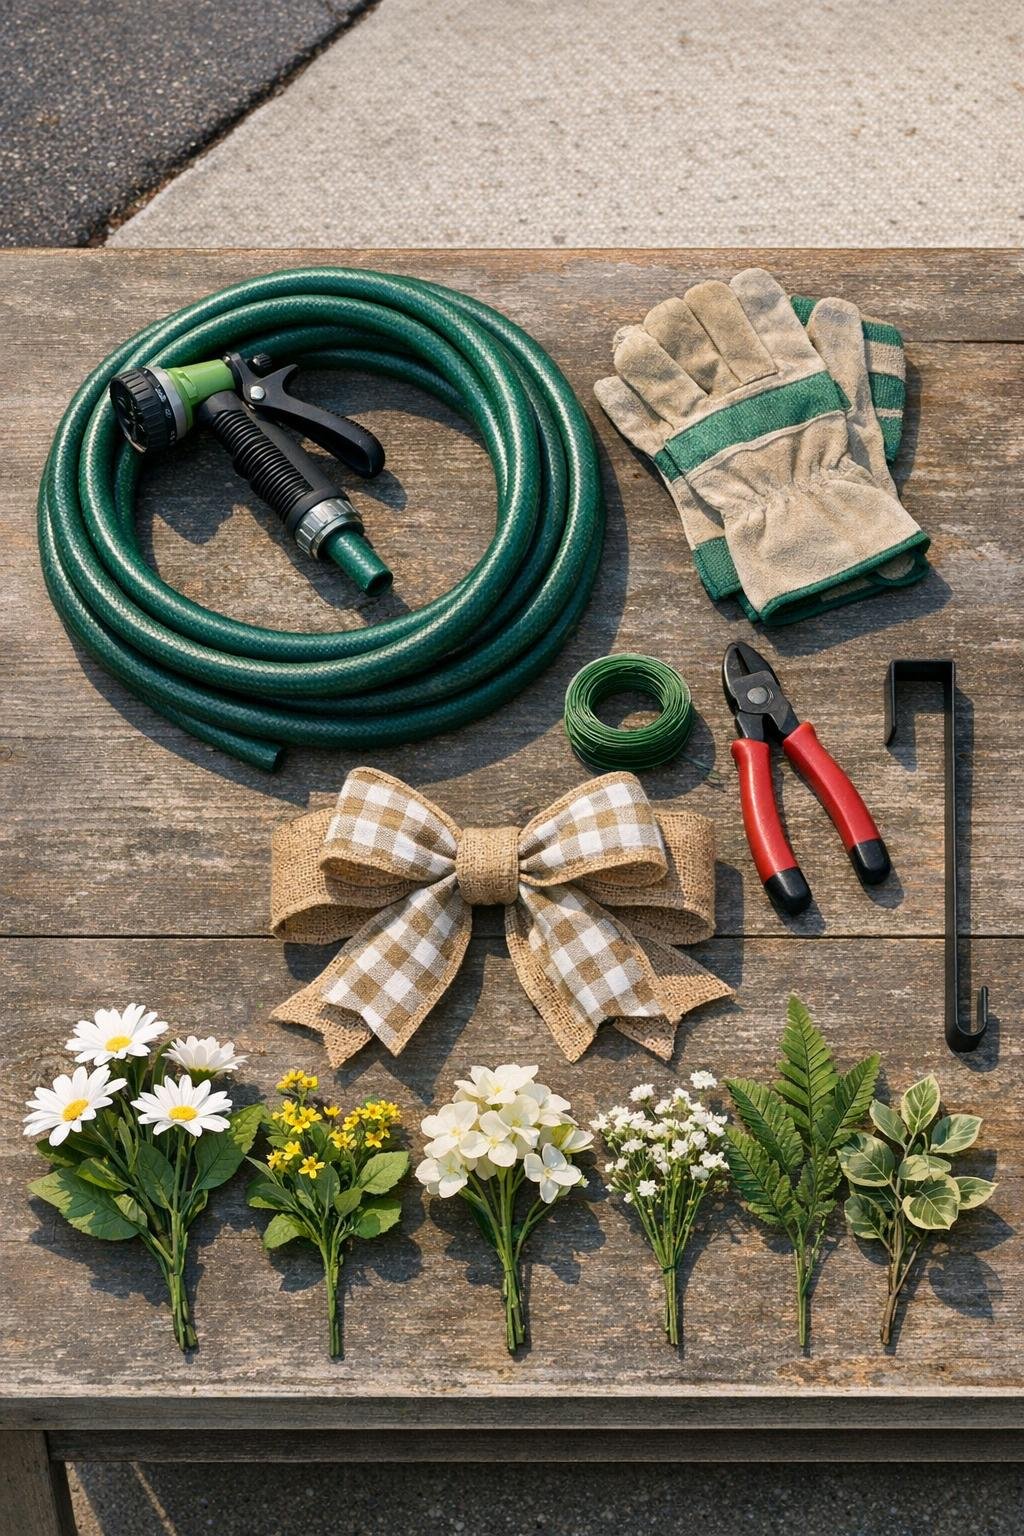
Materials
1 old garden hose, 40 to 50 feet long, clean and dry, with nozzle or sprayer still attached
Instructions
1. Set the hose in the sun for about 1 hour, or bring it indoors for 10 minutes, so it softens and bends more easily. A cold hose will fight you every inch of the way, and this little bit of patience saves the whole project.
2. Put on your gloves and lay the hose on a driveway or patio. Start coiling it into a circle about 24 inches across, making 4 to 5 overlapping loops and keeping the loops snug and even.
3. As soon as two sections cross, wrap that crossing point tightly with an 8-inch piece of floral wire and twist it secure. Wire every crossing as you go, because an unwired hose will spring open and undo your hard work in a hurry.
4. Continue coiling and wiring until the wreath feels firm and holds its round shape on its own. Aim for a generous, layered circle with the loops overlapping enough to look full rather than flat.
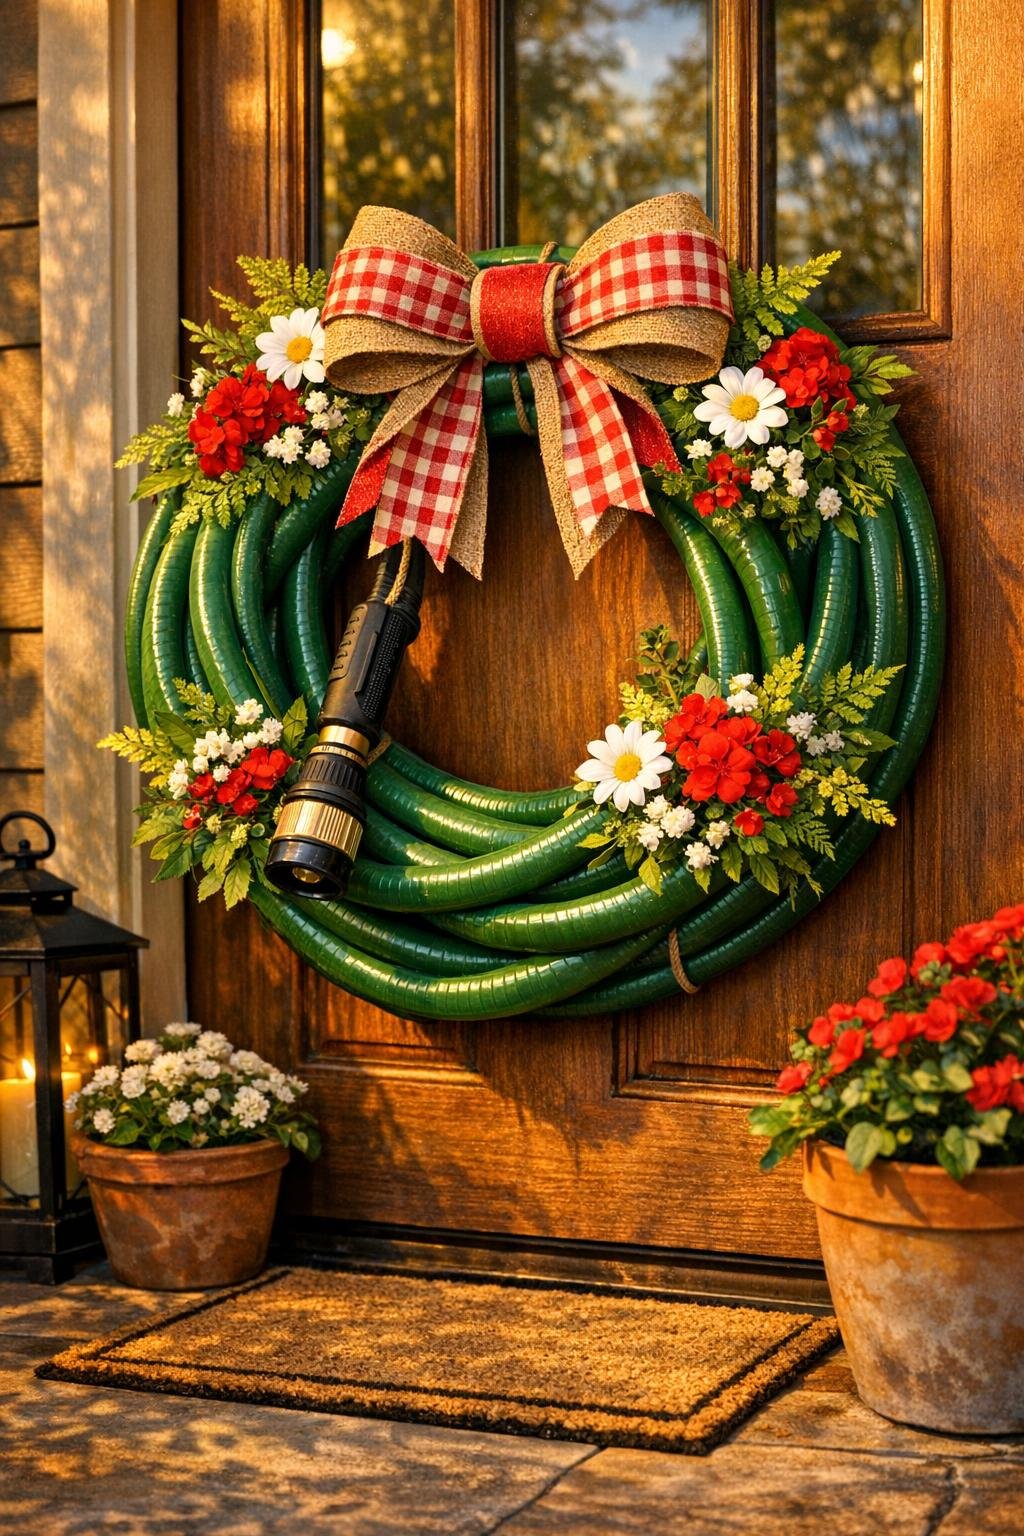
5. Bring the two hose ends together near the bottom right or lower side of the wreath and wire them neatly into place. Leave the nozzle dangling visibly outside the coil so the finished wreath still clearly reads as a garden hose.
6. Tie or wire the large bow over the spot where the two hose ends meet. This covers the join nicely while giving the wreath that finished, front-door look.
7. Tuck the faux flower picks or greenery stems into the gaps between the hose loops, spacing them around the bow and one side of the wreath for a balanced arrangement. If needed, add a short piece of floral wire around each stem to keep it from shifting in wind.
8. Trim any long wire tails and tuck the ends inward so nothing scratches your door. Lift the wreath by the top loop to check that everything stays secure and adjust the bow or picks if they lean.
9. Hang the wreath from a sturdy hook on your front door, porch wall, garden gate, or shed door. Because it’s heavier than a regular wreath, make sure the hook is firmly seated before you let go.
Variations & Tips
Seasonal swap: Change only the picks and bow to carry this wreath through the whole year. Tulips or daisies work for spring, bright blooms for summer, mums and berries for fall, and evergreen sprigs with pinecones for winter.
Best hose choice: A standard flexible vinyl or rubber garden hose works best for this. Very stiff heavy-duty hoses can still be used, but they need extra warming time and a few more wire ties.
Keep it balanced: If your wreath looks lopsided, spread the loops slightly before tightening the last few wires. I like to step back a few feet and look at the overall circle before adding the bow.
Make it fuller: Use 8 picks instead of 6 if you want a more lush look, especially for fall or winter. Tuck them in at slightly different angles so the arrangement looks layered and generous.
Outdoor durability: Choose UV-resistant faux picks and a weatherproof ribbon if the wreath will stay outside full time. The hose itself is already made for the weather, which is one reason this project is such a good one.
Storage tip: When the season changes, hang the bare hose wreath base on a garage wall hook and store the bows and picks in a labeled tote. Then next year you’re only minutes away from a fresh new version.