
This little garden project is one of my favorite kinds of DIY: cheap, practical, and the kind of thing that quietly makes your life easier when the season starts winding down. We’re turning a white 5-gallon bucket plus two simple dollar store supplies into a deep-root watering reservoir that slowly delivers water where thirsty plants actually need it, instead of letting it evaporate off the surface or run away.
I especially love this for late summer and early fall because that’s when I’m juggling work, dinner, and trying to keep tomatoes, peppers, and bigger container plants alive through hot afternoons and inconsistent rain. If you want a low-fuss watering helper that’s easy to make in one evening and sturdy enough to use year after year, this is absolutely worth the 20 minutes.
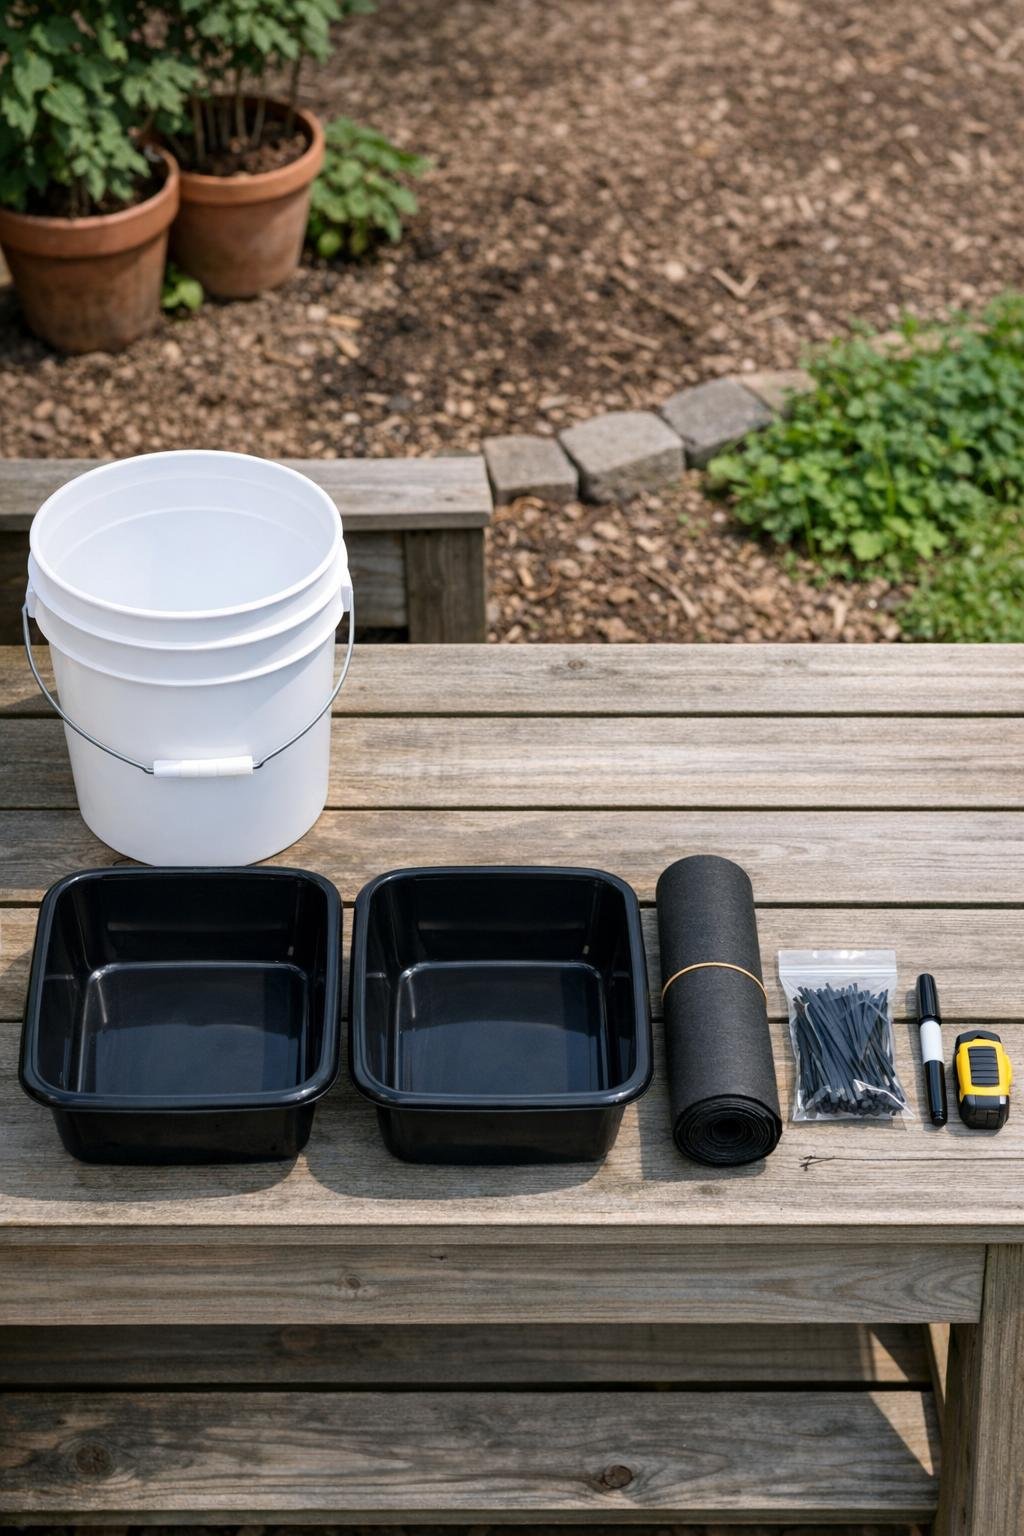
Materials
Instructions
1. Wash and dry the bucket and both dish tubs so the plastic is clean and easy to mark. Set the bucket upright and mark a band around the lower sides starting 2 inches up from the bottom and ending about 6 inches up.
2. Drill rows of small holes all the way around that marked lower band, spacing the holes about 1 inch apart in staggered rows. This creates the slow-release zone that lets water seep into the root area instead of dumping out all at once.
3. Drill 6 to 8 small holes in the very bottom of the bucket too, just enough for slow drainage and to prevent stagnant water. Keep these holes smaller and fewer than the side holes so the bucket still functions as a reservoir.
4. Take the first dish tub and drill or poke 10 to 12 holes across its bottom, spacing them evenly. This tub becomes a protective top tray that helps direct water down while keeping mulch and debris from immediately clogging the bucket opening.
5. In the second dish tub, drill a tighter pattern of 16 to 20 holes across the bottom and lower sides. This one acts like a coarse filter basket and helps slow soil from packing directly against the perforated bucket.
6. Cut the landscape fabric so it is large enough to line the inside of the more heavily perforated dish tub with a little overlap at the top edge. Press it into the tub and secure it through a few upper holes with 4 zip ties so it stays in place.
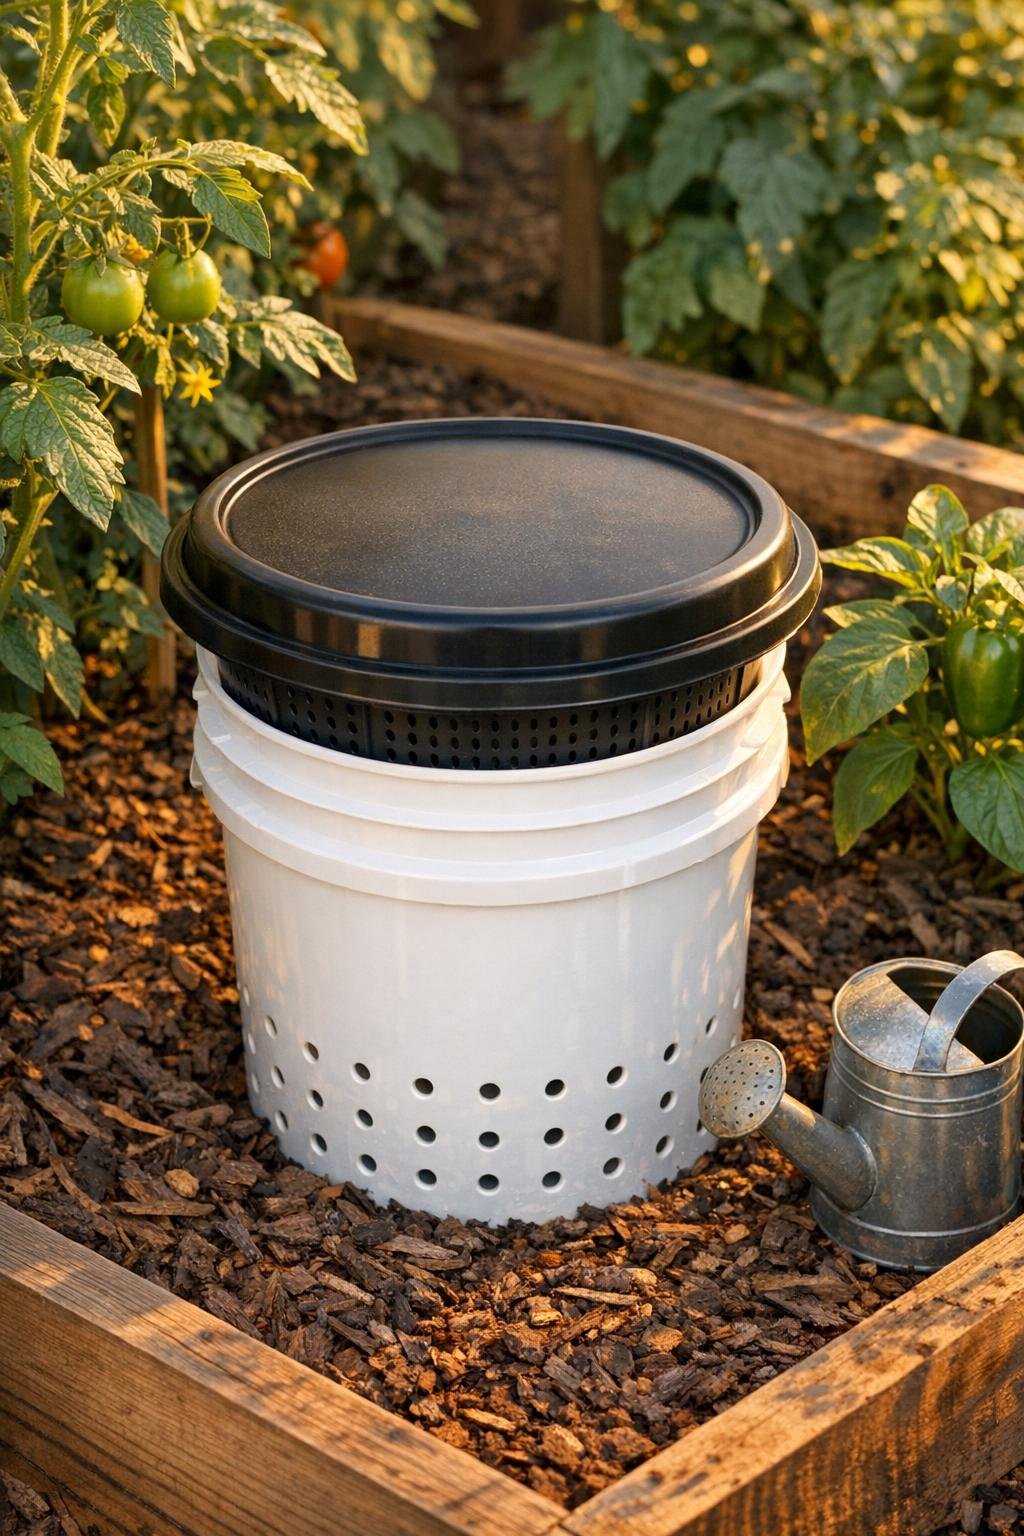
7. Set the fabric-lined dish tub into the planting hole or into the center edge of a large raised bed so its rim sits about level with the soil surface. Backfill around it firmly, because this outer basket supports the bucket and keeps surrounding soil from collapsing inward.
8. Lower the drilled bucket inside the lined dish tub and press soil around the outside if needed so it stands straight. The bucket’s lower perforated section should sit below the soil line where the roots can reach the moisture gradually.
9. Place the second dish tub upside down over the bucket opening like a lid, centering it so it covers the top well. If you want it more secure, add 4 zip ties through matching edge holes to loosely anchor the cover to the bucket handle mounts.
10. Fill the bucket with water and watch for a slow, steady seep into the surrounding soil rather than a fast pour. Top the area with 2 to 3 inches of mulch, keeping the cover accessible, and refill the reservoir deeply whenever the surrounding bed starts drying out.
Variations & Tips
For tomato beds: I like placing one reservoir between every 2 large tomato plants or between 3 pepper plants. It gives you a deep soak right where those roots are working hardest.
For raised beds: If your bed is shallow, leave a little more of the bucket above soil level and mulch around it. The system still works well as long as the drilled band sits below the surface.
To avoid clogs: The landscape fabric is worth using even though it feels like an extra step. It keeps fine soil from plugging the holes, which means the reservoir keeps releasing water evenly instead of turning into a muddy container.
For cleaner refills: If falling leaves are a problem, weight the upside-down dish tub lid with a small flat stone. I do this in late season when my beds collect every leaf in the neighborhood.
Make it look tidier: If the white bucket stands out more than you’d like, spray-paint only the exposed upper section with outdoor plastic-safe paint in brown or dark green before installing. Just avoid painting the drilled lower portion so the holes stay open and easy to inspect.
Best use timing: This is especially helpful at the end of the season when plants are mature and surface watering barely reaches deep enough. A full bucket gives a slower, more useful soak that saves me from dragging the hose out every single evening.