
Old turned table legs have so much personality, and this is one of my favorite ways to turn a thrift-store find into something cheerful for the yard. In this project, I’m using four wooden table legs to make a set of scarecrow-style garden stakes that look adorable tucked into planters, lined along a walkway, or grouped by a front porch mum display.
I love projects like this because they feel high-impact without being complicated. If you can paint simple faces, glue on a few embellishments, and tie fabric bows, you can absolutely make these. It’s also a great weekend craft if you want something festive but don’t have time for a full-blown porch build—I’ve done versions of these between grocery runs and meal prep, and they still come out looking polished.
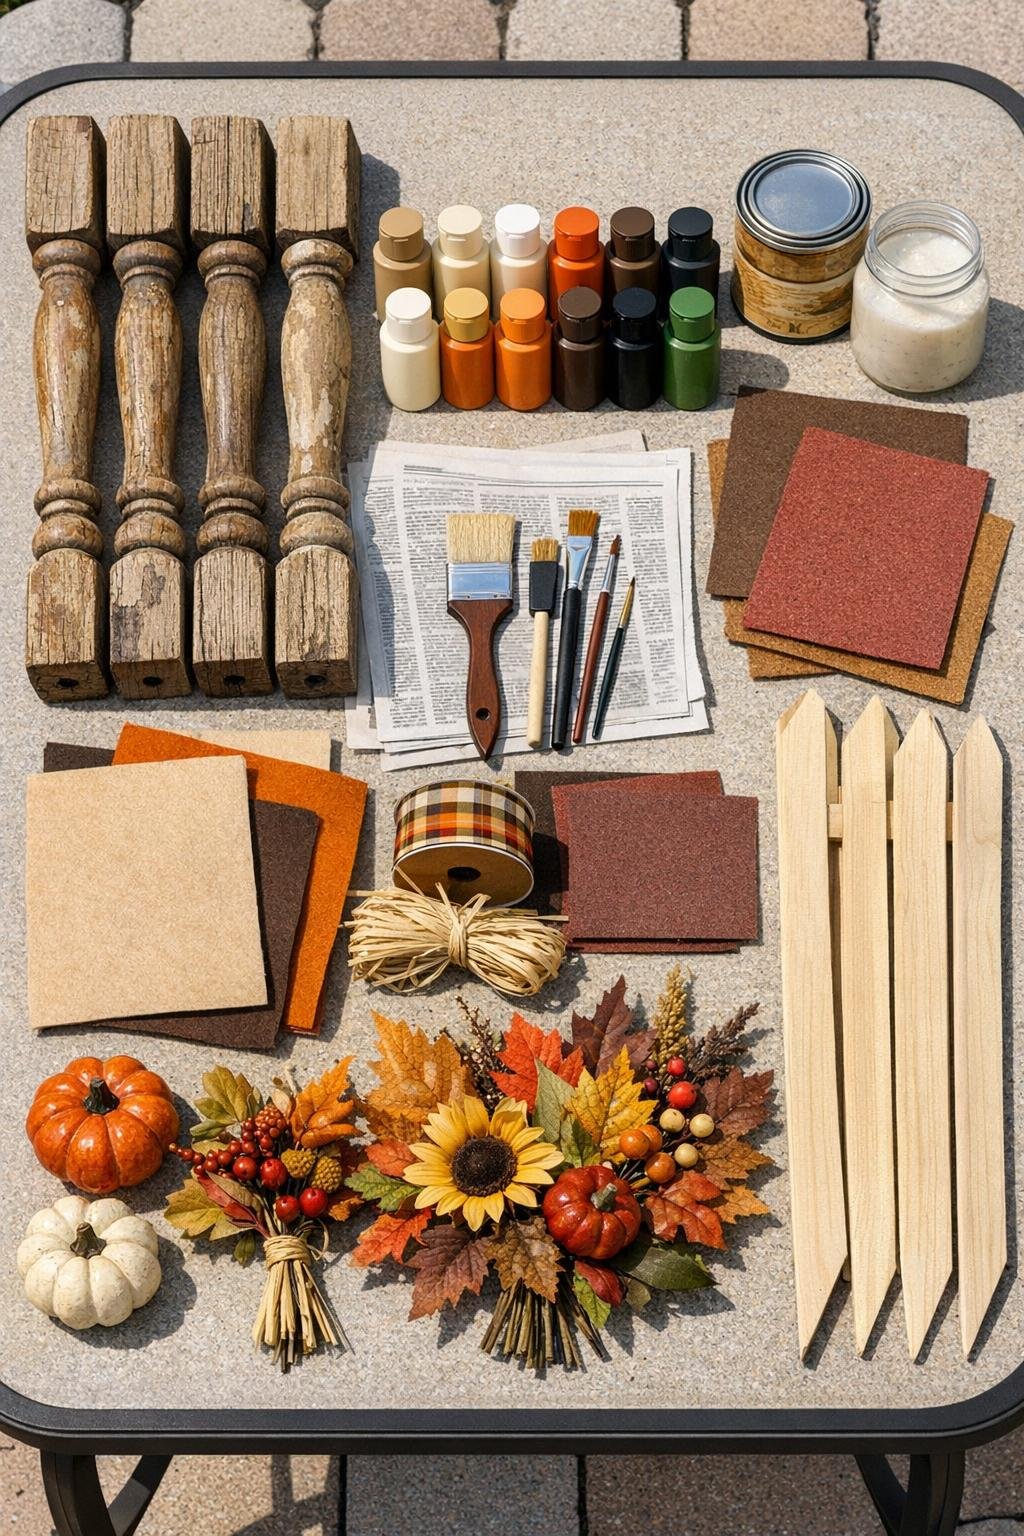
Materials
4 old wooden table legs, 24 to 30 inches long each
Instructions
1. Wipe each table leg clean and sand away any flaky finish with 120-grit sandpaper, then smooth everything with 220-grit. Focus extra attention on the top third of each leg, since that section will become the scarecrow face.
2. Paint the top 8 to 10 inches of each leg tan for the face area, working the paint into the grooves and curves. Let the first coat dry, then add a second coat for solid coverage.
3. Paint the lower sections in fall clothing colors, varying the legs so the set looks collected and lively rather than identical. I like using deep red, mustard, olive, and brown, then adding cream stripes or cuffs to make the turned details pop.
4. Use black paint to add simple eyes, brows, and smiling mouths on the tan sections, then use orange paint to add a triangle nose on each face. Dot tiny cream highlights in the eyes if you want them to look a little more animated.
5. Cut four hat brims from craft felt if the top of each leg has a flat enough area to support one, or glue the felt around the upper edge as a soft hat accent. Add raffia under the brim line to create shaggy “hair” all the way around each face.
6. Tie one fabric strip around each leg just below the face to form a scarf, and fluff the knot so it sits off to one side. Tuck in a few strands of raffia with the scarf knot to give the neck area more fullness.
7. Glue two sunflower heads and two fall leaf picks around each scarf area, layering them front and slightly to the sides for a fuller look. Add one mini berry pick per scarecrow to fill any gaps and make the arrangement look finished from several angles.
8. Attach one wooden garden stake to the back of each table leg with exterior wood glue and two screws, keeping the stake centered so 6 to 8 inches extend below the leg. Let the glue set fully before lifting them upright.
9. Brush on a coat of clear matte outdoor sealer over the painted wood, avoiding heavy buildup on the raffia and fabric. Let everything dry completely, then fluff the raffia hair and straighten the florals one last time.
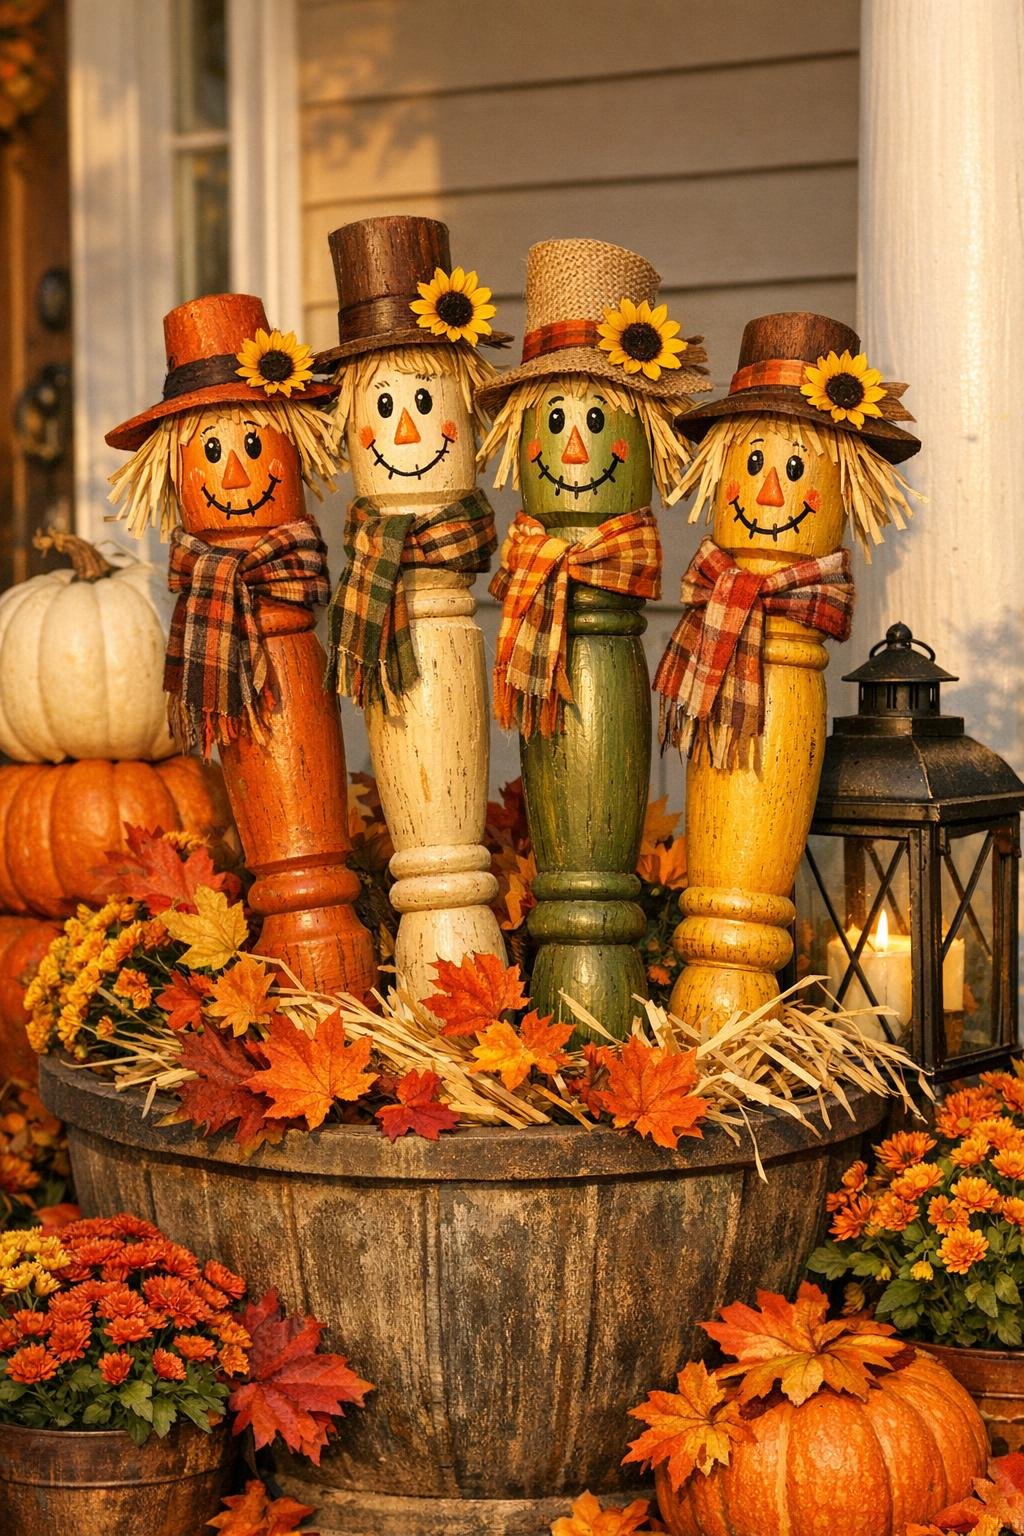
Variations & Tips
Face Style: If painting faces makes you nervous, keep them very simple—two dots for eyes, a tiny triangle nose, and a curved smile are more than enough. The turned shape of the leg does a lot of the character work for you.
Color Palette: For a more classic farmhouse look, use cream, sage, rust, and black buffalo check fabric. If your porch decor is brighter, burnt orange and sunflower yellow look especially happy against weathered wood.
Weather Protection: If these will live fully outdoors for the season, use exterior paint and an outdoor-rated matte sealer. I also like placing them in covered porch planters or beds near the house so the fabric and raffia stay nicer longer.
No Screw Option: If you don’t want to screw into the legs, mount each one to a longer stake with heavy-duty exterior construction adhesive and secure tightly with jute or clamps while it cures. It works best when the back of the leg has at least one flatter contact area.
Display Tip: These look best grouped as a set of four rather than spaced far apart. Tucking them close together gives you that full, styled fall display that makes thrifted pieces look intentional instead of random.
Thrift Store Tip: Don’t worry if the legs don’t match perfectly. Slightly different turned shapes actually make the scarecrows feel like they each have their own personality, which is half the charm.