
Every fall, I end up with the same nice little problem: too many potatoes, onions, and sweet potatoes to keep on the counter, but not quite enough pantry space to stash them neatly. This simple storage bin solves that in a way that feels almost ridiculously practical. By adding ventilation holes to a galvanized trash can and pairing it with two inexpensive dollar store basics, you get a roomy, breathable root vegetable bin that helps keep produce darker, drier, and easier to sort through.
I love this project because it looks tidy, costs far less than specialty produce storage, and comes together in one afternoon. If you're busy like I am and want a hardworking storage solution without building cabinetry or hauling out power tools for half a day, this is exactly the kind of DIY that earns its keep.
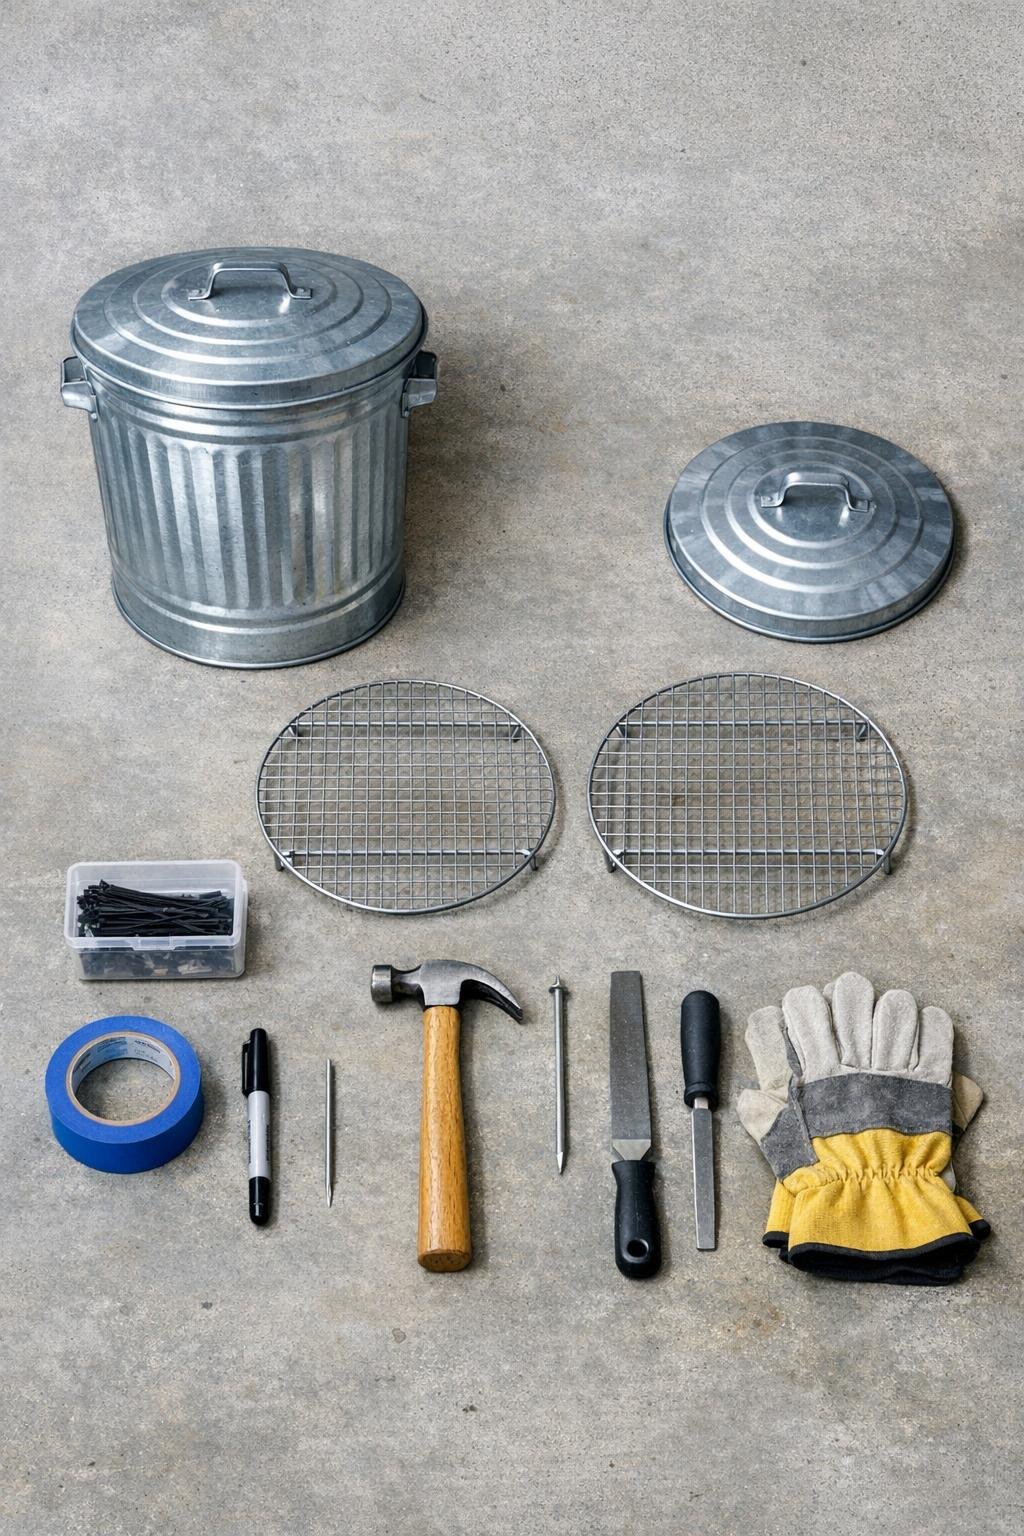
Materials
Instructions
1. Wash and dry the galvanized trash can, lid, and cooling racks so the finished bin starts clean and food storage-ready. I always do this first because it is much easier than trying to wipe around all the added holes later.
2. Turn the trash can upside down and place strips of painter's tape across the bottom so you can mark hole placement clearly. Draw a ring of holes about 2 inches in from the outer edge, spacing them roughly 1 1/2 inches apart, then add 5 to 7 holes in the center area.
3. Put on gloves, set the can on concrete or a sturdy scrap board, and punch each marked spot with the nail and hammer to create ventilation holes in the bottom. Make the holes large enough for airflow, about 1/4 inch wide, but not so large that small onions could press into them.
4. Flip the can upright and mark three horizontal rows of ventilation holes around the lower half of the can: one row 3 inches up from the base, one at 6 inches, and one at 9 inches. Space the holes 2 to 3 inches apart all the way around each row.
5. Punch the side holes with the nail and hammer, rotating the can as you go to keep the rows even. This part looks a little industrial when you're in the middle of it, but the airflow payoff is what makes the bin actually work for storage.
6. Smooth any sharp edges around the holes with a metal file or sanding block, inside and out, until the metal feels safe to handle. Wipe away any metal dust with a damp cloth.
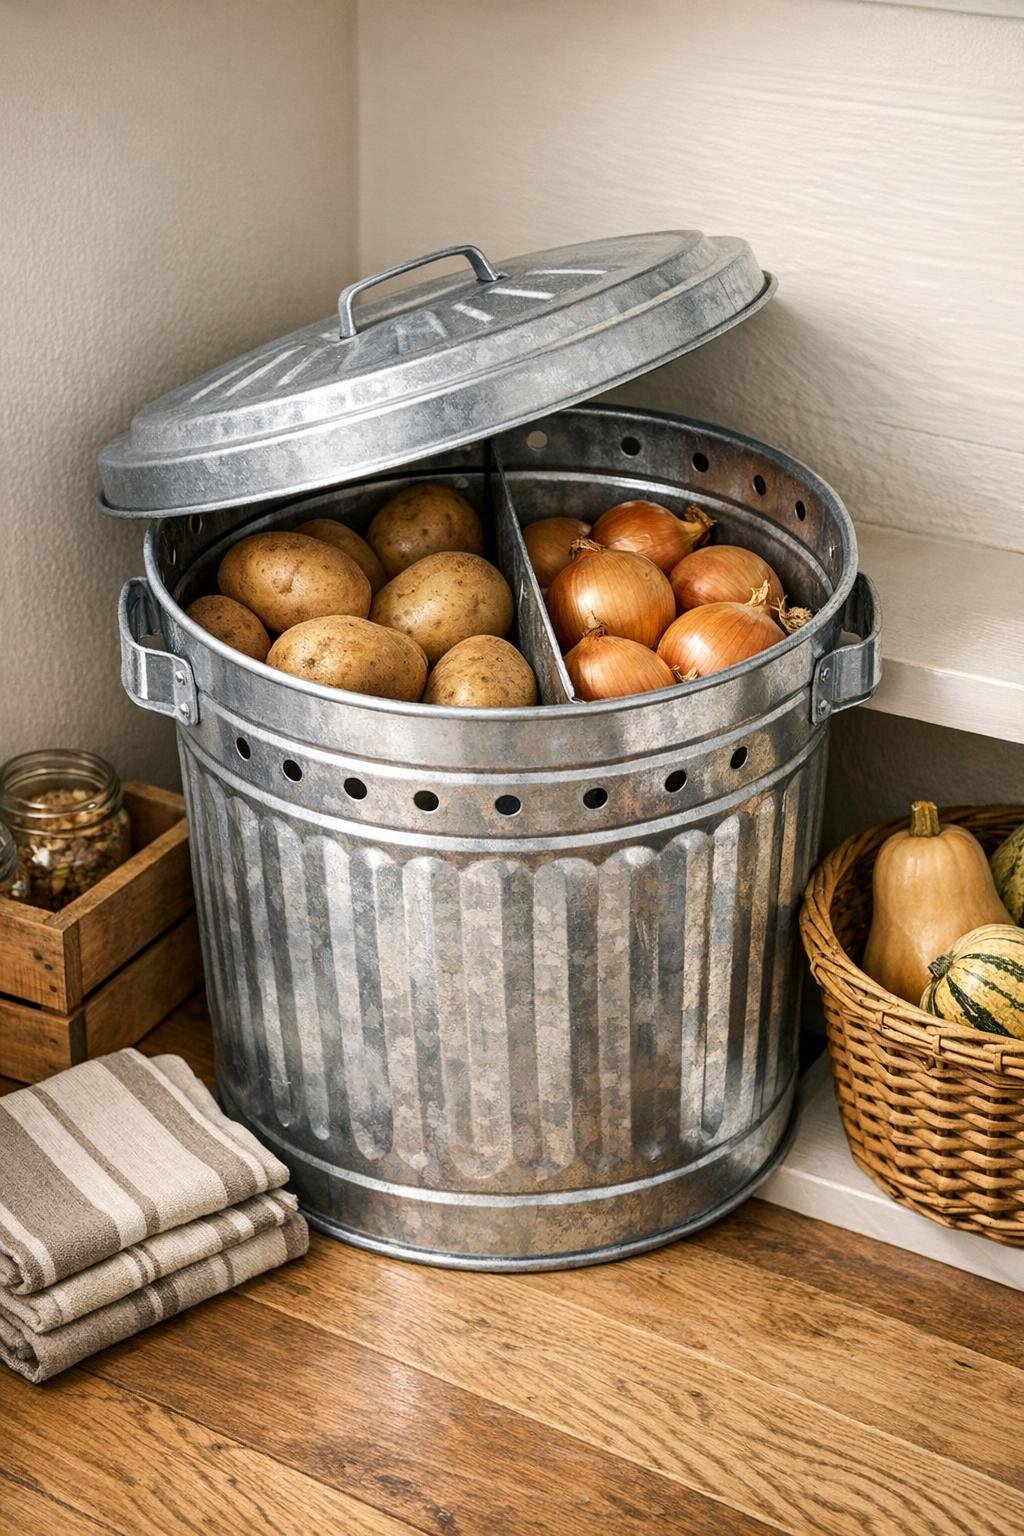
7. Set one cooling rack flat inside the can about 2 inches above the bottom to create a raised false floor for airflow under the vegetables. Use 8 zip ties threaded through the rack edge and nearby side holes to suspend it securely and keep it level.
8. Install the second cooling rack vertically inside the can as a divider, positioning it from front to back so you create two storage sections. Fasten it to opposite side holes with 8 more zip ties, then trim the tails for a cleaner finish.
9. Test the structure by pressing lightly on the raised rack and divider, then add the remaining zip ties anywhere the racks need extra support. The goal is a sturdy insert that will hold a generous amount of potatoes, onions, or sweet potatoes without sagging.
10. Place the lid on top and set the finished bin in a cool, dry, dim spot like a mudroom, garage corner that stays above freezing, or basement landing. Store potatoes on one side and onions or sweet potatoes on the other, keeping the lid slightly askew if you want even more airflow.
Variations & Tips
For three vegetable zones: If your trash can is wide enough, swap the two round cooling racks for one raised rack and two narrow vertical dividers cut from dollar store wire organizers, so you can separate potatoes, onions, and sweet potatoes more precisely.
For extra darkness: Root vegetables store better away from light, so keep the lid fully on unless you're grabbing produce. If your storage spot is bright, drape a breathable tea towel over the lid instead of using anything plastic that can trap moisture.
Best vegetables for this bin: This setup is ideal for potatoes, onions, shallots, garlic, and sweet potatoes. I would not use it for regular carrots or beets unless they are very well cured, because they usually prefer higher humidity than this airy bin provides.
How full to pack it: Fill each side no more than about two-thirds full so air can still move through the pile. That extra breathing room really does help produce last longer instead of creating one soft spot that spreads.
Easy clean-out routine: Empty the bin once a month, brush out papery skins and dirt, and check for any soft vegetables. I do this while I'm already tidying the pantry, and it keeps the whole system from turning into a forgotten science experiment.
If your floor is damp: Set the can on two scrap wood strips or a boot tray so the bottom holes stay clear and dry. Good airflow underneath the can matters just as much as the holes in the sides.
Make it look more finished: Trim every zip tie tail neatly and orient the divider so it looks centered when the lid opens. It is a purely functional project, but those tiny cleanup details make it feel intentional instead of improvised.