
When I’m trying to get a jump on the garden before the last frost date has fully behaved, I lean hard on simple little tricks like this one. This mini greenhouse frame uses upside-down wire tomato cages plus one common yard staple—clear plastic sheeting—to create a roomy, lightweight cover for a raised bed section, and it’s one of those old-school ideas that still earns its keep.
I love this project because it’s fast, inexpensive, and genuinely useful if you’re starting lettuce, spinach, brassicas, herbs, or hardening off seedlings in a small raised bed. If you’ve got a busy week and want something you can put together in under an hour without hauling out a workshop’s worth of tools, this is exactly the kind of practical garden fix that makes spring feel a little more manageable.
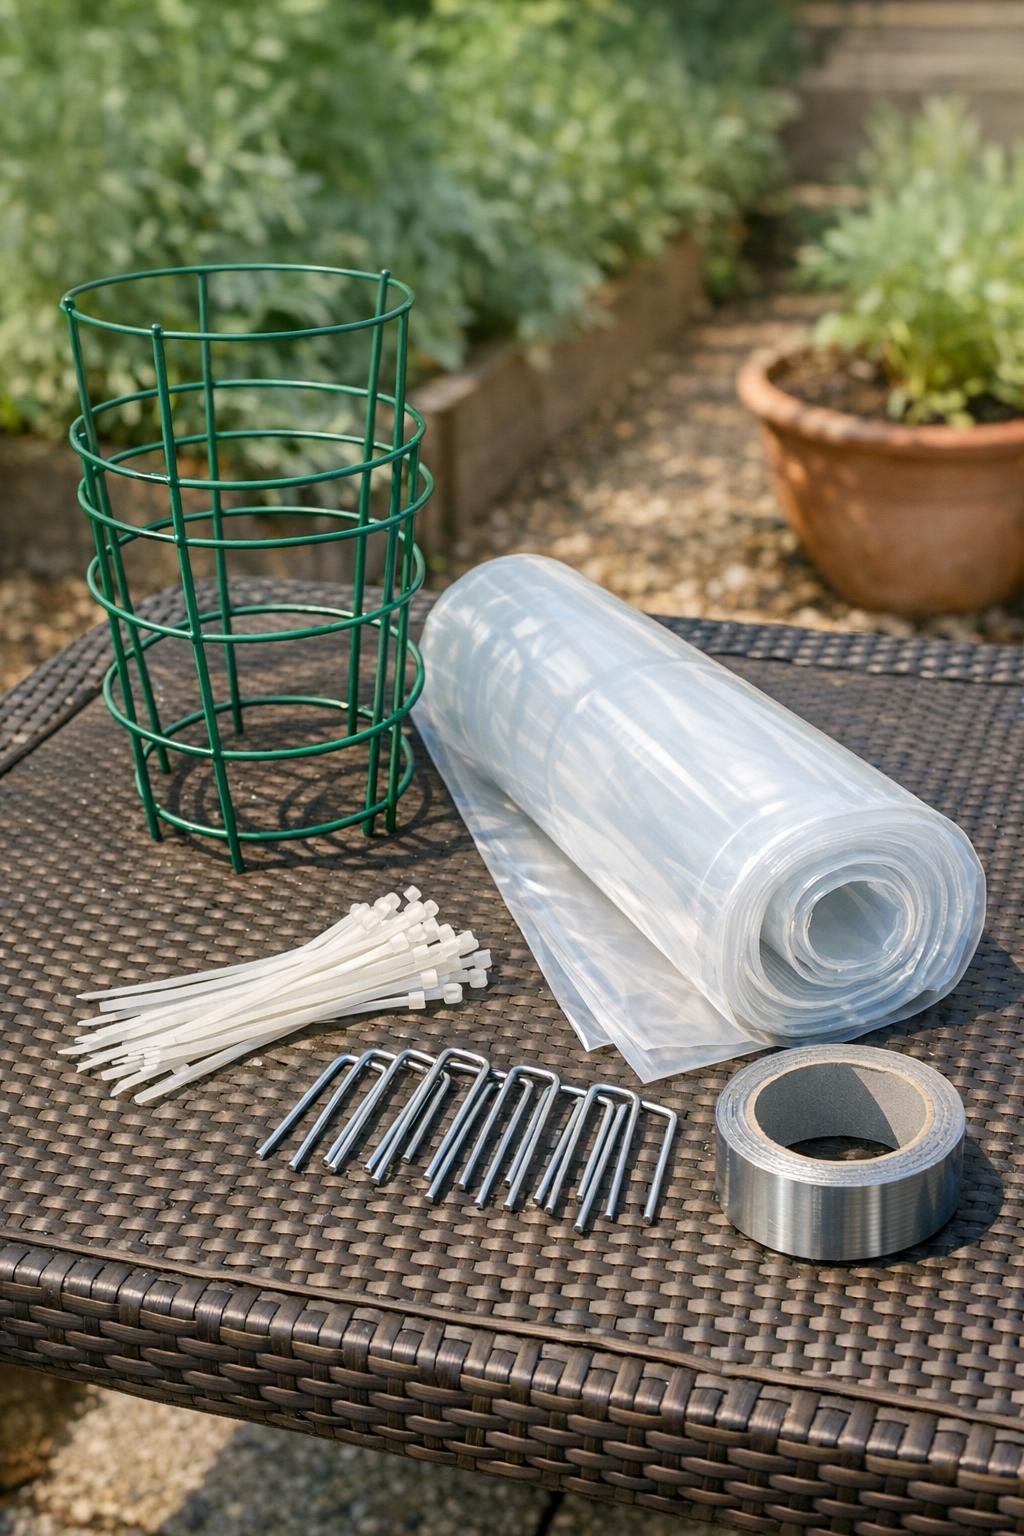
Materials
Instructions
1. Choose a raised bed section about 3 to 4 feet long and smooth the soil so the frame will sit evenly. Water the bed lightly first if it’s dusty, because that helps the plastic stay cleaner while you work.
2. Turn all three tomato cages upside down so the wide rings are on the soil and the pointed leg ends face up. Set them in a straight row, slightly overlapping, to create one longer tunnel-shaped frame.
3. Zip-tie each cage to the next at two or three contact points where the rings overlap. Pull the ties snug so the row acts like one sturdy frame instead of three wobbly pieces.
4. Check the height and width, then nudge the cages until the tunnel is centered over your planting area. If any sharp wire ends feel exposed at the top, wrap them with a scrap of cloth and a bit of tape so the plastic won’t snag.
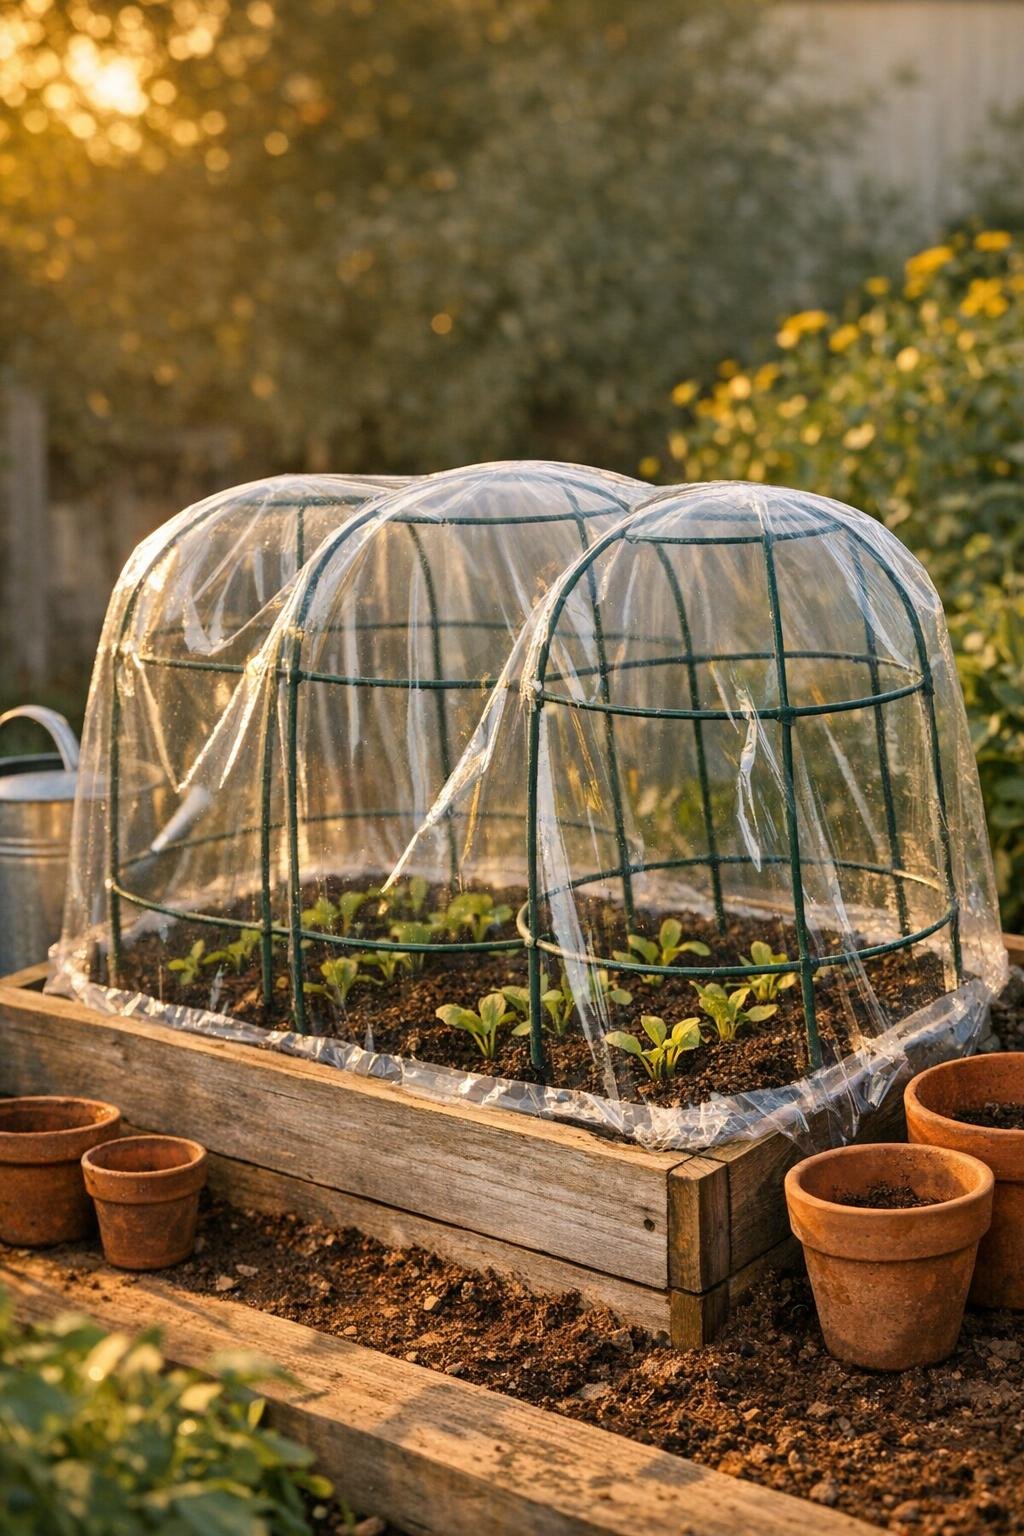
5. Drape the clear plastic sheeting over the full row, leaving enough extra on both long sides to reach the soil and enough at each end to fold down. Center it so the frame is evenly covered and the cages still keep their rounded shape.
6. Use binder clips or spring clamps to temporarily hold the plastic at the top and sides while you adjust the fit. The goal is a smooth cover with a little give, not drum-tight plastic that can tear in the wind.
7. Fold the plastic neatly at both ends like wrapping a gift, then secure those folds with weatherproof tape. Leave one end easier to open so you can vent the greenhouse on warm sunny afternoons.
8. Anchor the plastic along both long sides with landscape staples pushed through the excess plastic into the soil just outside the frame. Add staples every 10 to 12 inches so the cover stays down and holds warmth overnight.
9. Replace the clips with a few zip ties around the top wires if you want the plastic attached more permanently to the frame. Keep the ties loose enough that you can still lift one side or open one end for airflow.
10. Vent the greenhouse whenever the day turns warm, then close it again in late afternoon to trap heat for the night. I usually check mine when I’m doing my after-work garden lap, and that two-minute habit makes a big difference in preventing overheated seedlings.
Variations & Tips
For colder nights: Drape an old sheet or frost cloth over the plastic in the evening, then remove it in the morning for light. This double layer is especially helpful when temperatures dip lower than expected.
For windier yards: Add a few bricks or boards along the plastic edges on top of the staples. In my Midwest yard, a calm forecast can turn breezy fast, so I like the extra insurance.
For taller seedlings: Use larger tomato cages or space the cages a touch farther apart before tying them together. That gives you more headroom without changing the basic build.
For easier watering: Leave one end clipped instead of fully taped so you can fold it back quickly. It’s much simpler than pulling up the whole side when you’re squeezing in garden chores before dinner.
Best crops for this setup: Try leafy greens, radishes, baby carrots, cilantro, parsley, broccoli starts, cabbage starts, and hardened-off annual flowers. It works best for low to medium-height crops during the early-season window.
Plastic choice: Thicker 6 mil plastic lasts longer and resists tearing better than thin drop cloth plastic. If you want this to survive more than a quick cold snap, the sturdier sheet is worth it.
Heat management: Sun builds up fast under clear plastic, even on cool days. If the bed gets strong afternoon sun, prop open one end with a clamp or lift one side slightly to keep tender plants from cooking.
End-of-season storage: Cut the zip ties, shake off the soil, and stack the cages back together for storage. I keep the folded plastic in a lidded bin so it’s ready when spring weather starts acting unpredictable again.