
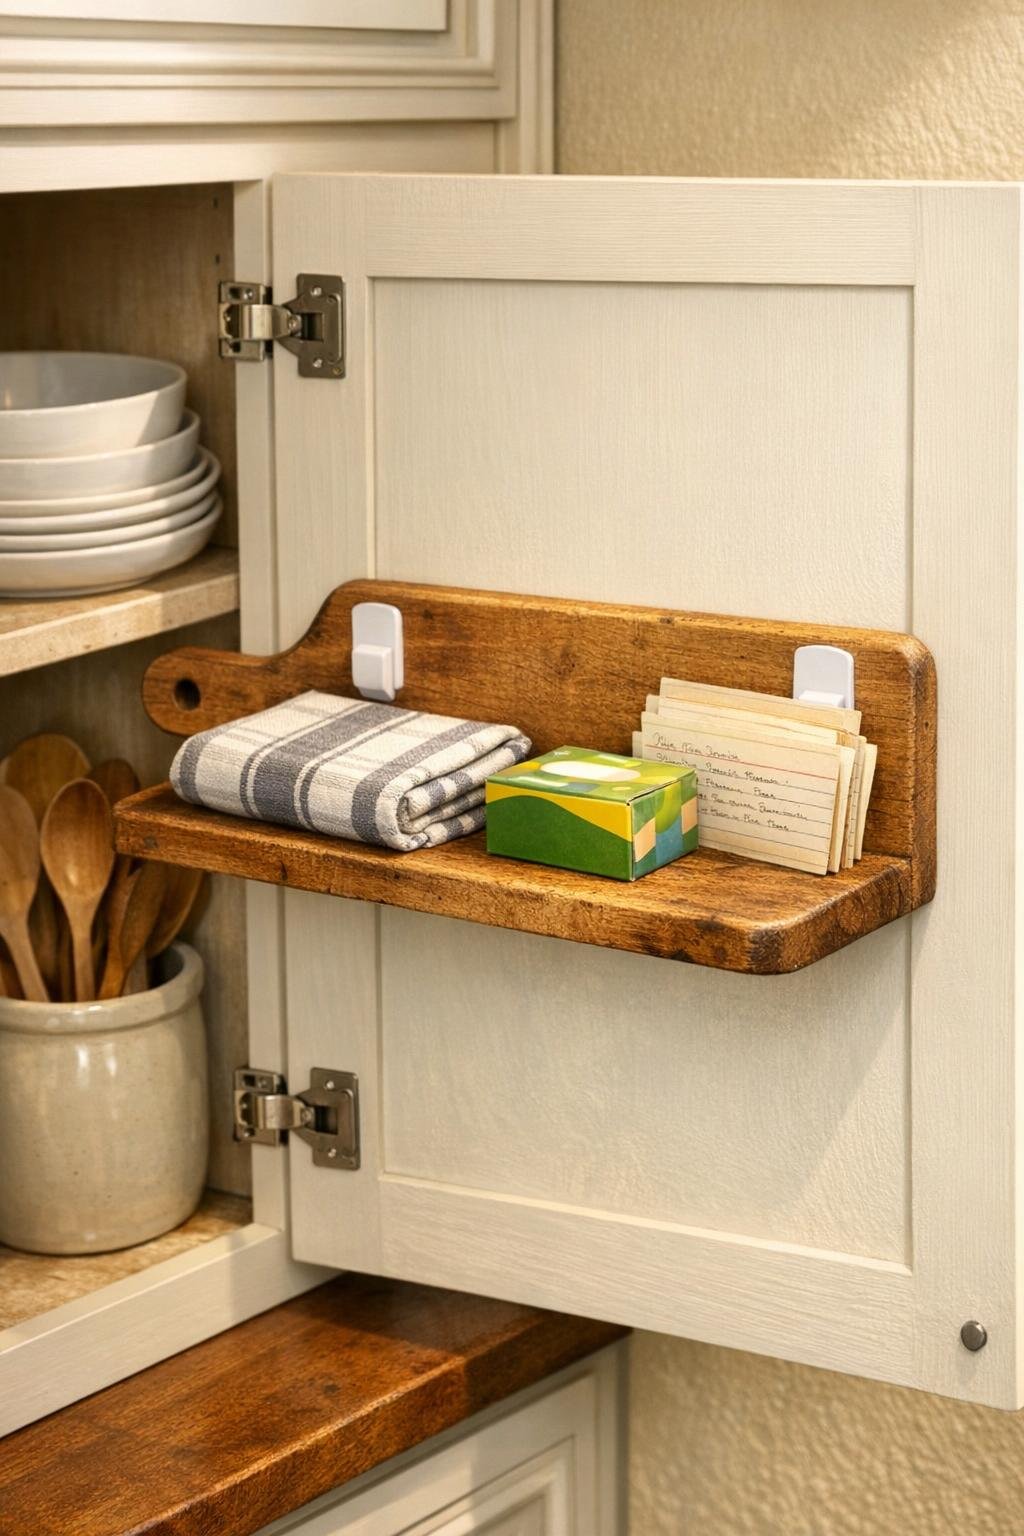
I’m fond of any kitchen trick that makes a small space work harder, and this one is about as practical as they come. By mounting two adhesive towel hooks on the inside of a cabinet door and sliding a small wooden cutting board onto them, you get a tidy little shelf that’s perfect for stashing foil, sandwich bags, dishcloths, lightweight spice packets, or those odds and ends that always seem to wander around the kitchen.
What I love most is that it uses simple materials, goes up fast, and doesn’t ask you to drill into the cabinet. It’s a fine project for renters, for busy family kitchens, or for anyone who likes a clever fix that looks neat and polished once it’s done. It reminds me of the kind of household solution my generation has always appreciated: use what you have, make it sturdy, and tuck it where it truly helps.
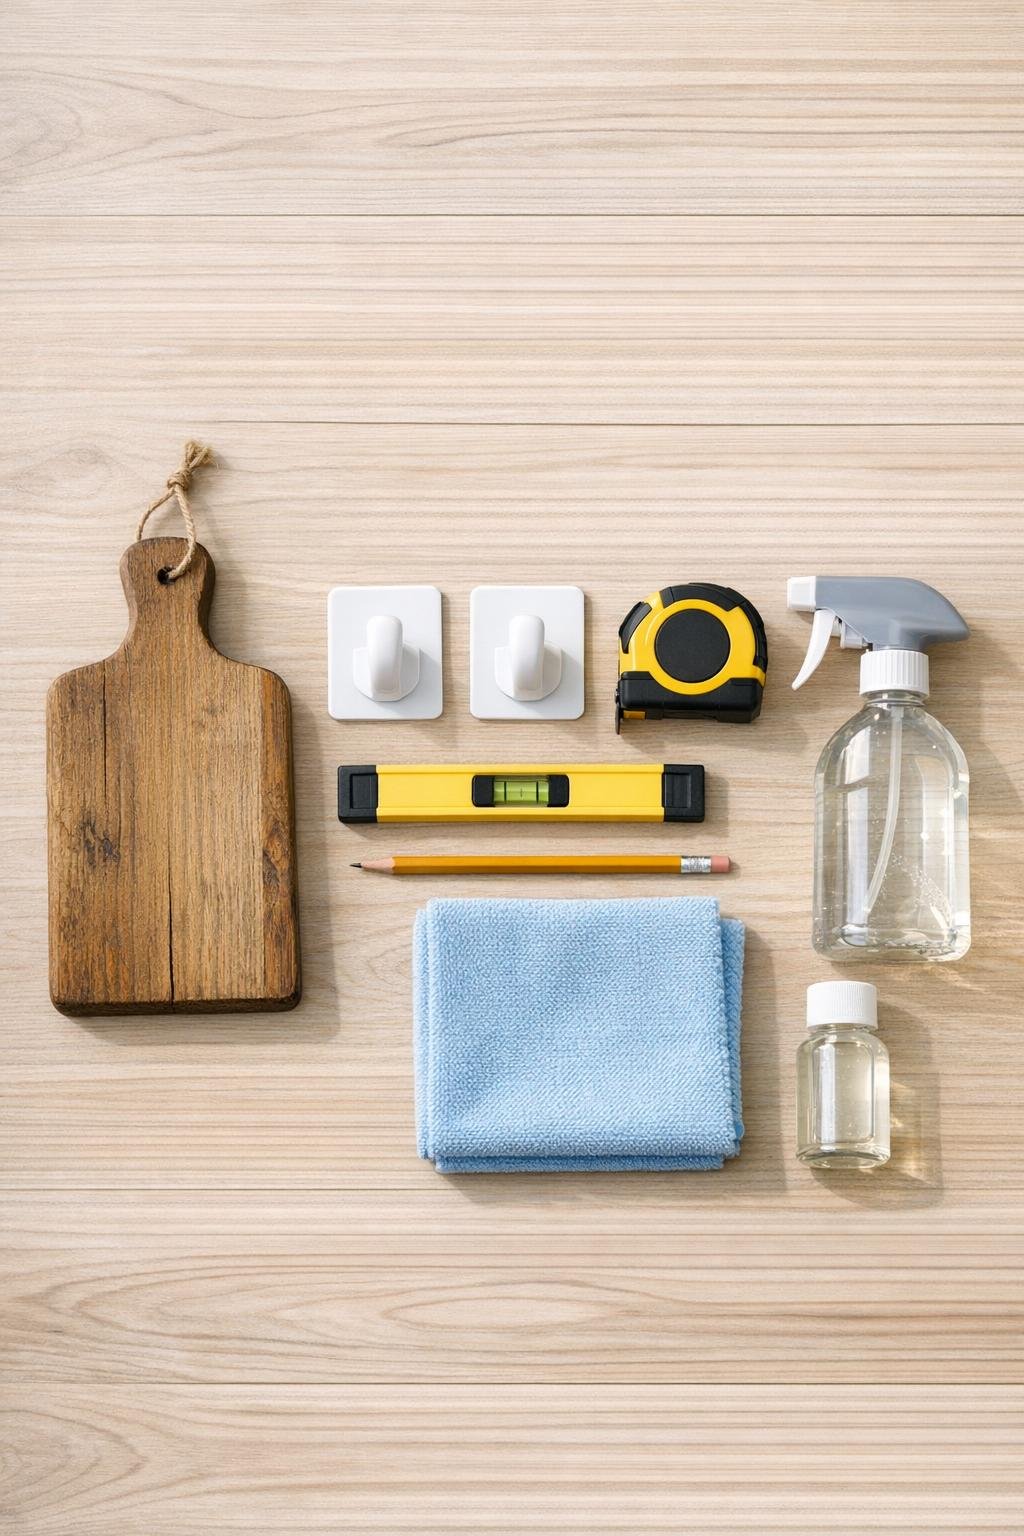
Materials
Instructions
1. Empty the cabinet door area and check that there’s enough inside clearance for the cutting board to sit flat without hitting shelves, hinges, or stored items when the door closes.
2. Wipe the inside of the cabinet door with degreasing cleaner or rubbing alcohol, then dry it well so the adhesive hooks can bond properly.
3. If you’d like a more finished look, brush or wipe a thin coat of clear matte or satin sealer onto the cutting board and let it dry completely before installing.
4. Hold the cutting board against the inside of the cabinet door in the position you want, usually with the long side horizontal, and lightly mark where the bottom edge will rest.
5. Measure the width of the cutting board and mark two hook locations so they sit level and support the board evenly, placing them about 1 to 2 inches in from each side.
6. Remove the hook backing and press each adhesive hook firmly onto the cabinet door at your marks, keeping the top edges level with one another; follow the package hold time so the adhesive sets well.
7. Slide the cutting board down onto the two hooks so the hooks cradle the lower edge and the board rests securely like a shallow shelf against the cabinet door.
8. Open and close the cabinet door slowly to make sure nothing shifts, then adjust your stored items plan so the board stays balanced and the door closes easily.
9. Add felt pads where the board touches the door or hooks if you want a quieter fit and a slightly more snug feel.
10. Load the new shelf with lightweight kitchen essentials such as a folded dish towel, a box of sandwich bags, recipe cards, or seasoning packets, keeping the weight light and centered for long-term hold.
Variations & Tips
Use the right board: A flat wooden cutting board with straight sides is easiest to fit on the hooks and gives you the most usable shelf space. If it has a handle, that’s fine; it adds charm and still looks like the cutting board it is.
Mind the weight: This is best for lightweight storage only. I’d skip heavy cans, glass jars, or stacked ceramics, because adhesive hooks do best when the load stays modest.
Test the depth first: Before peeling the hook backing, hold the board and close the door gently to be sure it won’t bump anything inside. That one little check saves a lot of fuss later.
Make it match your kitchen: You can leave the cutting board rustic, deepen the tone with a food-safe wood conditioner on the visible side, or use a clear sealer for a cleaner finished look. I like keeping the grain visible because it gives the cabinet a bit of warmth.
Try a narrower version: In a tight cabinet, use a board closer to 8 inches wide and store slim items like wax paper, tea towels, or envelope mixes. It’s still useful, just easier to fit.
Give the adhesive time: If your hook packaging recommends waiting before hanging weight, do it. In my experience, patience at this stage makes the whole setup much sturdier and keeps it from peeling loose down the road.