
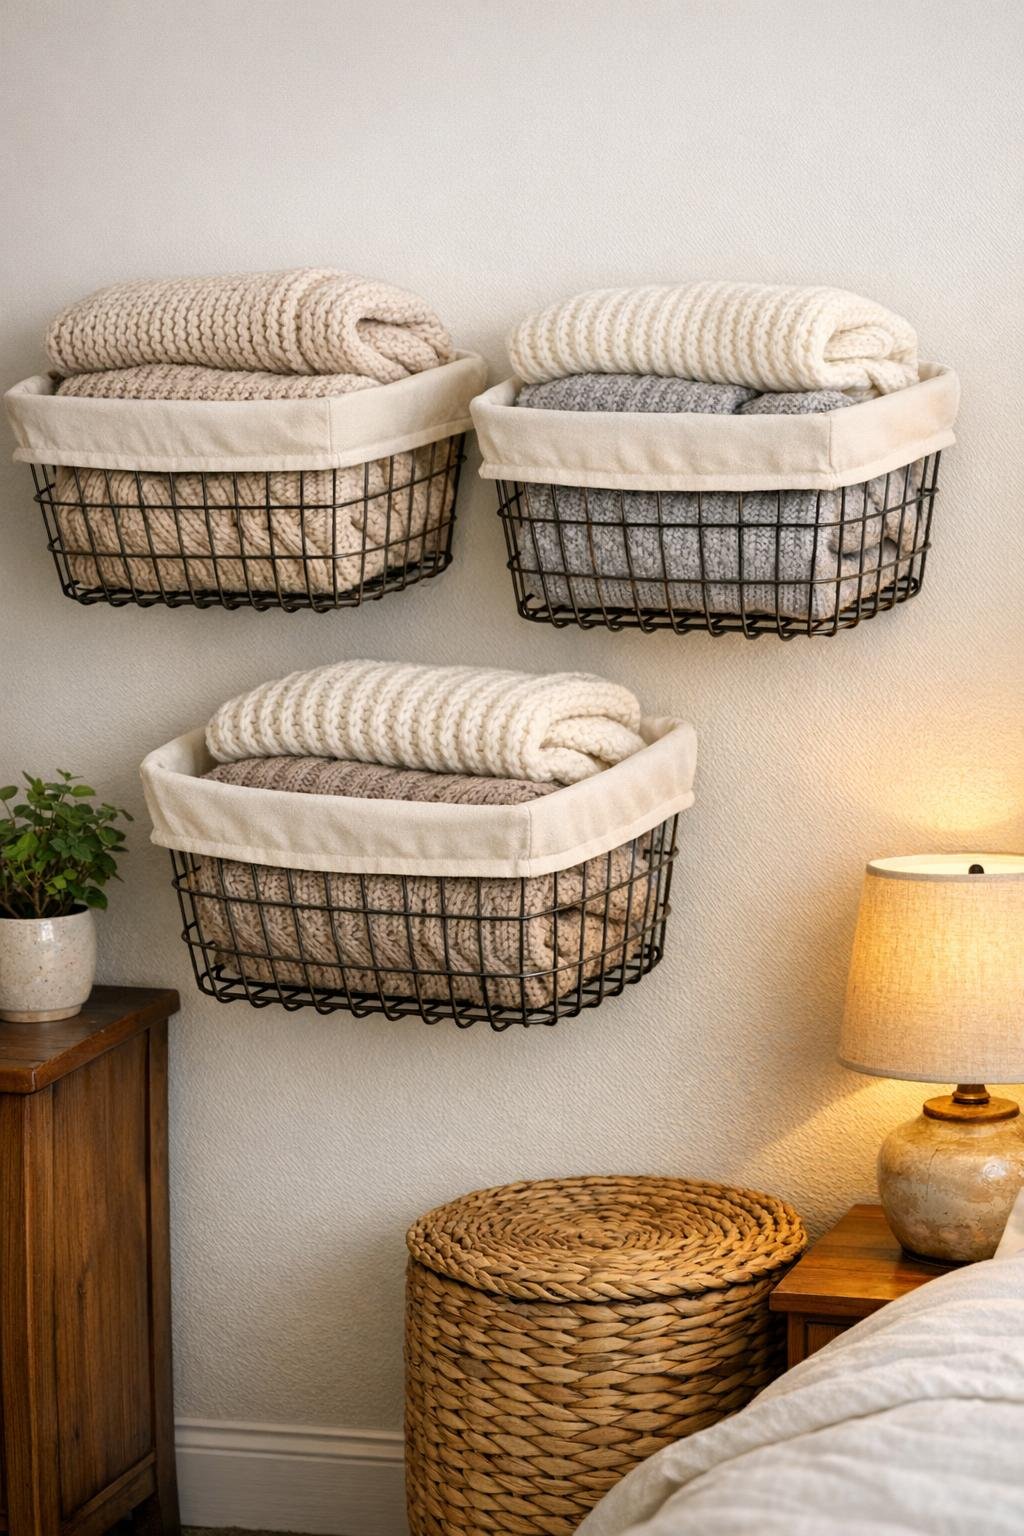
I’m always looking for bedroom storage that feels soft and pretty instead of purely functional, and this wall-mounted sweater setup checks both boxes for me. By mounting wire bicycle baskets on the wall and lining them with fabric, you get easy grab-and-go storage for folded knits without cramming a dresser or stuffing a closet shelf until everything topples over.
This is a great project if you have a small bedroom, not enough drawer space, or a stack of bulky sweaters that deserve better than being hidden away. I especially love it for busy seasons, because once it’s up, putting laundry away is basically as simple as folding and sliding each sweater into its own basket.
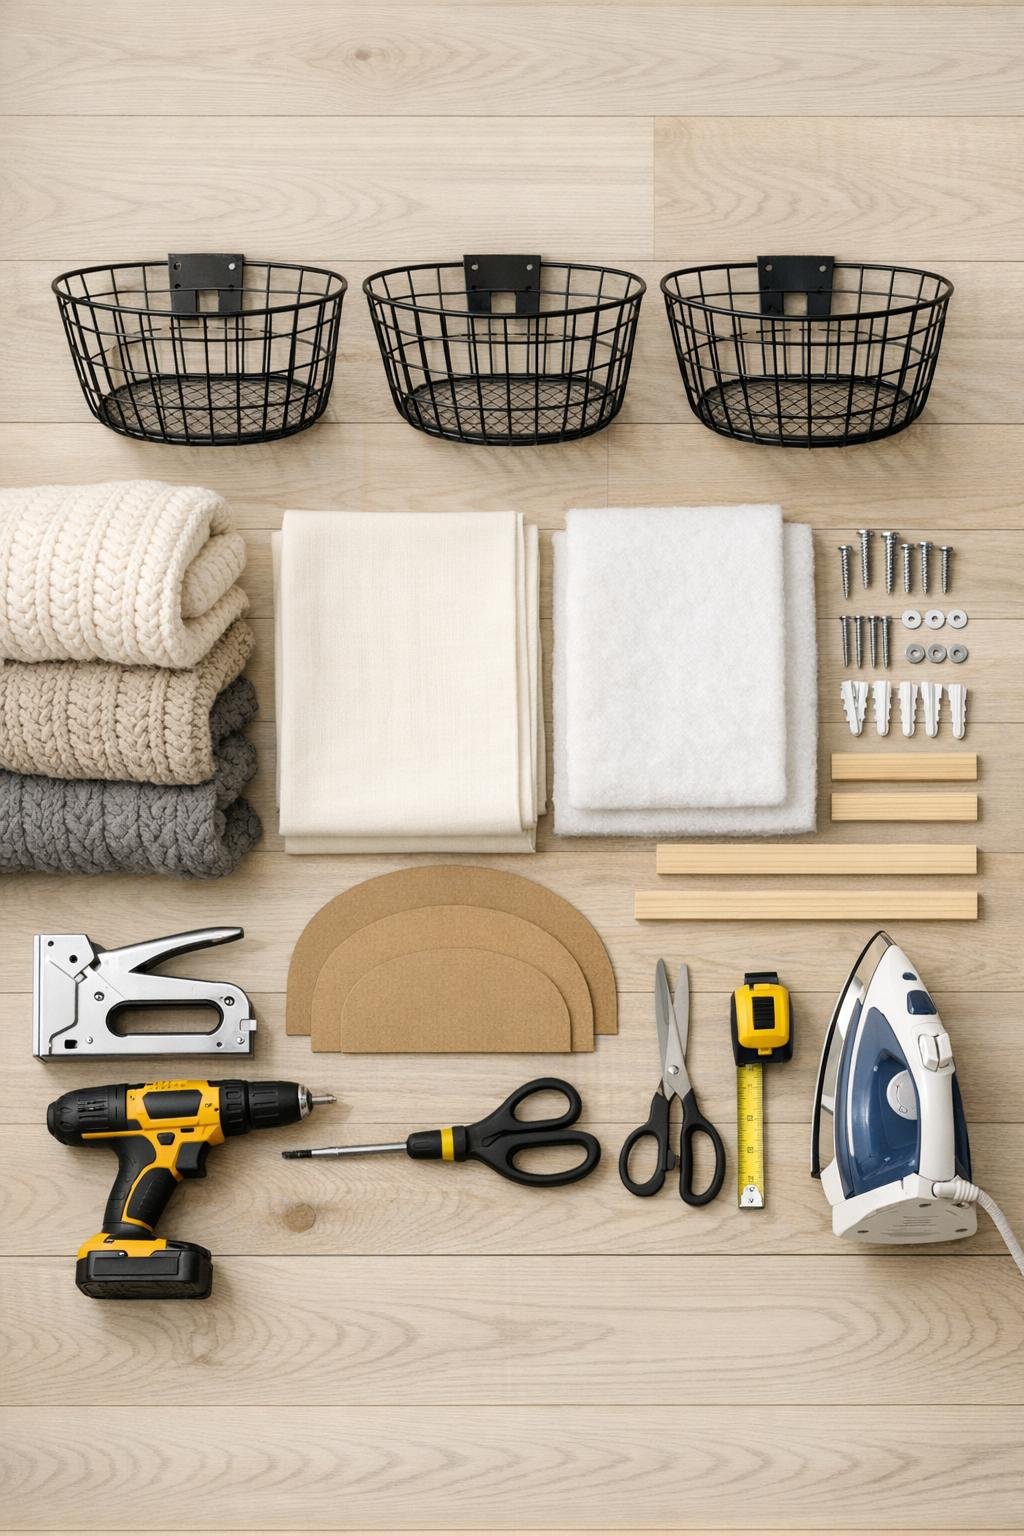
Materials
Instructions
1. Choose your wall and mark a layout for three baskets, spacing them about 4 to 6 inches apart horizontally or stacking them vertically with 8 to 10 inches between rows so sweaters can slide in easily.
2. Hold each basket against the wall to confirm the depth works beside the bed, dresser, or doorway, and adjust the placement until the baskets feel easy to reach without sticking out awkwardly.
3. Cut three wood support rails to match the inside back width of the baskets if they are not already sized, then lightly sand the edges so they won’t snag fabric or scratch the wall.
4. If any part of the wood rails will remain visible, brush on a thin coat of clear topcoat or wax and let it dry for a cleaner finished look.
5. Measure the inside of one basket, then cut three fabric liners from the cream canvas, adding 1 inch to each side measurement and 3 inches extra at the top for a soft fold-over edge.
6. Cut matching pieces of fusible fleece and fuse them to the wrong side of each fabric liner with an iron to give the baskets a cushioned, structured look that helps folded knits sit neatly.
7. Sew the side seams of each liner into a simple box shape, or fold and topstitch the corners to create a fitted basket insert that sits flat against the wire frame.
8. Wrap each cardboard base insert in leftover fabric or slide it into the bottom of the liner so the basket base feels smooth and supportive instead of bumpy under the sweaters.
9. Fit each liner into a basket, fold the top edge over the rim by about 1 1/2 inches, and tack it in place at the back with a few hand stitches, staples into the wood rail area, or tiny dots of fabric glue.
10. Attach two twill tape ties to the upper back corners of each liner so you can secure the fabric neatly to the basket and keep it from slipping forward over time.
11. Position the first wood rail level on the wall, drive screws through the rail into studs or heavy-duty anchors, and make sure it sits tight and solid because this rail will help carry the basket load.
12. Set the basket over or against the rail and fasten the basket’s back wire panel through to the rail using screws and washers, placing fasteners at the top corners and lower back points for a firm hold.
13. Repeat with the remaining baskets, checking level and spacing as you go so the finished arrangement looks intentional and polished rather than slightly crooked.
14. Give each basket a firm shake test before loading anything, then add your folded sweaters with the heaviest knits on the bottom and the prettiest textures facing outward.
15. Fold sweaters to fit the basket depth, then slide them in vertically or in slightly overlapped stacks so you can see every option at a glance without pulling the whole basket apart.
16. Finish by smoothing the liner folds, tying the back corner tapes neatly, and styling the area with just enough breathing room around the baskets to let the texture of the knits stand out.
Variations & Tips
Vertical column layout: If your bedroom has a narrow wall slice near the closet or dresser, stack the baskets vertically instead of side by side. It saves floor space and still keeps sweaters visible.
Liner fabric options: Cotton canvas is my favorite because it holds its shape, but denim, linen blend, or lightweight upholstery fabric also work well. Just avoid slippery fabric that lets stacks slide around.
No-sew version: If sewing is not happening on a weeknight, cut the liners with generous allowance, fold the edges twice, and use fabric glue plus iron-on hem tape for a clean, simple finish.
Best basket size: Deeper baskets are ideal for chunky winter knits, while shallower wire baskets work better for cardigans, scarves, or lighter pullovers. I like using matching baskets so the wall feels calm instead of cluttered.
Stud-mount tip: Whenever possible, hit at least one stud per basket. Bulky sweaters are heavier than they look, especially when you load a basket fully.
Folding tip: I get the neatest look by folding sweaters to a consistent width before loading them. It sounds fussy, but it makes the whole setup look boutique-pretty in about two extra minutes.
Seasonal rotation: Use the wall baskets for your current-season favorites and store the off-season pieces elsewhere. That keeps the display useful instead of overstuffed.
Extra polish: If you want the setup to look especially finished, add matching labels on the inside back of each basket or choose liners in a subtle ticking stripe. It gives the whole project that custom-storage feel without adding real complexity.